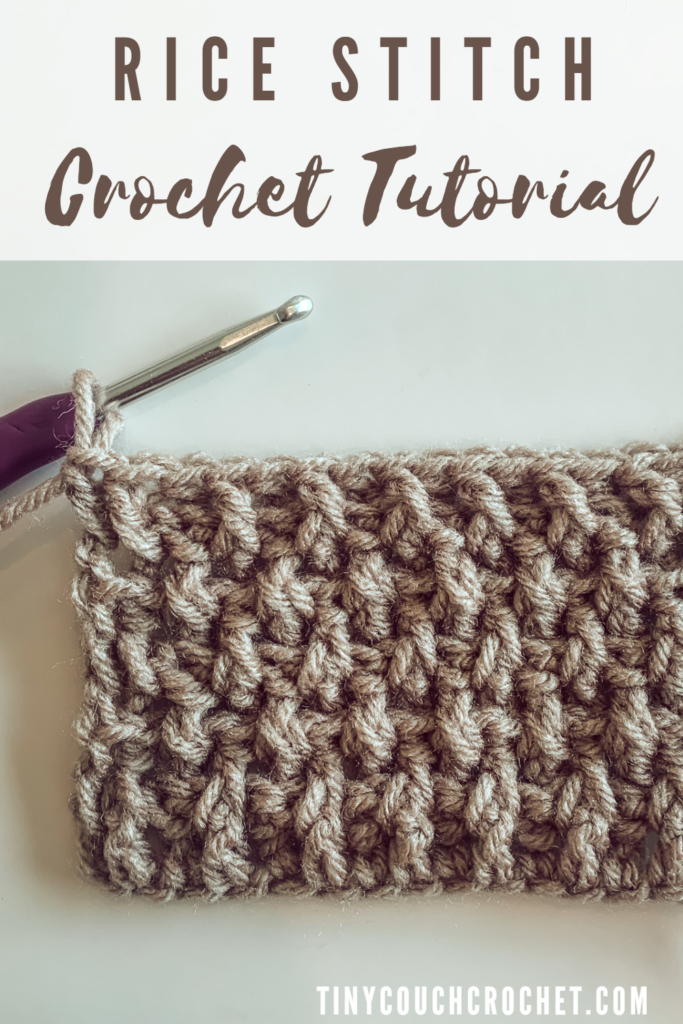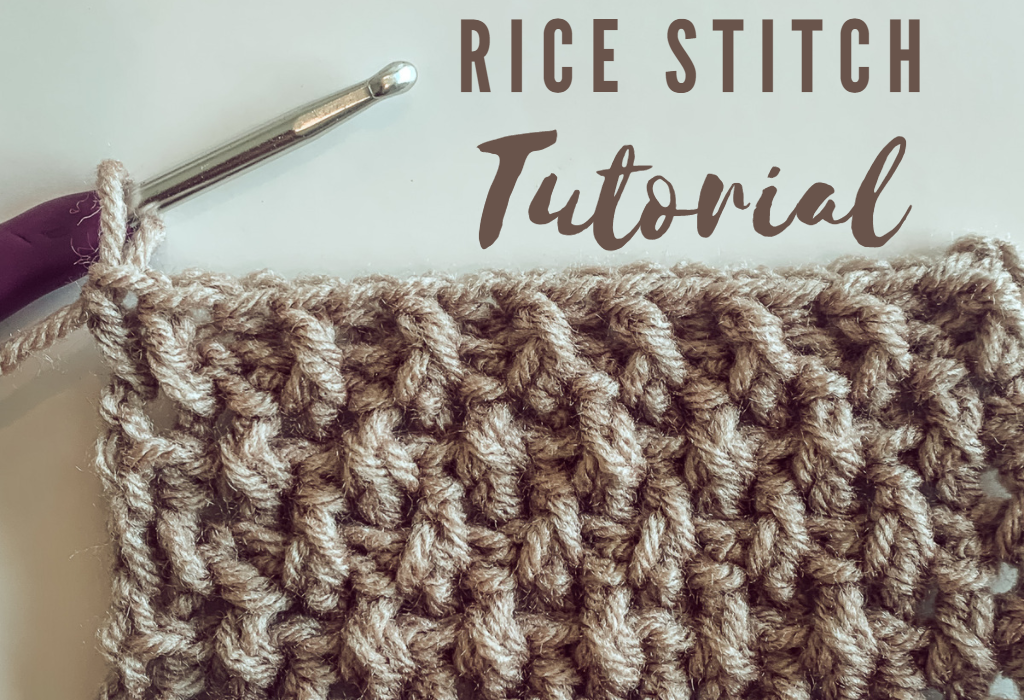
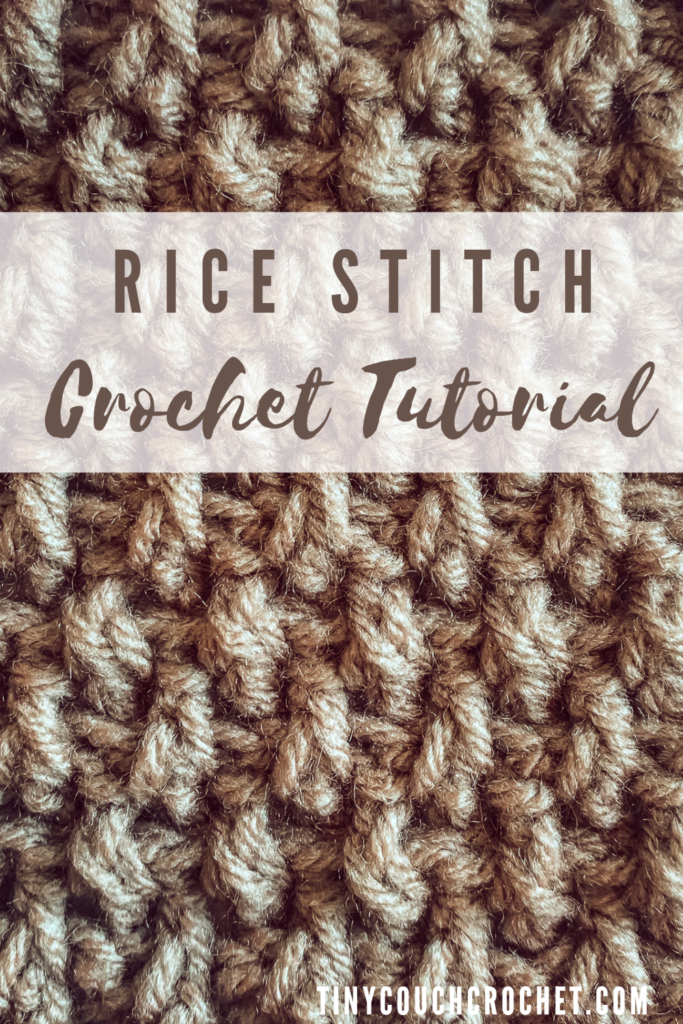
Who doesn’t love a good textured stitch? The Rice Stitch, also known as the Mini Basket-Weave Stitch, is a fun textured stitch with a modern look. While it is similar to the Alpine stitch, this method is stretchier so keep this in mind when using it in your designs.
Scroll down for instructions and photo tutorial. Or, Pin the image below to save it for later.
This post may contain affiliate links, which means I receive a small commission, at no extra cost to you, if you make a purchase using this link.
When to use the Rice Stitch
This stitch is so versatile and stretchy, I can see it being used for so many things! When I look at it I dream up blankets and coffee cozies. I might stay away from garments with this stitch due to how stretchy it can be, but I do think it could work for beanies and mittens, as long as you go down a hook size or two than you might normally use. This stitch is holy when stretched so a smaller hook size will make the stitches tighter for something warm.
It’s also a great stitch to use for Velvet and other textured yarns because you do not have to find the top stitches to work in. Instead, it is made entirely by working around the post of stitches – much easier to find when working with textured yarn! If you’re looking for other stitches to use with velvet, this blog post gives you more options.
Skills to Know
You’ll need to know some crochet basics, like how to chain and double crochet (U.S. terminology) (if you need to brush up on these skills, click here!)
This stitch also requires knowledge of how to Front Post Double Crochet (FPDC) and Back Post Double crochet (BPDC). These stitches are like a typical double, but instead of placing your hook in the top stitch of to make your DC you place them around the post of the stitches. (The posts are the vertical member you create when making a stitch). Photo tutorials are given with the instructions below.
Abbreviations (U.S. Terminology):
Ch = Chain
St = Stitch
Yo = Yarn Over
DC = Double Crochet
FPDC = Yarn over (YO), insert hook around the front of the post of the stitch below so that the post is in front of your hook, YO and pull up a loop (3 loops on your hook). YO and pull through first two loops (two loops left on your hook). YO and pull through remaining two loops.
BPDC = Yarn over (YO), insert hook around the back of the post of the stitch below so that the post is behind your hook, YO and pull up a loop (3 loops on your hook). YO and pull through first two loops (two loops left on your hook). YO and pull through remaining two loops.
Rice Stitch Crochet Pattern
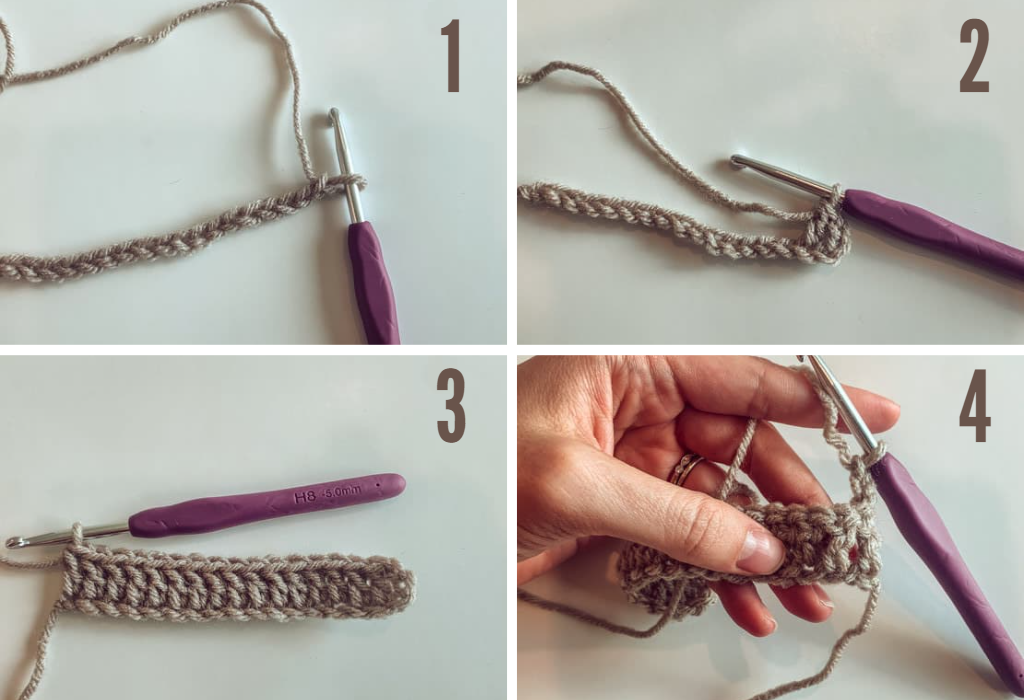
Foundation: Chain any even number. (add 3 for turning chain)
Row 1: Dc in 4th chain from hook and in each remaining chain. (See Photos 1 – 3 in the Photo Tutorial below)
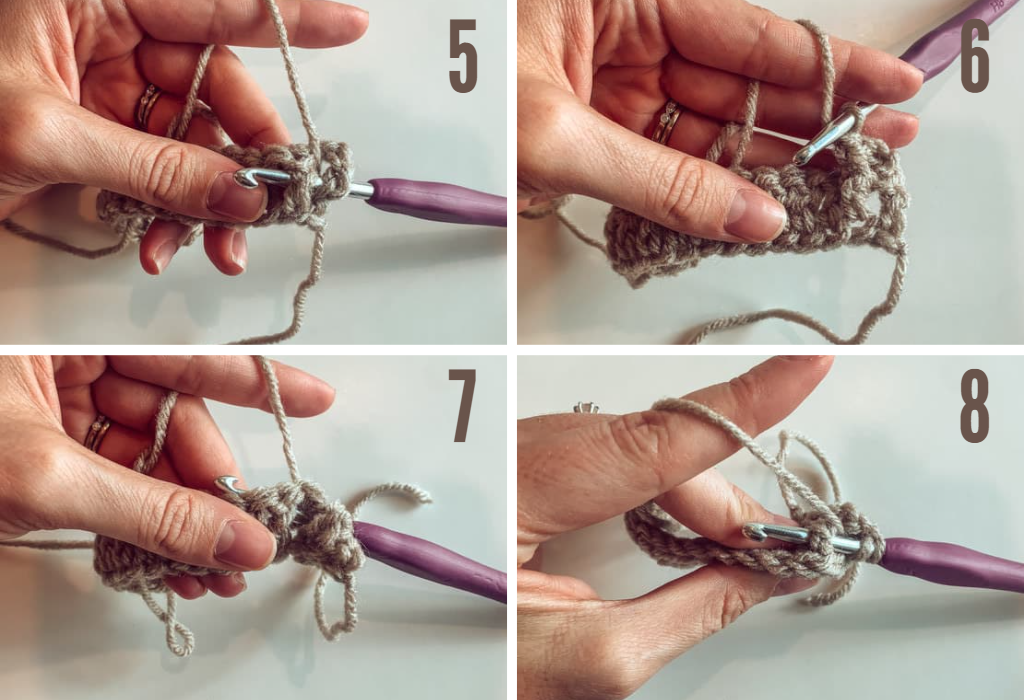
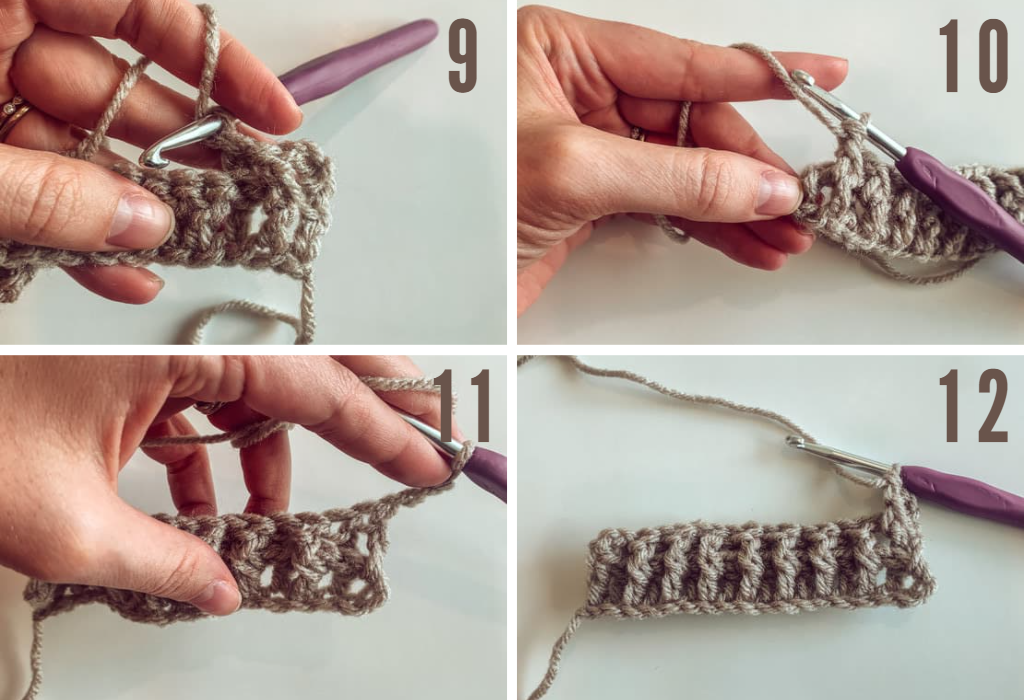
Row 2: Chain 3 and turn. FPDC in first stitch (not stitch directly under chain 3, but the next. See Photos 4 – 6). *BPDC in next stitch (Photos 7 – 9, FPDC in next stitch, repeat from * until end of row. Dc in turning chain (Photo 10).
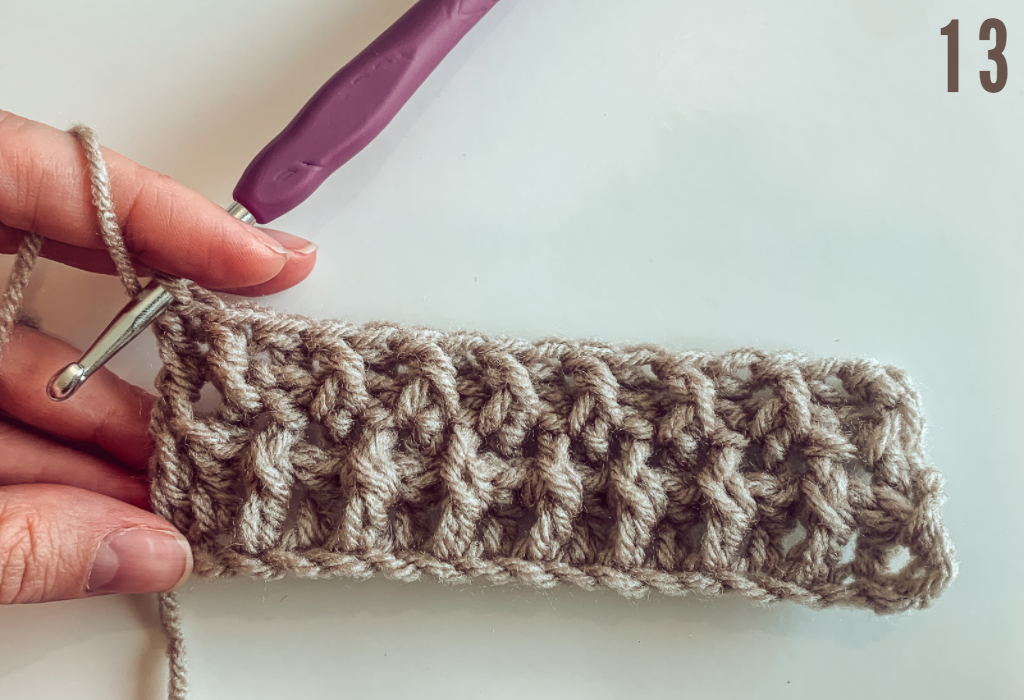
Row 3: Chain 3 and turn (Photo 11). FPDC in first stitch (not stitch directly under chain 3, but the next See Photo 12. Note that this was a FPDC on the Right Side, and therefore looks set behind on the Wrong Side. Placing a FPDC around a FPDC from the row below offsets the post stitches and gives the rice stitch it’s signature look). *BPDC in next stitch, FPDC in next stitch, repeat from * until end of row. Dc in chain 3 space (Photo 13)
Repeat Row 3 to end of project.
Photo Tutorial
I hope you love this stitch as much as I do! If you’re looking for a free pattern that uses this stitch, I have a free velvet pumpkin pattern here. While I might not use this stitch for amigurumi with acrylic or cotton yarn, with velvet or other textured yarns it gives a nice look and is quick to work up.
Want to see more modern stitches? Check out the tutorials below!
- Crossed Double Crochet stitch
- Herringbone Half Double Crochet
- Herringbone Single Crochet
- Waistcoat Stitch
- Moss Stitch