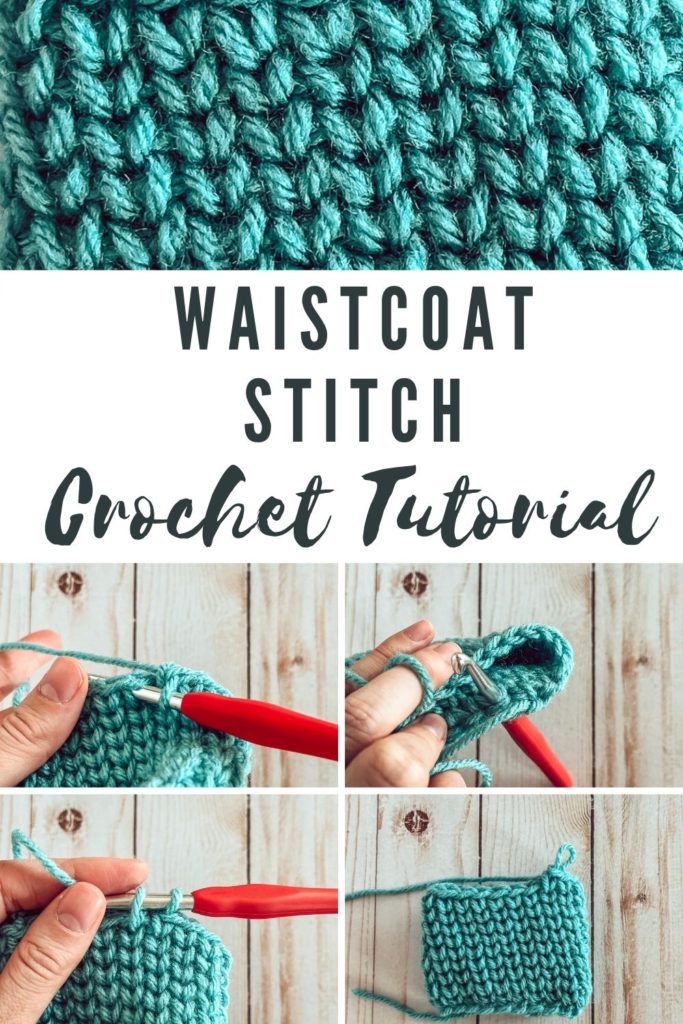
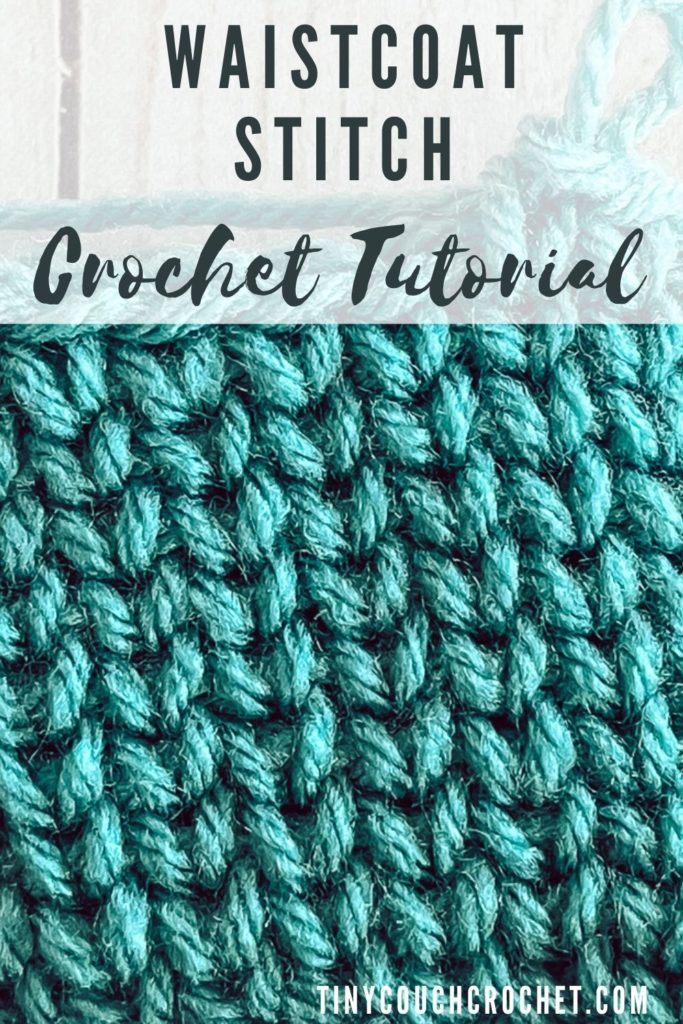
The Waistcoat Stitch is one of my absolute favorite crochet stitches. It looks so much like knit, but it’s all crochet! This Waistcoat Stitch Tutorial will show you that it’s much easier than it looks. It’s really just a Single Crochet stitch, but you place your hook in a different spot to make the stitch. Other names for the Waistcoat stitch are the Center Post Stitch (because of where you place your hook) and the Knit Stitch (because it really does look like knitwork!)
Scroll down for the full Waistcoat Stitch tutorial, including the written pattern and photos.
Looking for more crochet stitches that look like knitting? Check out this roundup of 9 crochet stitches here!
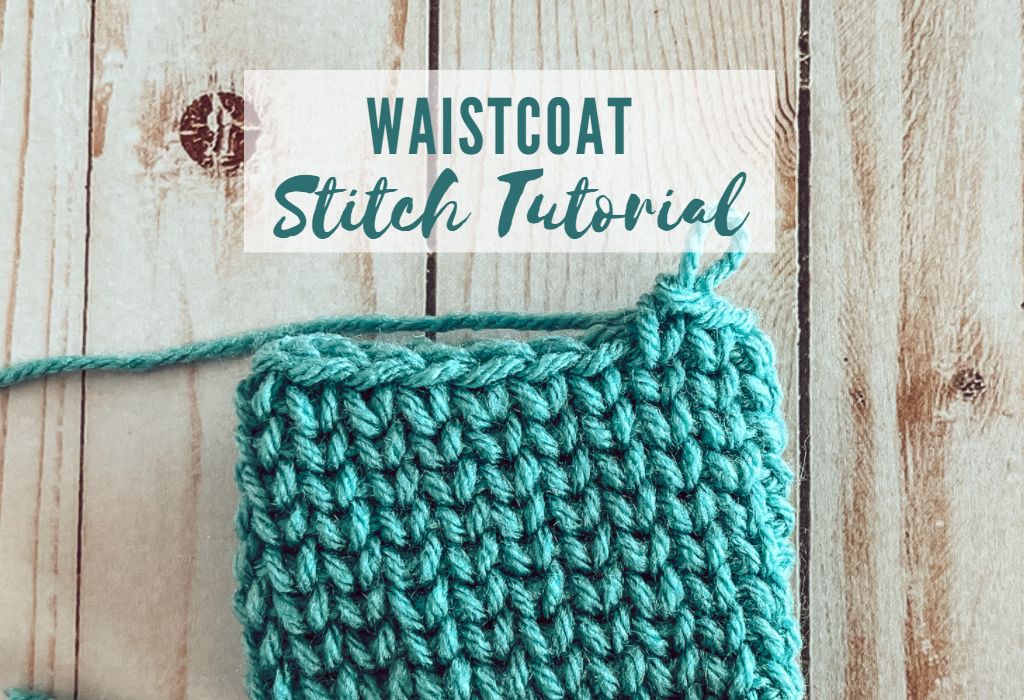
Want to save this Tutorial for later? Click on the image below to save to your Crochet Pinterest board.
This post may contain affiliate links, which means I receive a small commission, at no extra cost to you, if you make a purchase using this link.
When to use the Waistcoat Stitch
There is one downside to this stitch – it’s best worked in the round. While you can work this stitch in rows, the final look doesn’t quite give you that knit look that the waistcoat stitch in the round does. It is still a great stitch to use when you need a flat fabric, but it has more of that knit-like look when crocheted in the round.
(That said, I do get away with working the waistcoat stitch in rows with a simple trick in this mug rug pattern – check out the Dotted Hearts Mug Rug/Coaster pattern here!)
Because it is usually worked in the round, and because this stitch makes a tight fabric, some great things to make with the Waistcoat stitch are crochet baskets, cup cozys, and hats.
Skills to Know
You really only need to know the very basics of crochet: how to chain, slip stitch, and single crochet! If you need to brush up on these skills or are a beginner crocheter, click here for a beginner’s tutorial.
Abbreviations (U.S. Terminology):
Ch = Chain
St = Stitch
Sl St = Slip Stitch
Yo = Yarn Over
SC = Single Crochet (insert hook into stitch, pull up a loop, Yo and pull through both loops on hook)
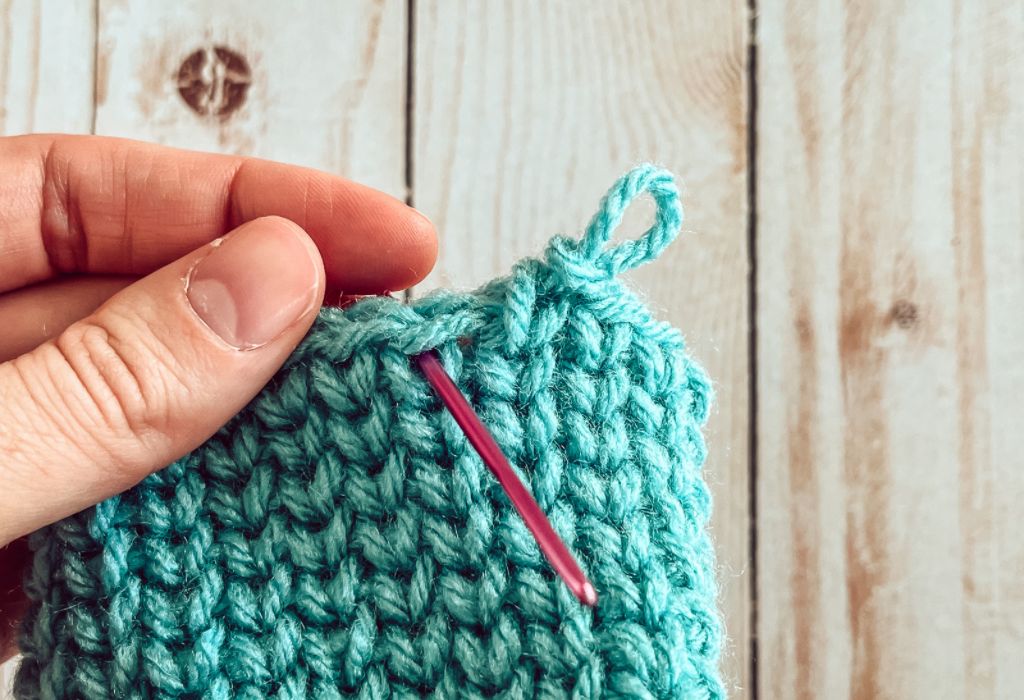
Wc = Waistcoat Stitch (Yo, insert hook into center of post of next stitch, pull up a loop, Yo and pull through both loops on hook). This is essentially a Single Crochet, but you place your hook into the center of the V of the stitch below instead of the top of the stitch. See photo below – the pink needle shows where you would insert your hook.
Pattern Notes
The pattern is worked in continuous rounds (a spiral), so instead of chaining to move up to the next round, you would crochet directly into the first stitch of the previous round.
The pattern is written to practice Wc in the round
Waistcoat Stitch Crochet Pattern
Foundation: Chain any number.
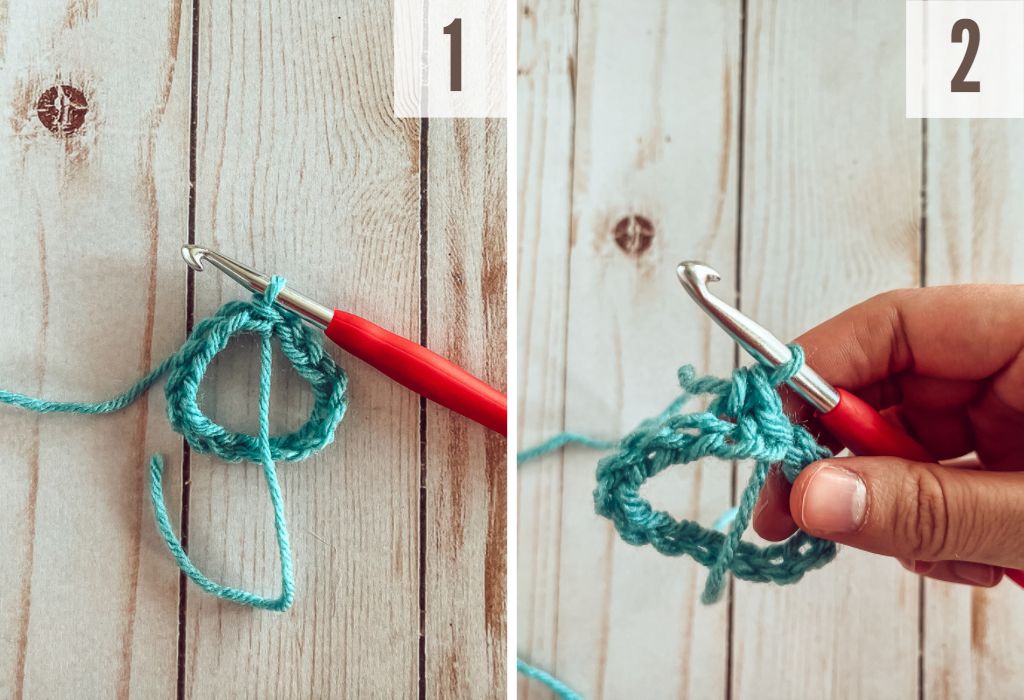
Round 1: Slip Stitch into first chain made. Chain 1. (Do not turn work). SC into next chain and each chain to end of round. (See photos 1 and 2 below).
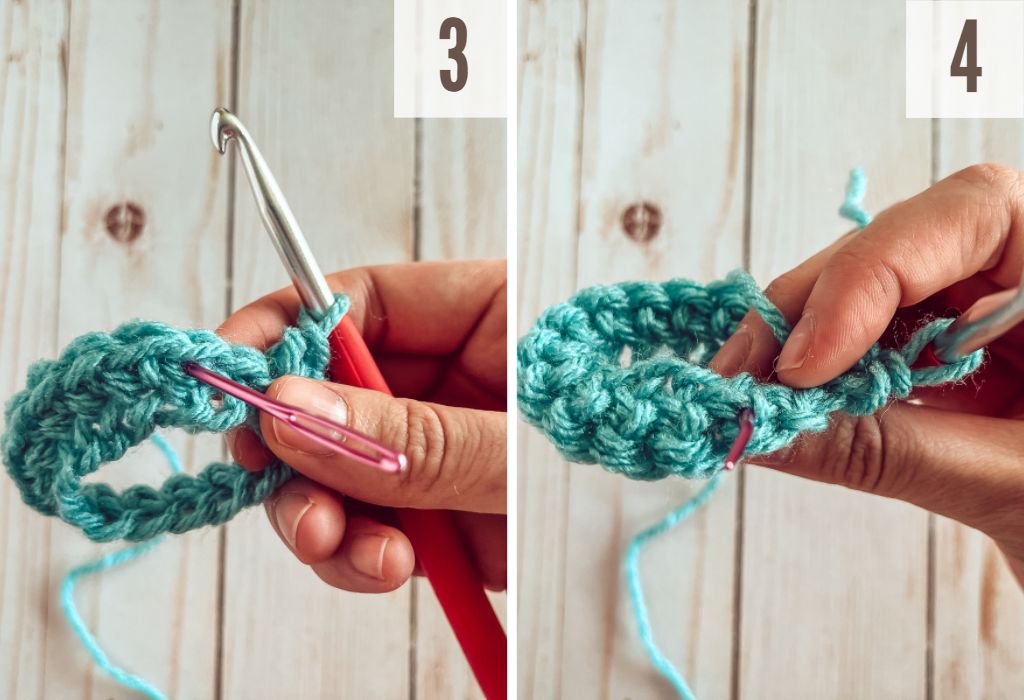
Round 2: (Do not slip stitch or chain 1) Working directly into the first Single Crochet from Round 1, Wc (Waistcoat). Place a stitch marker in the top of this stitch to keep track of rounds, then Wc in each Single crochet of the first round to end of Round. (See photos 3 and 4 below – the pink needle shows where to place your hook)
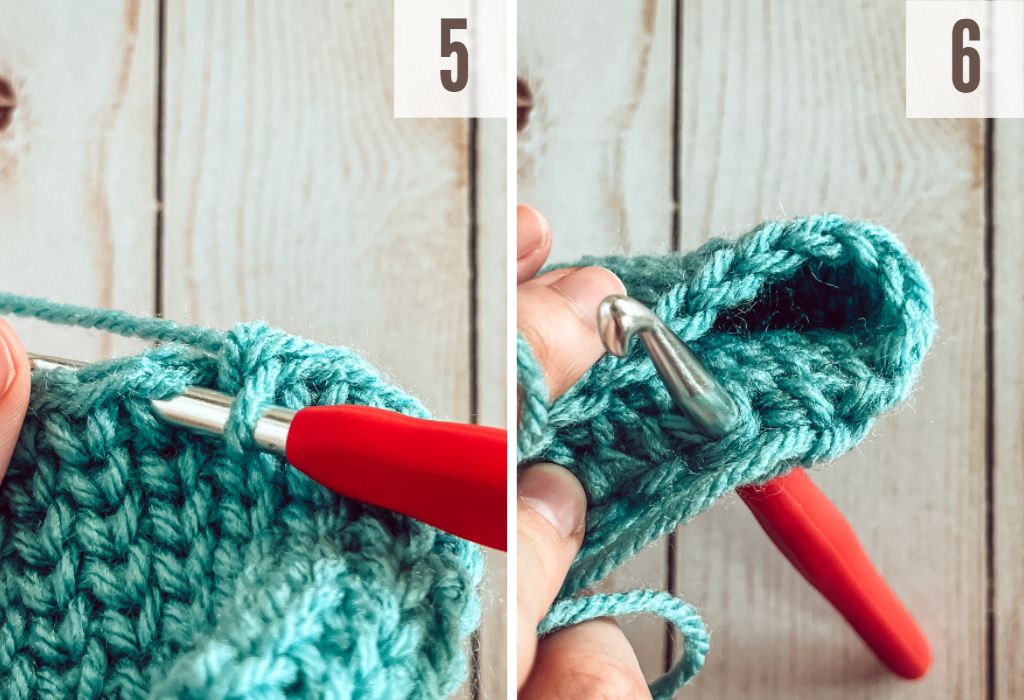
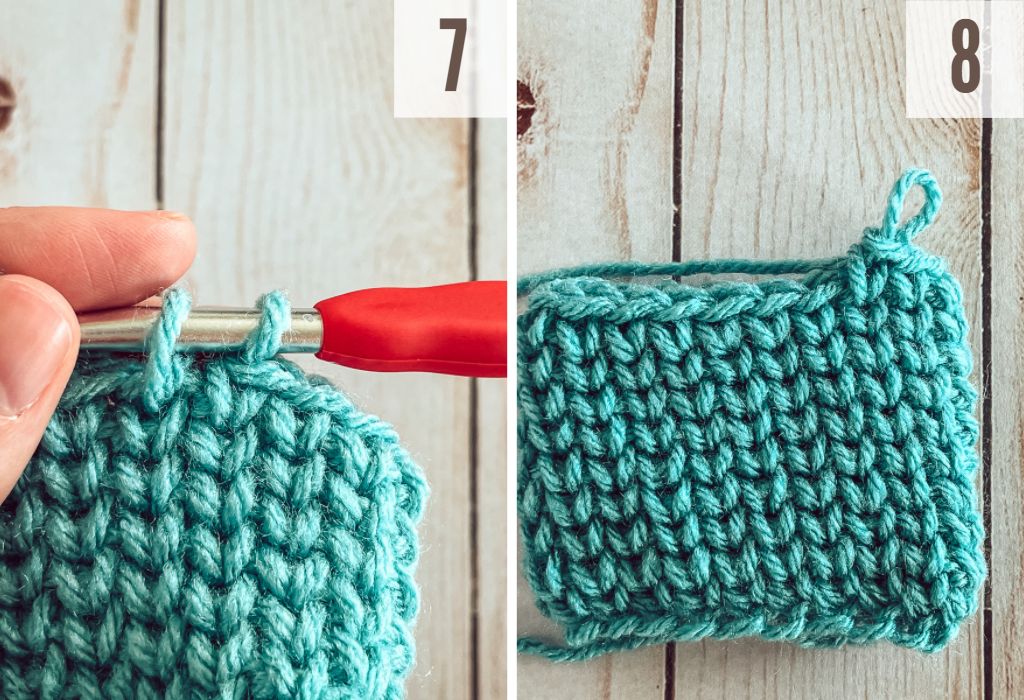
Round 3 – x: Continue crocheting in a spiral: Wc in first stitch of round (with the stitchmarker) and each stitch to end of round. Move or add stitch marker to first stitch of each round. Slip stitch to close final round. (See photos 5 & 6)
Photo Tutorial
Congrats on learning a new stitch! Looking for more modern crochet stitch tutorials?
- Rice Stitch tutorial
- Herringbone Single Crochet tutorial
- Herringbone Half Double Crochet tutorial
- Crossed Double Crochet tutorial
- Moss Stitch tutorial
- Camel Stitch tutorial (3 methods)
Happy Stitching! – Ashley