This post contains affiliate links, which means I receive a small commission, at no extra cost to you, if you make a purchase using this link. Please see my disclosure for more details.
Why Crochet?
Crochet is an underrated hobby that can be used to create almost anything you can think of. My grandmother taught me how to crochet when I was a kid, and I’ve been ‘hooked’ ever since (see what I did there?)
Not only can crochet be a productive hobby, but many people create small businesses selling their finished crocheted items. I hope to share what I know and spread the joy of crochet – then it will be up to you how you want to use your new skills!
Continue below for the How-To and photo tutorials, or save this for later by clicking here to save to Pinterest.
What is Crochet?
Not to be confused with knitting, crochet is a fiber art using yarn and a single hook. Crochet is often associated with older generations and “granny blankets,” but it can be used to create so much more!
Crochet is making a comeback in younger generations and is now commonly used to make custom clothing, modern blankets, items for the home (think baskets to dishcloths) and the list is endless. It’s even gaining traction in a style called amigurumi, where you can make your own stuffed animals.
Common Misconceptions
- Isn’t that knitting? No! Knitters use two needles, while crocheters use one hook. Both are rewarding, and if you ask the knitting and crocheting community which is easier, each person will probably answer with the artform they learned first. Crocheting is typically a little faster.
- Isn’t crochet hard to learn? No again! Like any new skill, it does take dedication and practice, but it is not hard to learn if you’re willing to practice.
- Isn’t crochet an expensive hobby? Well, it’s not if you don’t want it to be! Basic hooks are very affordable, and yarn prices range drastically depending on what kind of yarn you’re using. See below for affordable beginner yarn recommendations.
Materials List for Beginner Crocheters
The following list includes the basic items you will need to create most crochet projects. Depending on your specific project, you may need more or fewer materials, but this is a great place to start.
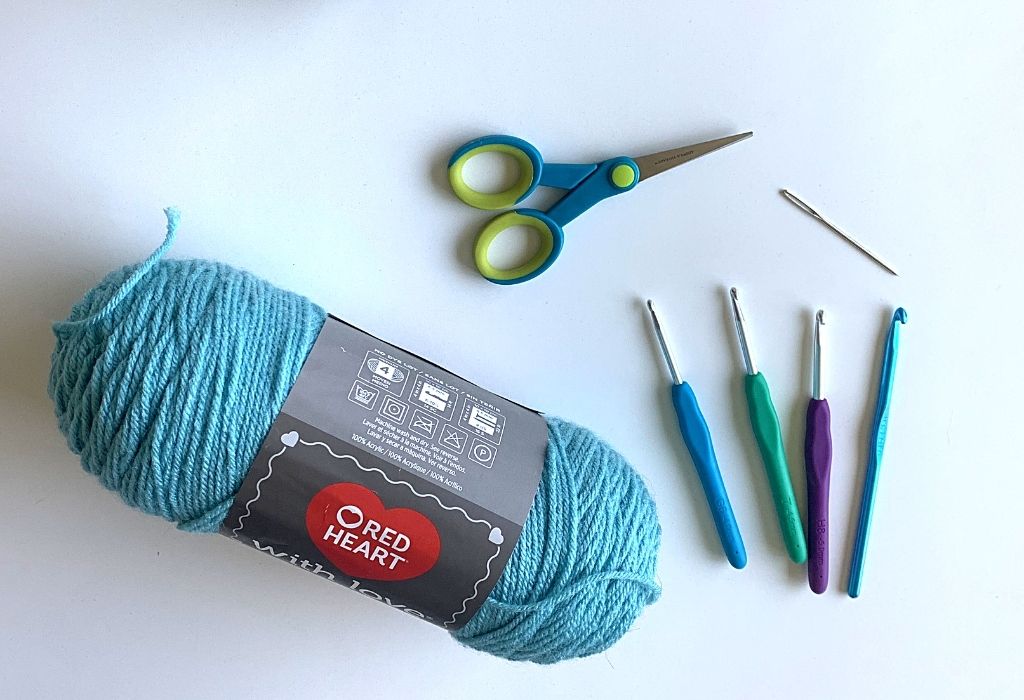
- Crochet Hook. Crochet hooks come in all shapes and it can be easy to get overwhelmed. I recommend beginners start with a hook that matches the yarn you are using. See graphic on yarn label with the crochet hook – this will tell you what hook size to use. (I like to use this ergonomic set)
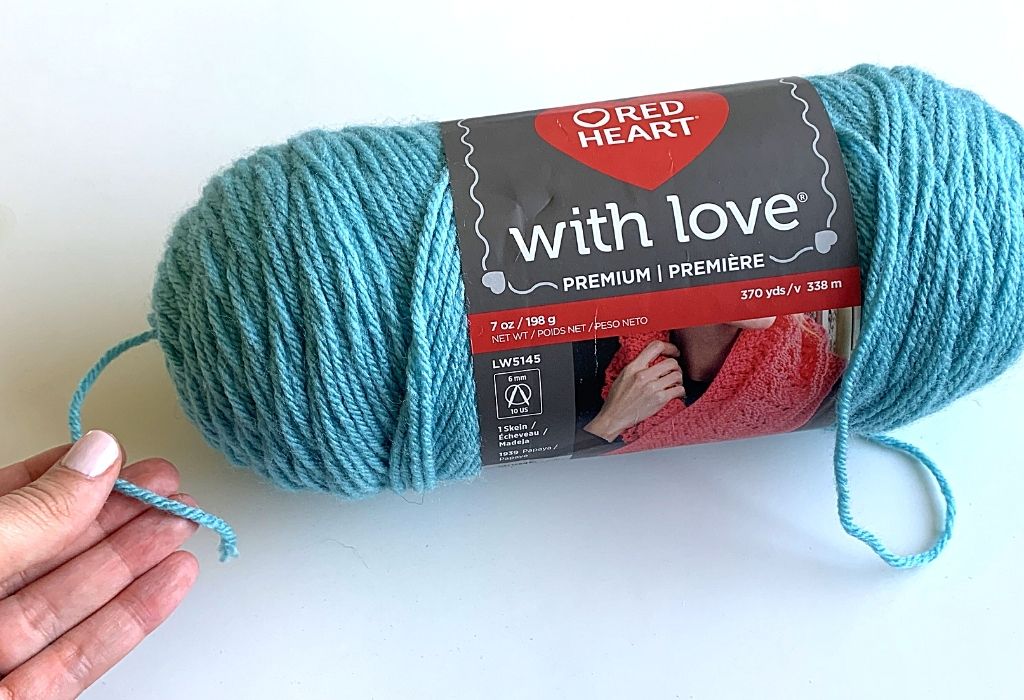
- Yarn. Again, don’t let yourself get overwhelmed by the yarn choices out there. There are so many different sizes and materials! Often, a pattern will tell you what size and material to choose, and from there you can select brands and colors. For beginners, I highly recommend starting out using a worsted weight acrylic yarn (size 4).
- Scissors. As a beginner, you can use any scissors you have lying around the house. That said, if you get hooked on crochet, I recommend buying a pair of “yarn scissors” – scissors that stay sharp and cut yarn easily. Plus, it’s always fun to be able to say “no one touch my yarn scissors!”
- Yarn needles. What, you thought I said needles are for knitters? Well yes…. these are different yarn needles (stay with me here.) At the end of your crochet project, you will have yarn ‘tails’ that need to be hidden and woven into the project. These needles look like large sewing needles.
How to – Find the End of Your Skein of Yarn
(Note: a ‘ball’ of yarn you buy in the store is called a Skein)
This first step may seem like it doesn’t need a how-to, but it does. Even experienced crocheters get bested by yarn skeins. You can’t crochet without finding the end of your yarn – here’s what you need to know:
There are two yarn ends to every skein. One is usually located very easily on the outside of the skein, sometimes tucked into one of the ends or into the label.
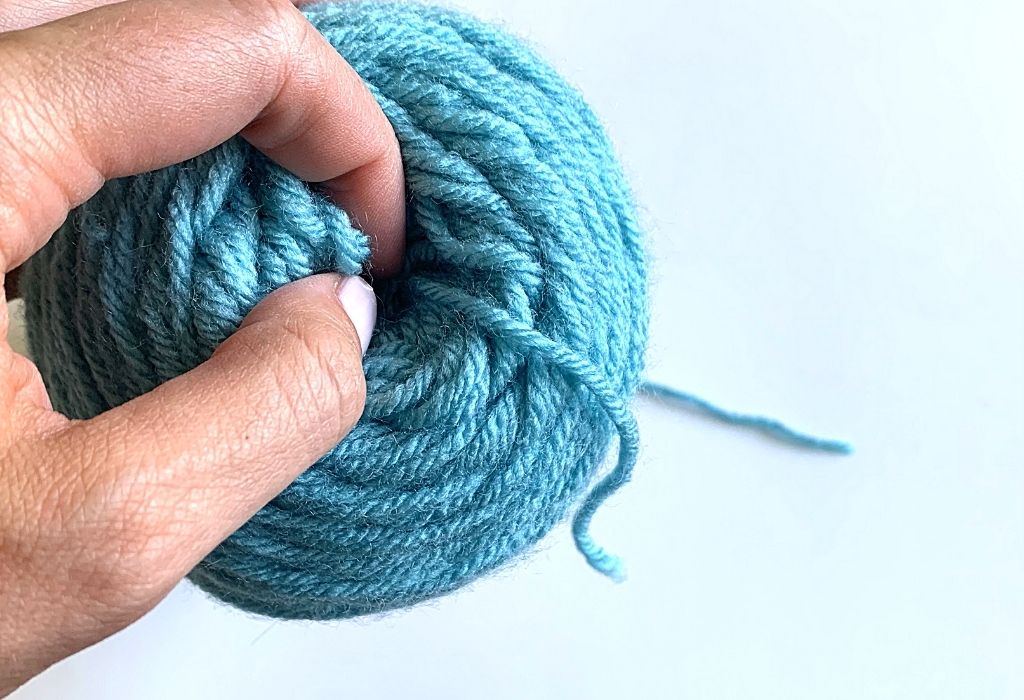
The other end is the one we want – and it’s usually buried in the middle of the skein, and not-so-fun to find. If you’re lucky, you’ll see the end coming out of the skein as shown in the first photo below. If you’re not lucky, you’ll have to dig into the middle of the skin and pull out the insides to find it.
Try to pull out the very center of the skein – the smaller the ball the easier! Sometimes a large portion of the yarn comes out for you to sort through – us pros use the very technical term “yarn barf”. But don’t give up – you’ll know when you find your end because the yarn should come easily out of the center of the skein when pulled.
Slip Knots & Chains
These two skills are fundamental to crochet – give yourself time to get them down!
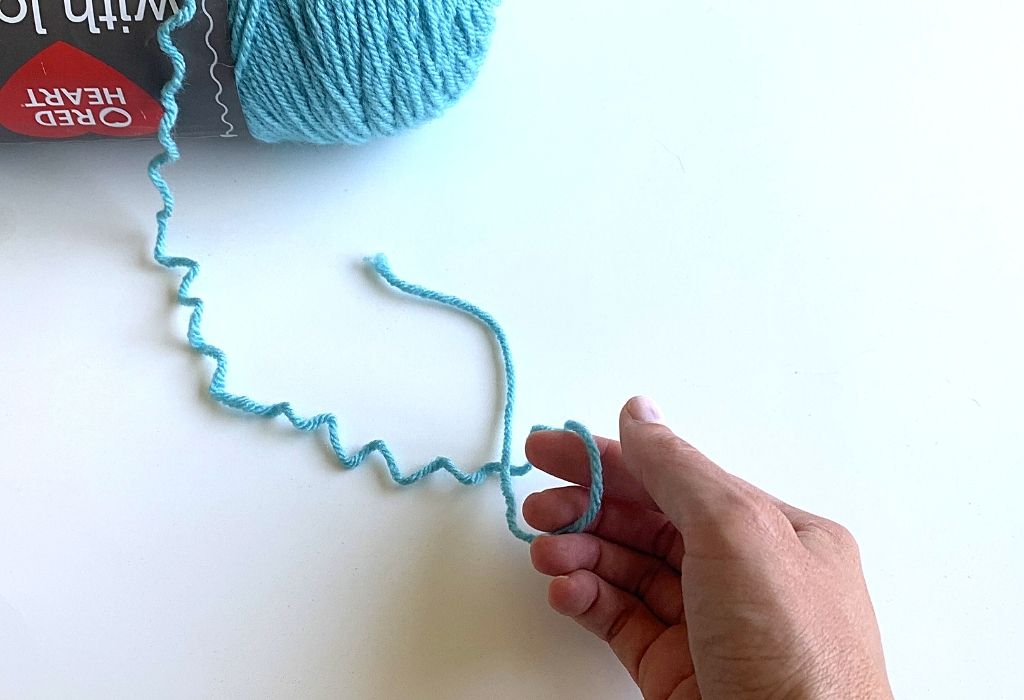
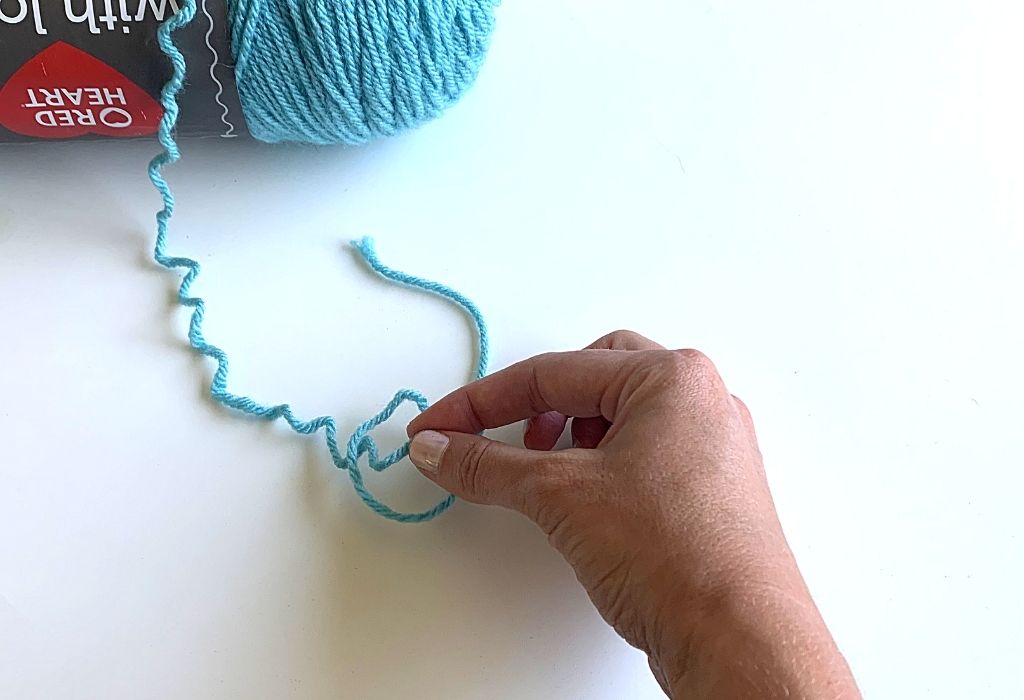
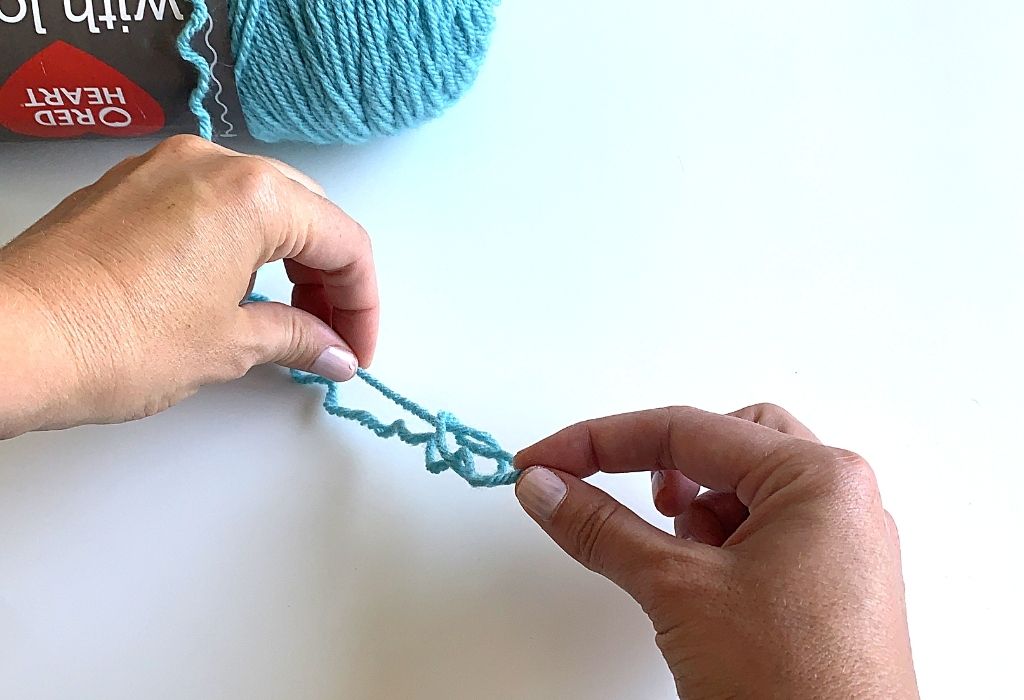
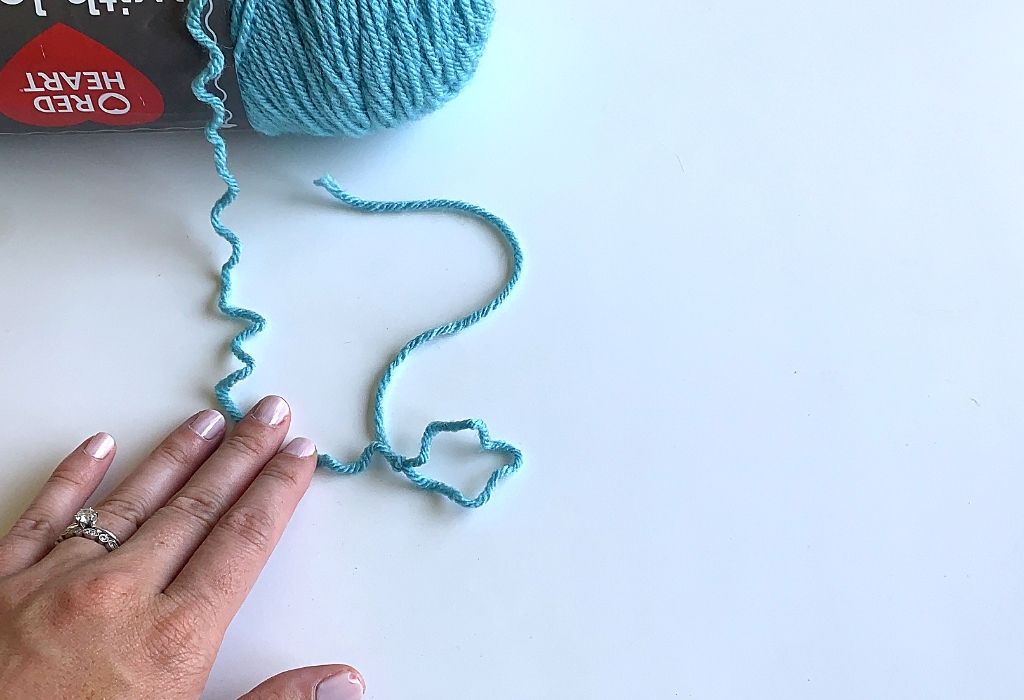
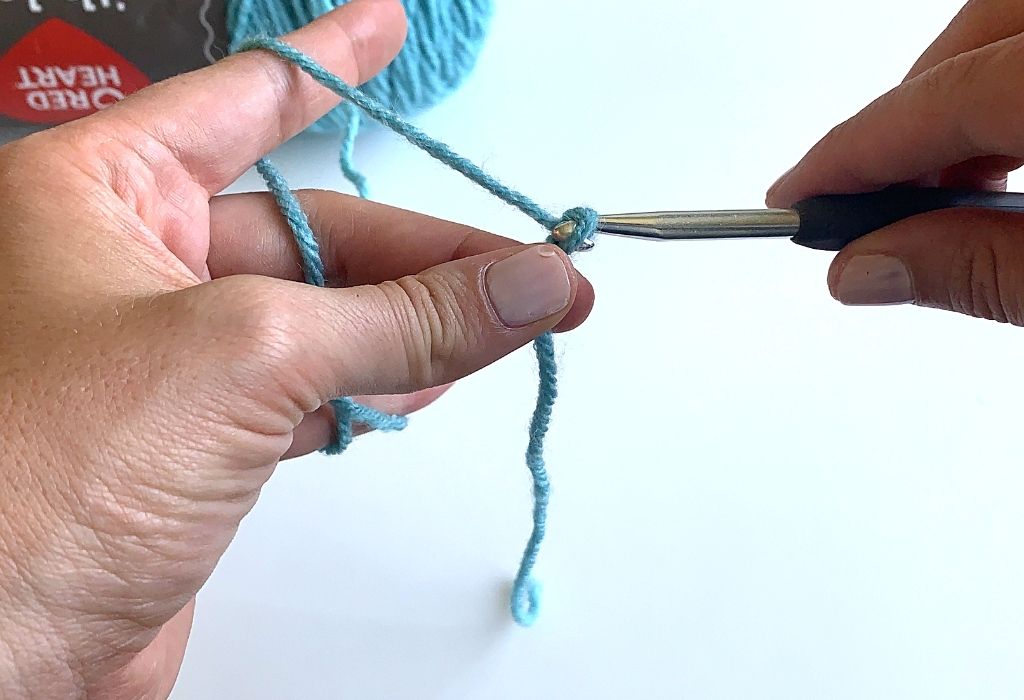
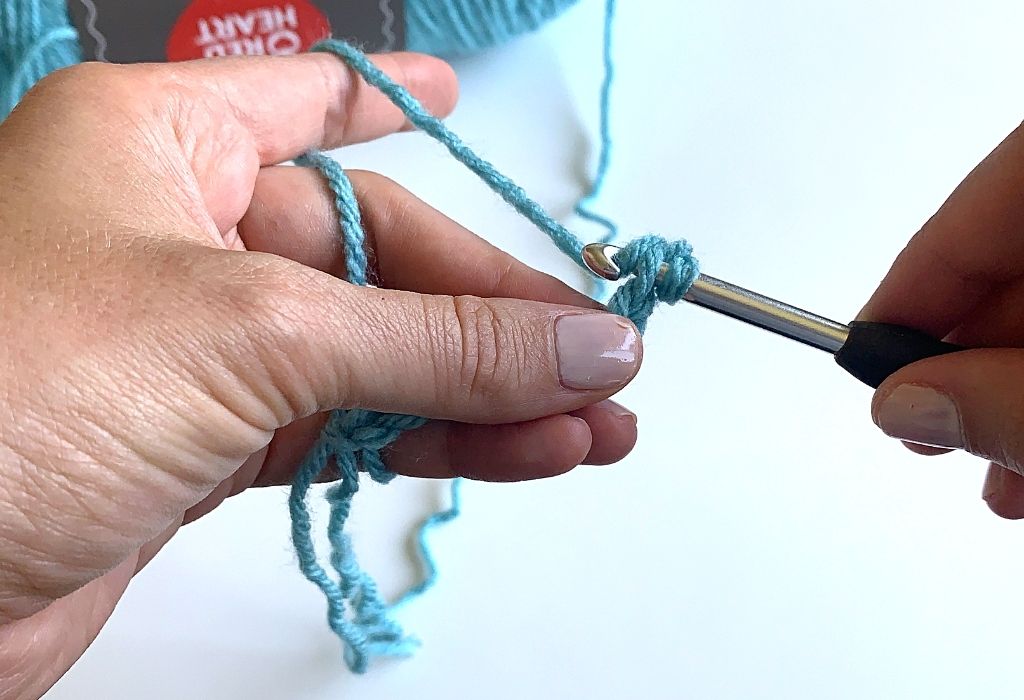
- The Slip Knot: It’s not as scary as it looks. Take your yarn, and cross the end over to make a circle (see images below). Then reach through the circle, and grab the piece of yarn connected to the main skein (i.e. not the loose end of the yarn). Pull this piece through the circle and pull on the loose end to tighten the circle around the yarn you pulled through so that you have a loop.
- Placing slip knot on hook: This knot is how you’ll start every crochet project. Slip your hook into the loop and tighten by pulling the end of the yarn. You want it just tight enough so that it doesn’t fall off the hook, and loose enough to be able to pull the knot up and down the hook without an issue.
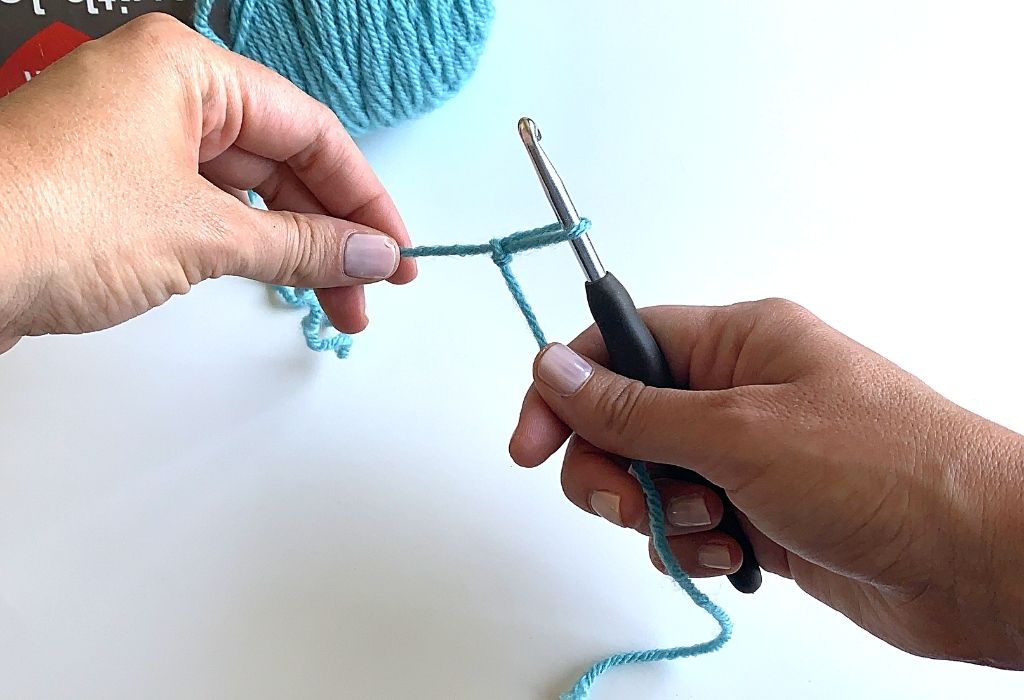
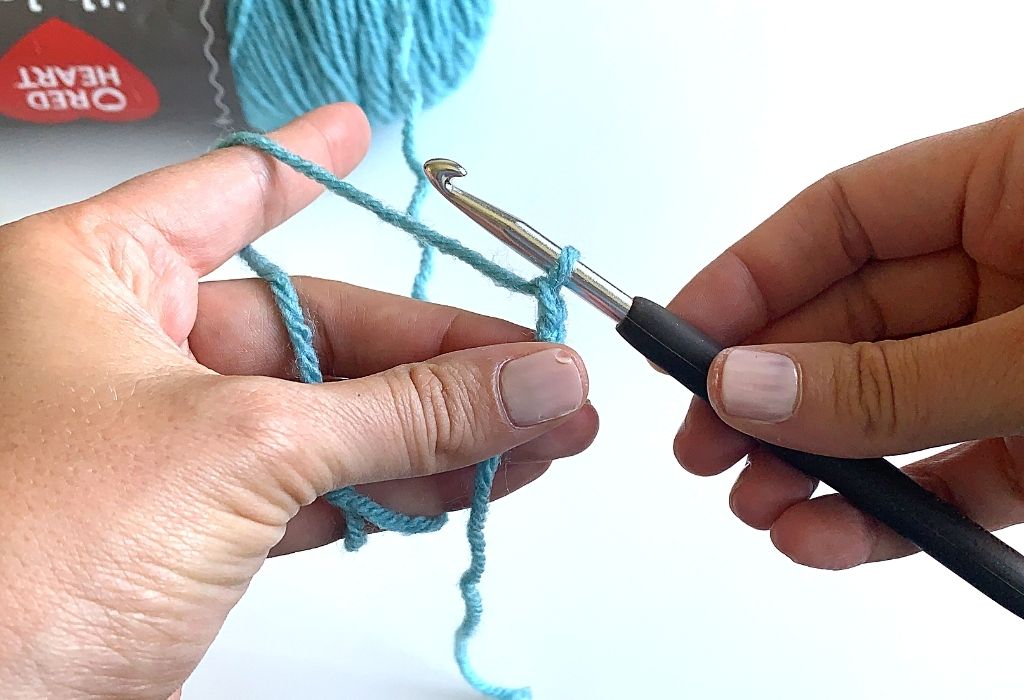
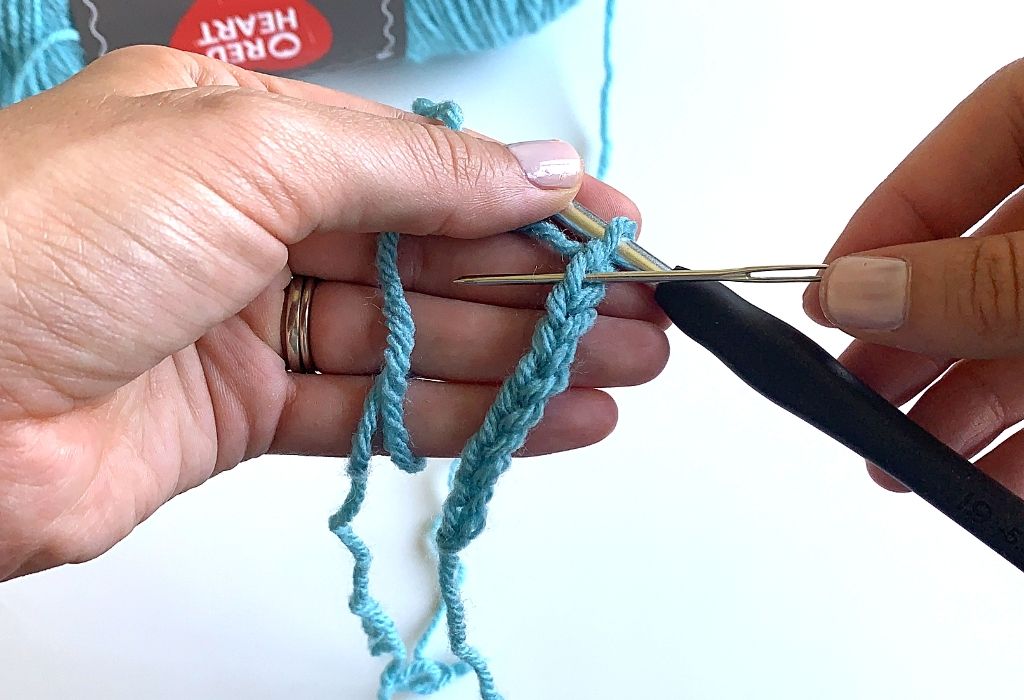
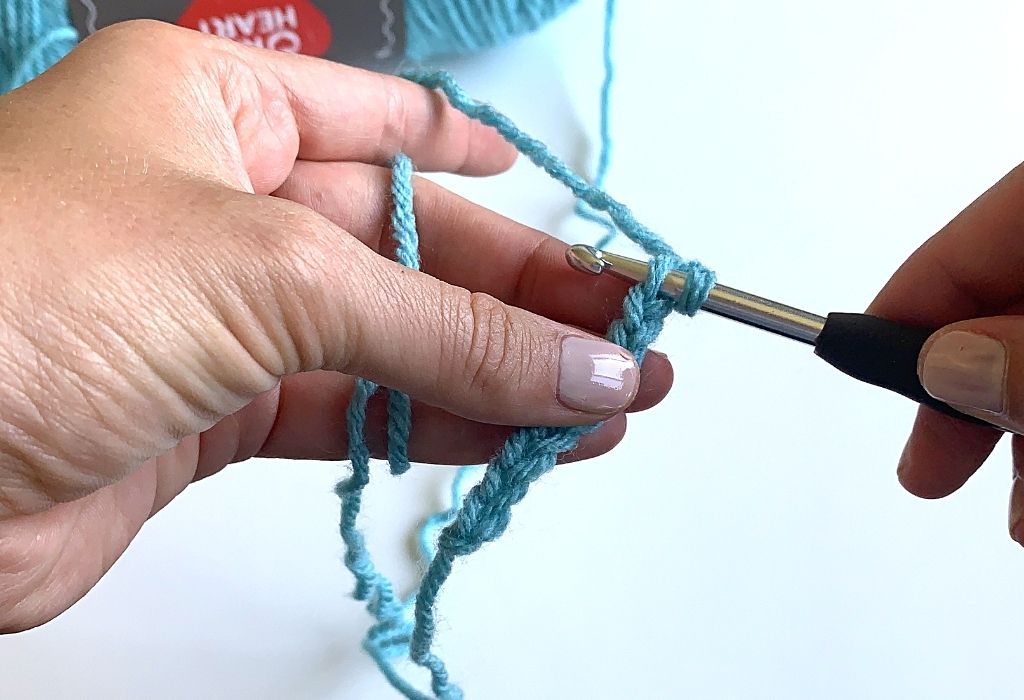
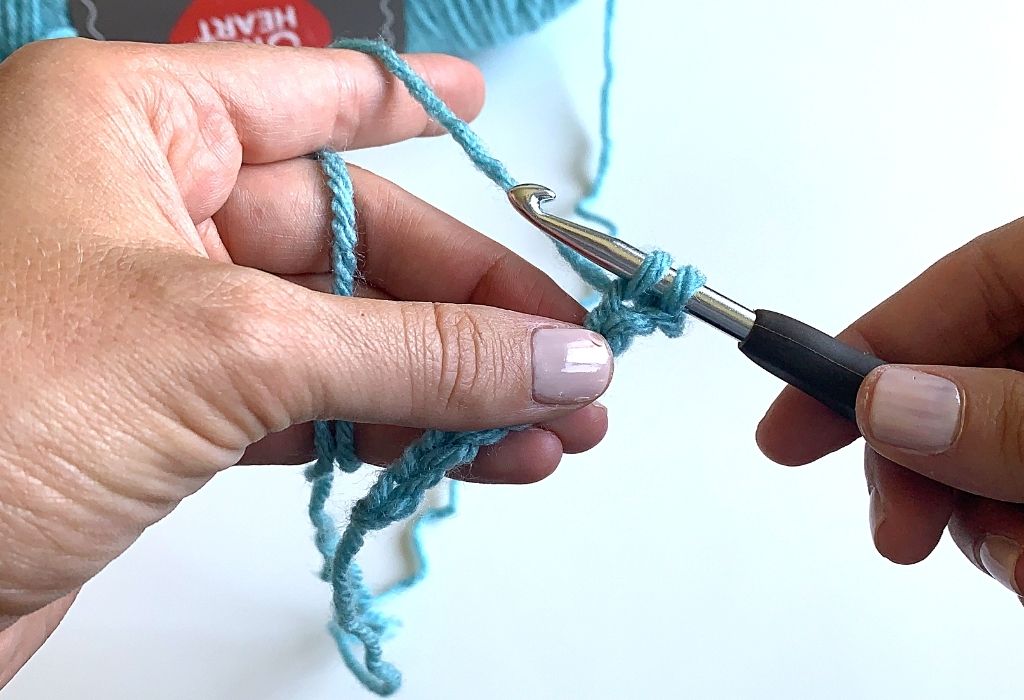
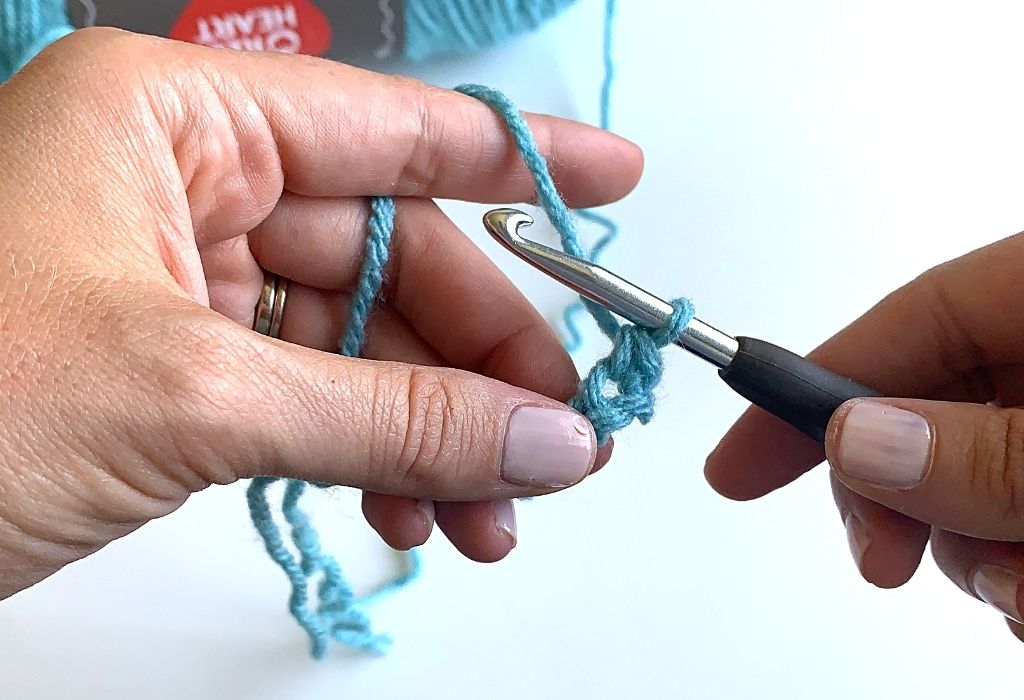
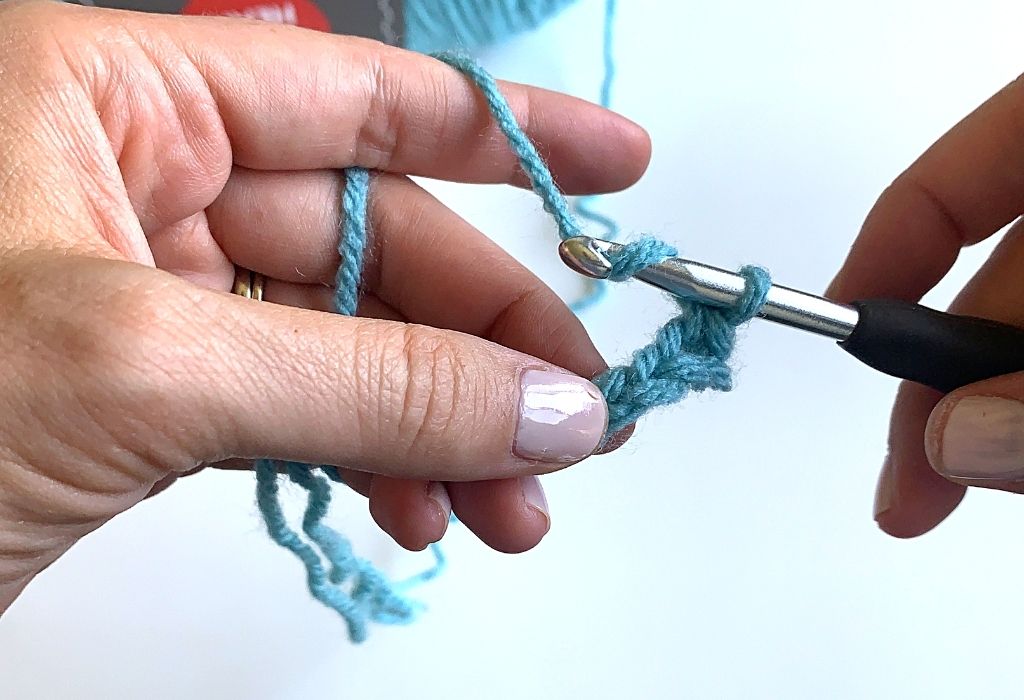
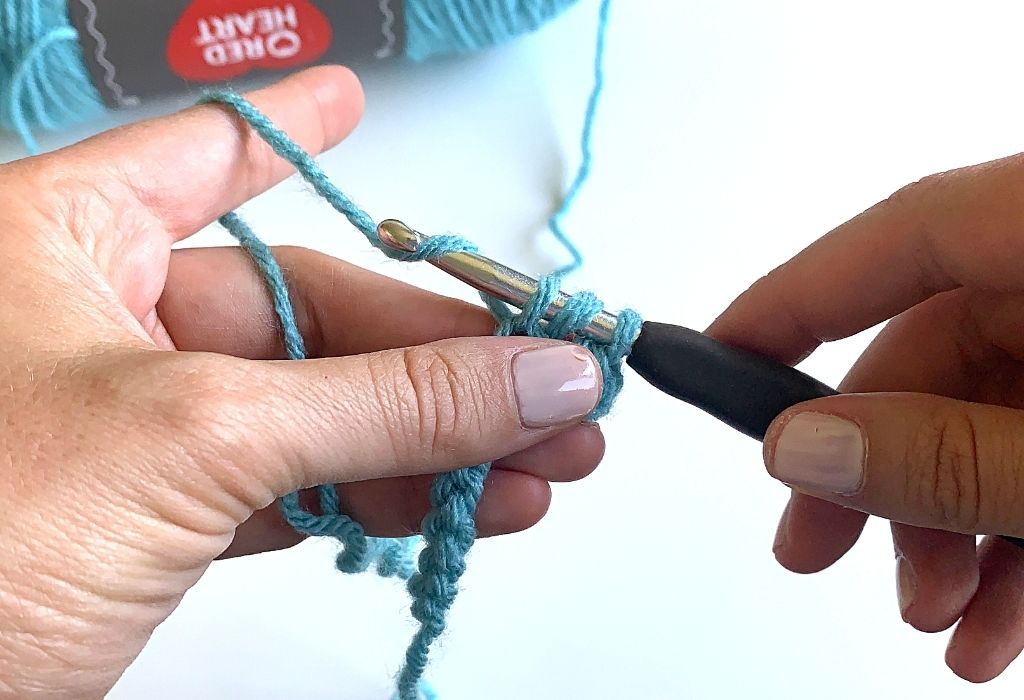
- Chain: *At this point, skip below to the section on how to hold your hook and yarn and come back* To chain, hold hook and yarn as noted below. Move the hook so that it grabs the yarn, and then pull the yarn through the loop that’s attached to your hook. This will create one chain, and you will have one loop left on your hook. Continue to grab yarn (this is called Yarning Over, often YO in crochet patterns) and pulling through the loop on your hook to create more chains.
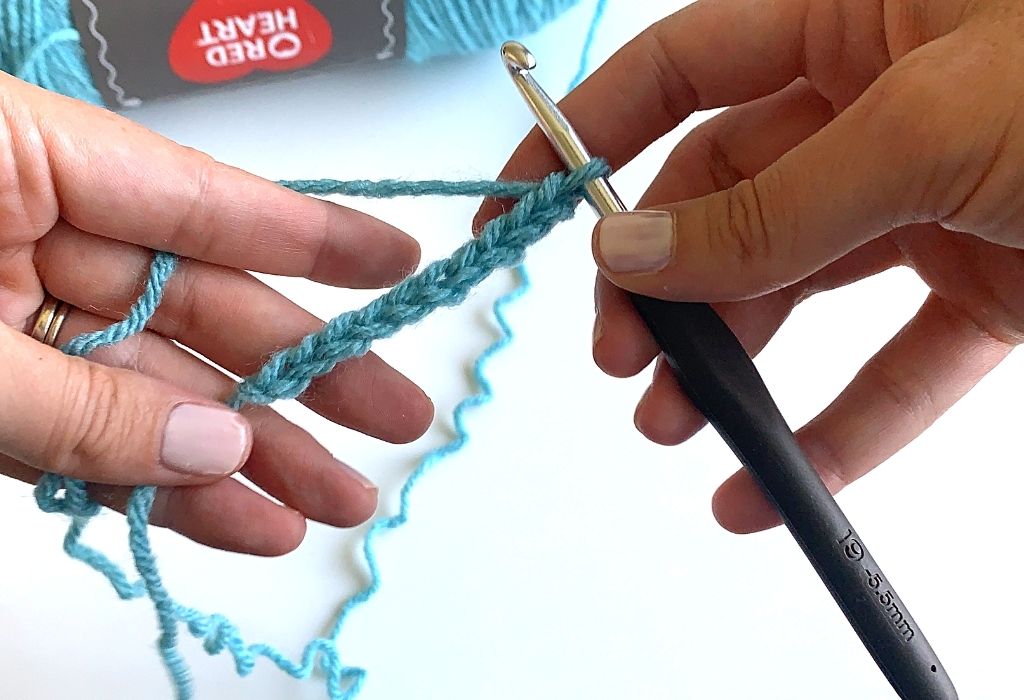
How to Hold Your Yarn and Hook
(Note: these instructions and pictures below are for right-handed crocheters)
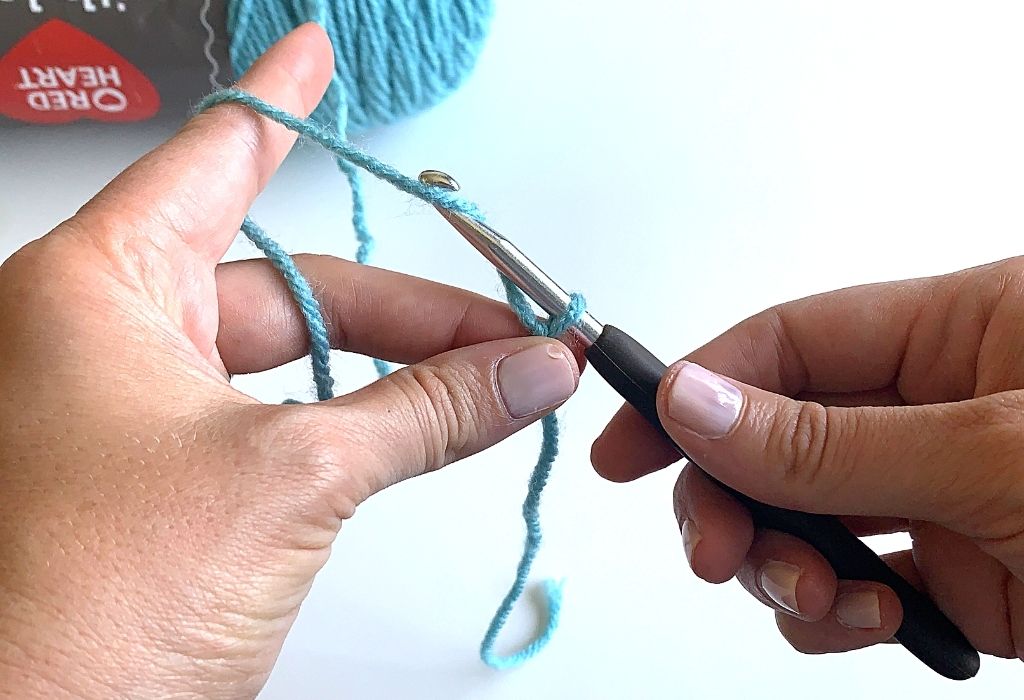
Hold your hook in your right hand and yarn in your left. There are many ways to hold the yarn and how you do so will affect the tension of your yarn, and therefore how tight or loose your crochet style is. The right answer is different for everyone, keep trying different methods to find what works for you!
I crochet the way my grandmother taught me as a child, and it allows me to have control over the yarn. I do this by wrapping the yarn around my pinky finger, and then placing it over my pointer finger (see photos below). I can then grab the crochet item, or tail of the yarn, with my middle finger and thumb.
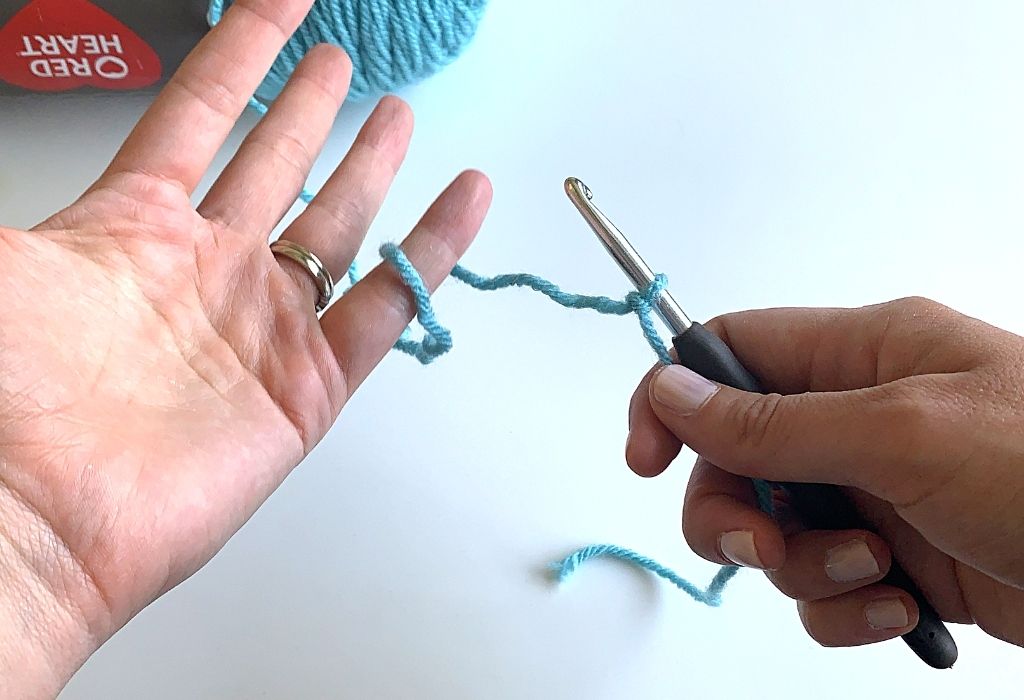
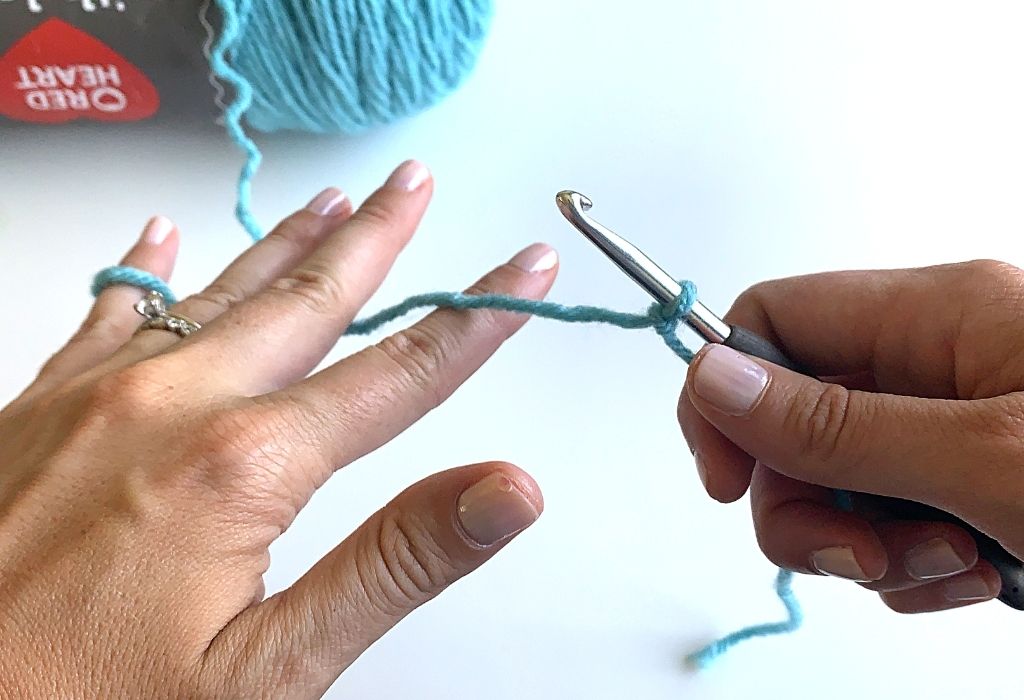
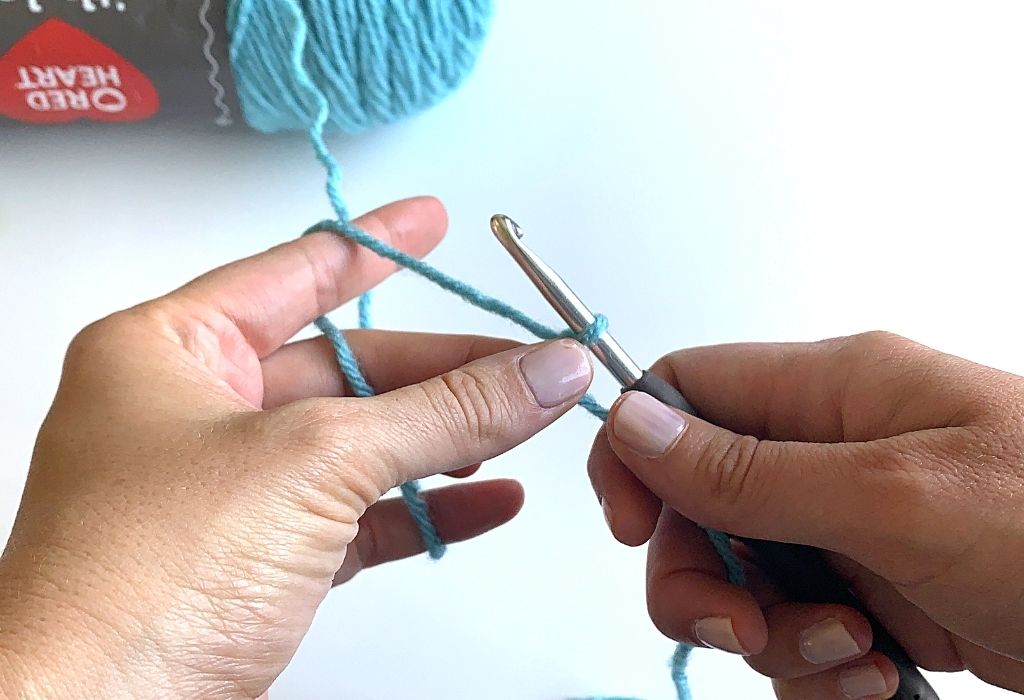
If I lift my finger up, I can tighten the tension/ pull more yarn from the skein. Give it a try. I will have a future post up to go over other methods of holding yarn.
Where to Insert Hook – Chain vs Stitch
If you followed the steps above, you now have a chain. You know how to hold your hook and yarn. What’s next? Where do you even place the next stitches?
I have listed basic crochet stitches below, but first we’ll need to know where to place them. When you read a pattern, it will often say something like this: “Chain 10. SC into second chain from the hook.”
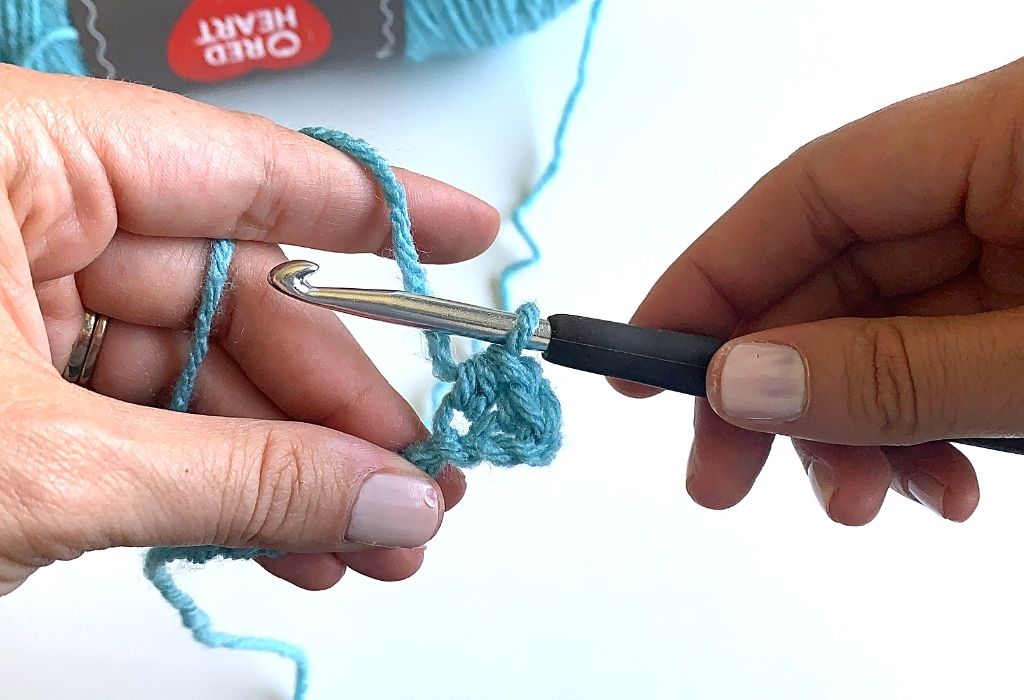
If you look at the chain you created, each single chain creates a v shape. To place a SC, or Single Crochet stitch, into a chain, you’ll typically place the hook into the upper V of the stitch in question. See images below.
If you flip your chain over, you will see each chain actually has another loop, called the third loop. Some patterns may suggest you insert your hook here. This creates a clean look for blankets without adding a border.
Once you have a row of stitches (see stitch descriptions below and come back), you will see that once again you have v shapes. Each stitch has a v shape. Now your pattern will tell you how to move up to the next row, but we’ll start with a simple example of a row of single crochet. At the end of your row, chain one. Now “turn your work”. You will see this phrase often in crochet – it means to literally flip the work over so that you are looking at the backside. This will allow you to continue to work.
Now to place your hook into the first stitch, slide it under the two loops you see that make a v. From here, single crochet as instructed below. Continue to place a single crochet stitch in each stitch across. At the end of the row, chain one, turn work, place single crochet into the first stitch and each stitch across, and repeat!
Basic Crochet Stitches
There are three stitches fundamental to crochet, and you can make almost anything using one of these three stitches. They are: Single crochet (often abbreviated as SC in crochet patterns), Half Double Crochet (HDC), and Double Crochet (DC). Please note that these are American/U.S. terms and that this blog will provide patterns using U.S. terminology.
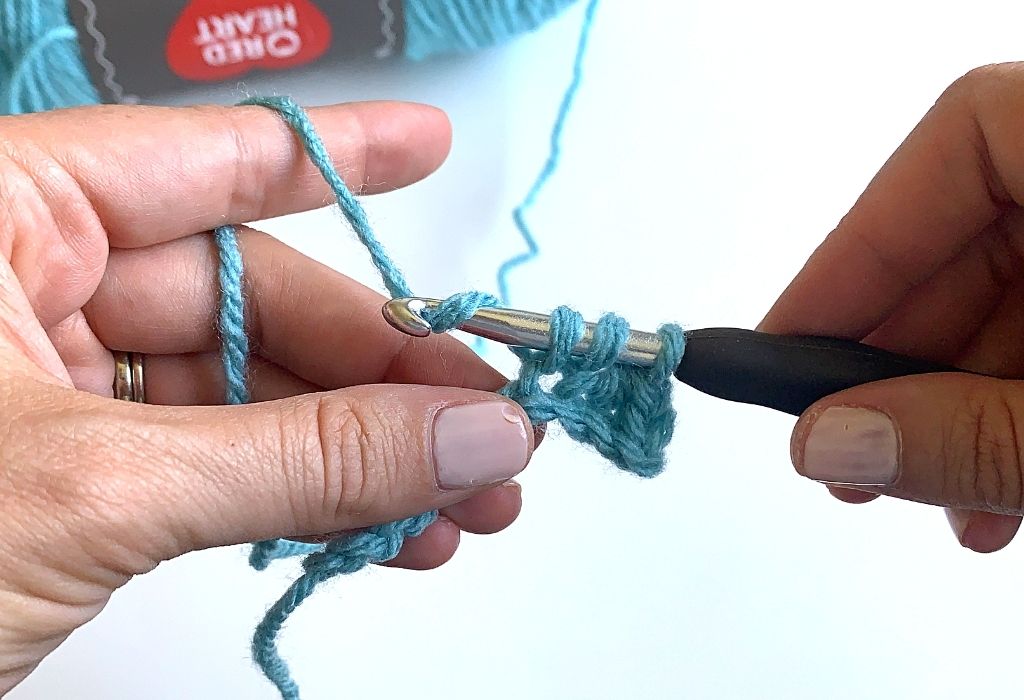
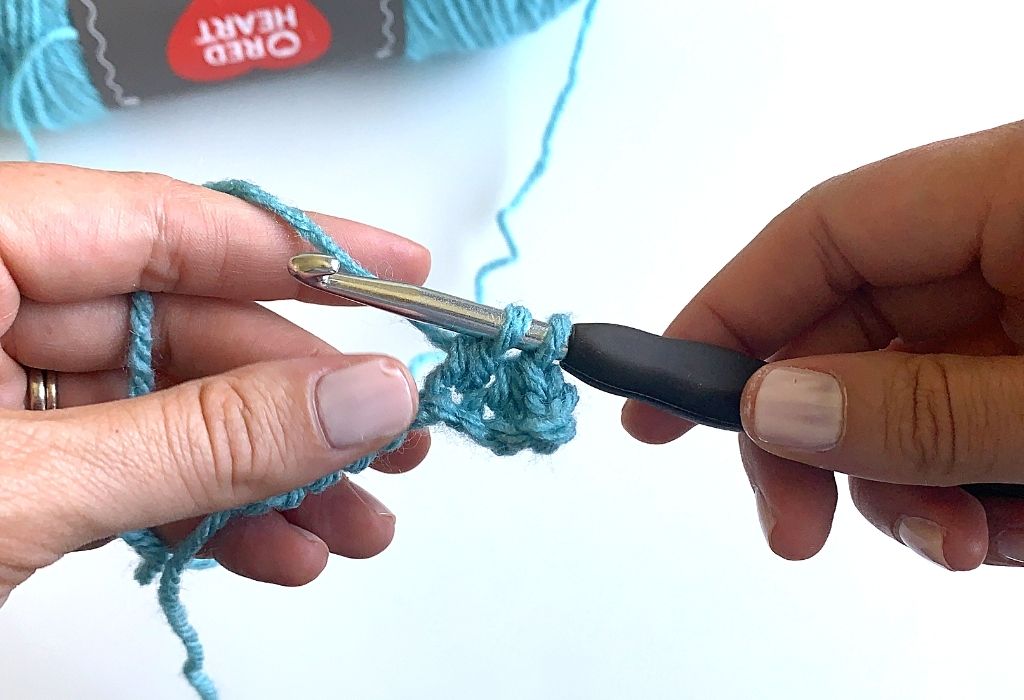
- Single Crochet: Insert hook into chain or stitch (see above). Yarn over and pull up a loop. (You will see this phrase often – it means to grab the yarn with your hook and pull it through the stitch). You will now have two loops on your hook. Yarn over and pull through both loops on your hook. This completes one Single Crochet, and you are left with one loop on your hook.
- Half Double Crochet: Yarn over, then insert hook into chain or stitch. Yarn over and pull up a loop. You should have three loops on your hook. Yarn over and pull through all three loops. This completes one Half Double Crochet, and you are left with one loop on your hook.

- Double Crochet: Yarn over, then insert hook into chain or stitch. Yarn over and pull up a loop. You should have three loops on your hook (these first steps are the same as the Half Double Crochet). Yarn over and pull through only the first two loops on your hook. You should now have two loops remaining on your hook. Yarn over and pull through both remaining loops. This completes one Double Crochet, and you are left with one loop on your hook.

If you tried all three, you will notice that the stitches increase in height from single crochet to double crochet. Lots of patterns use only these three stitches to create fun and unique projects. And if you get these down, you’ll be able to learn more complex stitches easily!
Reading Crochet Patterns
This can be intimidating for a lot of folks out there, even experienced crocheters who learned by watching! But it’s really not complicated if you know what you are looking at. Basic stitches are usually referenced with abbreviations (SC for single crochet, etc.) A list of the most common U.S. Crochet abbreviations by the Craft Yarn Council can be found here: https://www.craftyarncouncil.com/standards/crochet-abbreviations
If the pattern includes a unique stitch, or a stitch that goes beyond the basics, there is usually a description of the stitch at the beginning of the pattern.
Counting Stitches
I’ll warn you now – this is my least favorite step. It is also the most important step (because of course it is!) Even experienced crocheters get tripped up here, but if you count your stitches, you’ll spare yourself a headache later!
Patterns will usually list a number of stitches you should have at the end of a row or round. (A round is a row when you’re literally crocheting something round, like a hat or a stuffed animal or amigurumi).
Stitch markers help with this – little pins you place around a stitch to help you count or keep track of your place. These are especially helpful when working in the round because it can be nearly impossible to find the beginning of your row. They can also be helpful with large items like blankets. Placing a stitch marker every 10 stitches can help you keep track!
You can use household items as stitch markers, like safety pins and paper clips, or you can buy a pack of brightly colored markers at craft stores or on amazon.
You can also explore Etsy stores and finding handmade stitch markers there!
Weaving in Ends
Ok… there is one more not-so-fun step. At the end of your crochet project, you will have a few yarn strings hanging off of it from where you started or ended a new skein of yarn or new color. It’s not exactly pretty. This is where your yarn needles come in handy.
Take an end and pull it through the eye of your yarn needle. Sometimes, it helps to bend the yarn and pull that part through. Then use your yarn needle to weave in the end into the project in places it can’t be seen. If you can hide a knot, feel free to do so if you want the end to feel more secure. Hats, garments, and amigurumi projects you can typically hide the ends on the side that is not seen. Blankets are a little trickier. Once you’re satisfied with how you’ve weaved in the ends, cut off any excess.
What is a Gauge?
At the beginning of your crochet pattern, there should be a gauge that looks something like this: 10 DC x 5 rows = 4″x4″. This means that if you measure the width of 10 double crochet stitches, you should get 4″, and if you measure the height of 5 rows of double crochet, you should get 4″. Of course, this is just an example.
Is it necessary? Depends on the project. For beginner projects and projects like blankets and wash clothes, it is likely not necessary. But it absolutely IS necessary for clothing if you want them to fit. I will do an entire post on gauge in the future that explains when you need to do it and how.
Don’t Give Up!
Keep trying! Take a break if you need to and try again. Try different hooks and methods of holding the yarn. And of course, practice! Once it clicks, it clicks, and the crochet world will be completely open to you.
Now that you’ve practiced a little, check out this quick project for true beginners – Easy Mug Rug