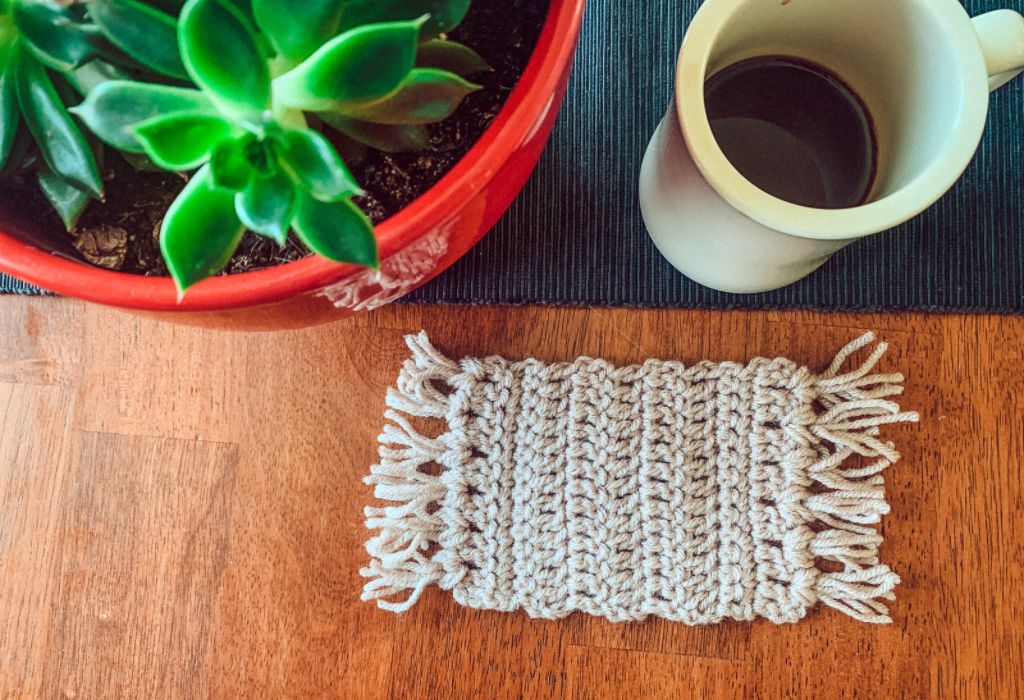
So you want to learn how to crochet – guess what? You can! And I have the perfect beginner crochet pattern for you. While the pattern below is also a great quick and easy pattern for experienced crocheters, it is also perfect for beginners. The entire project is made using two very basic crochet stitches and can be done in one sitting!
Scroll down for ‘instructions’ if you are a beginner or ‘Pattern’ if you can read crochet patterns. Or if you’d like to save this for later, click here to Pin it!
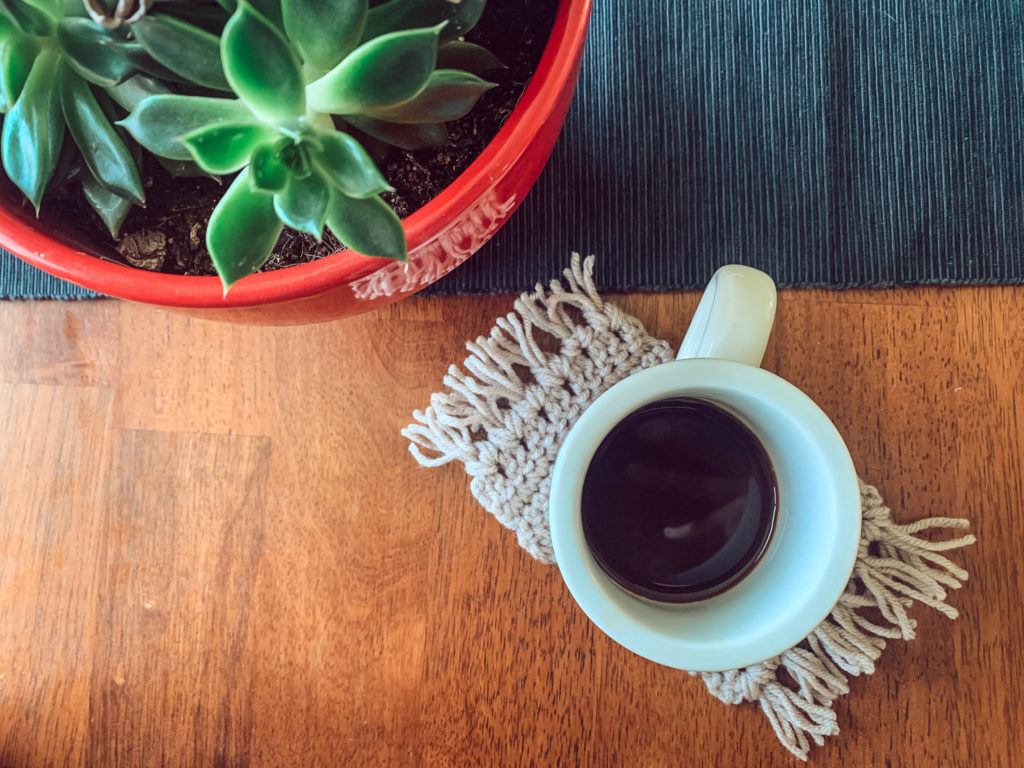
Why a Mug Rug?
Mug rugs are the perfect beginner project, especially if you’re like me and run out of patience quickly. They are so quick to make! And how cute is the idea of a rug for your mug?
The pattern below uses two of crochet’s most basic stitches – Double Crochet and Single Crochet. Once you get these down, you can make mug rugs while practicing other stitches! Turn your learning opportunities into more rugs for your mugs 🙂 Mug Rugs don’t use very much yarn, so they also make great projects for using up scrap yarn.
Is this really a Beginner Crochet Pattern?
Yes! While the pattern really is for beginners, if this is your first time picking up a crochet hook, check out this post first: How to Crochet for Absolute Beginners.
If you’ve tried out a few stitches before, stick around!
If you get the hang of this pattern and want to try out something with color changes, you can find the Dotted Hearts Mug Rug pattern here!
Materials List
Here’s what you’ll need:
- Acrylic Yarn, Weight 4.
- I used Red Heart Super Saver in the color Oatmeal.
- Typically, cotton is a better choice for kitchen items (cotton does well with heat and messes). But for a beginner project, acrylic is much easier to work with.
- A crochet hook
- Use your yarn’s recommended hook size. I used a I-9 hook (5.5 mm).
- I like to use this set of ergonomic crochet hooks
- A yarn or tapestry needle
- Scissors
- Something to wrap your yarn around to make the fringe – a phone case, credit card, etc.
Easy Mug Rug Instructions:
I’m calling these instructions because I will be spelling out what to do, however, I will also include a written pattern below. If you can read patterns go ahead and skip forward. Beginners are welcome to compare the instructions with the pattern and start learning how to read crochet patterns.
And again, if you get stuck, check out this How-to
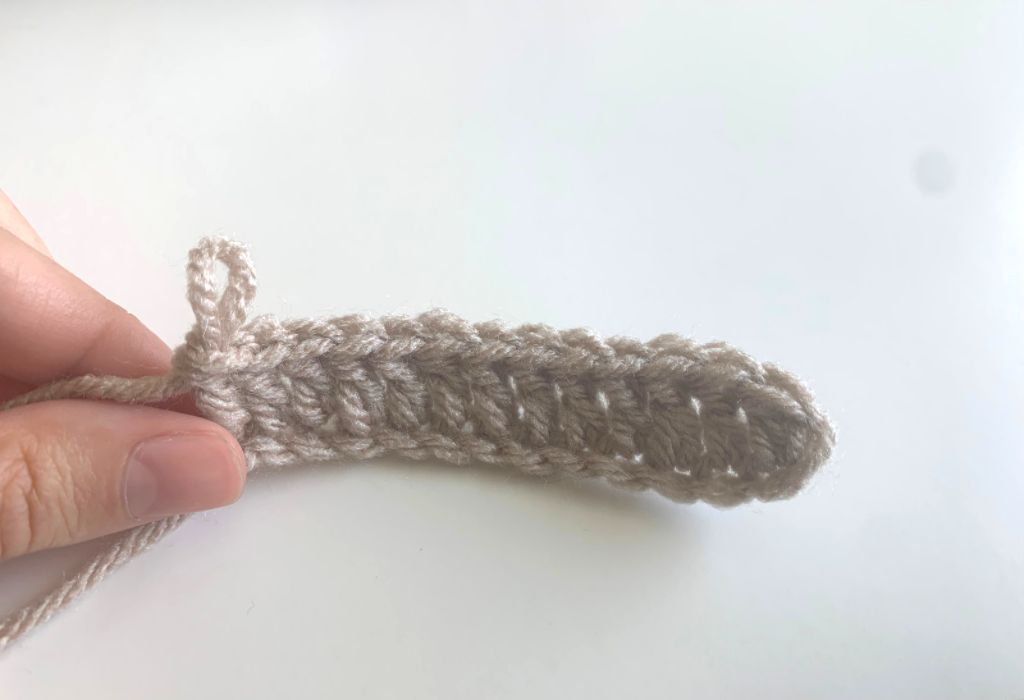
Starting/ Row 1:
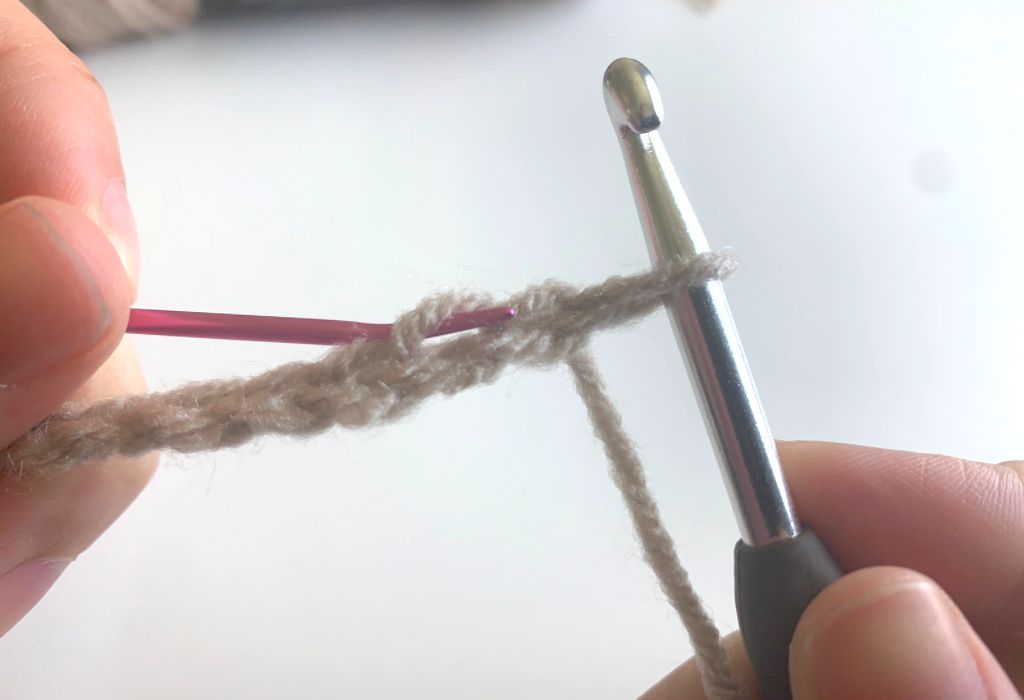
To start, tie a slip not and tighten it around your hook. Then make 14 chains. To make each chain: yarn over, and pull through loop on your hook so that you have a new loop on hook.
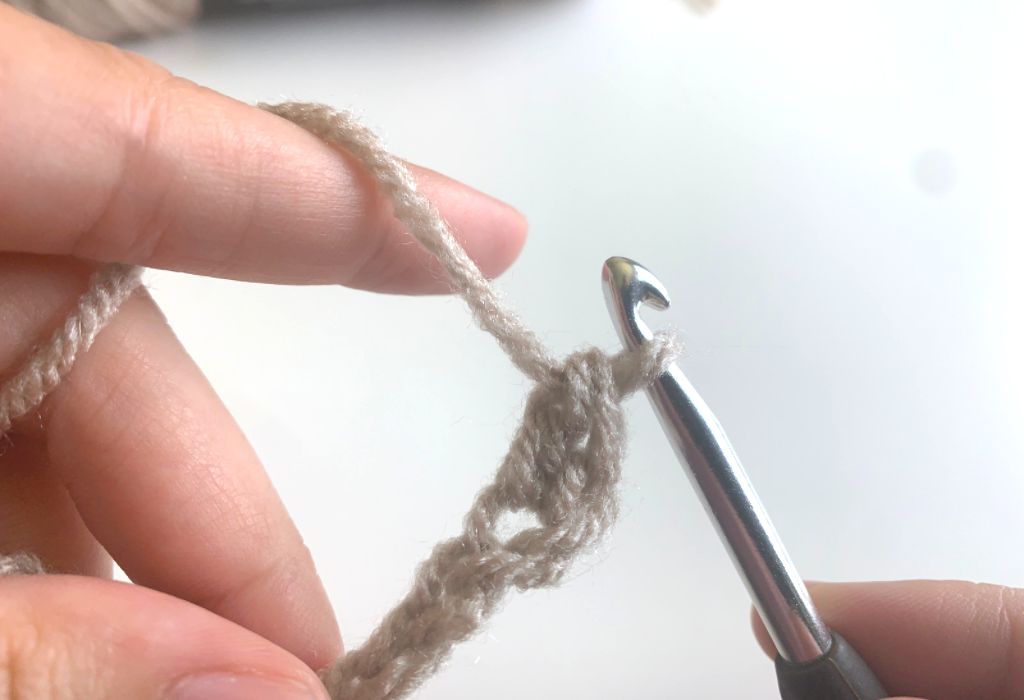
Starting in the second chain nearest your hook, place a Double Crochet. To make a Double Crochet: yarn over, insert hook into chain, yarn over again and pull up a loop. Yarn over and pull through first two loops on your hook. Yarn over and pull through the remaining two loops on your hook. You should have one new loop on your hook. Double crochet made!
Place a Double Crochet into each of the remaining chains. When you’re done, you should have made 13 Double Crochets and therefore have 13 stitches. To count each stitch, look for the V shape at the top of each Double Crochet that you made.

Row 2:
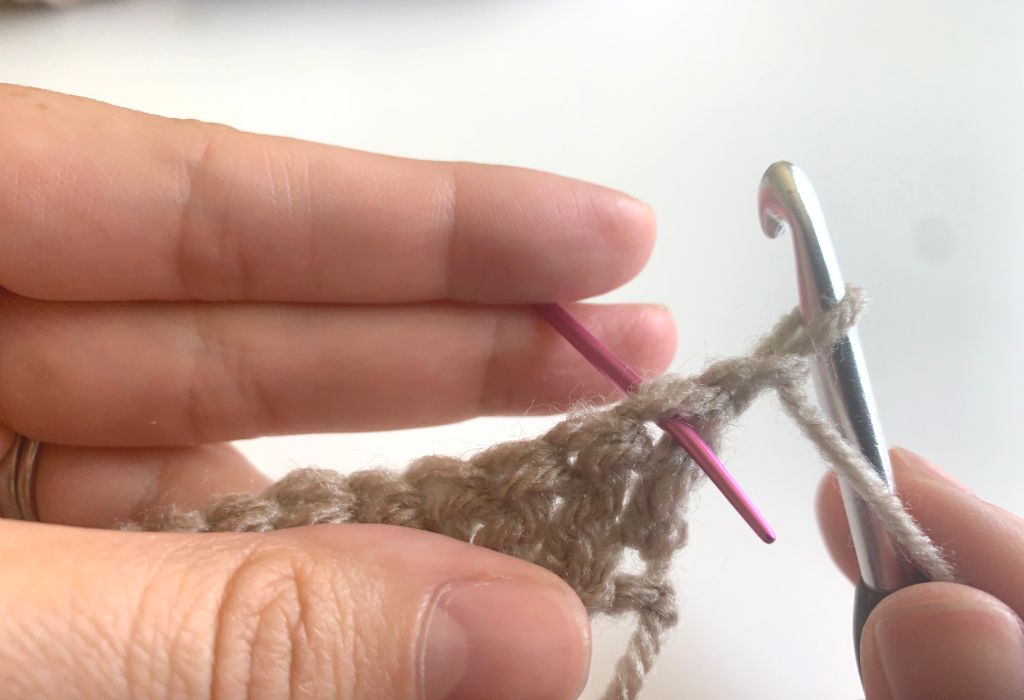
Now that you’ve tried Double Crochet, the next two rows will be Single Crochet! To move up to the next row, chain 1. Now turn your work by literally flipping it over left to right, so that what was the front side is now the backside and your hook is back to the right side of the project (assuming you are right-handed).
Place a Single Crochet in the next stitch – see photo below to determine where to place your hook. To place your hook in a stitch instead of a chain, you’ll place it under the top to bars of the stitch that make the V shape (unless pattern says otherwise). To place your single crochet, insert hook into stitch, then yarn over and pull up a loop. Yarn over and pull through both loops on your hook. You should have one loop remaining on your hook.
Place a Single Crochet into each remaining stitch. When you reach the end of the row, you should have 13 stitches.
Row 3:
For Row 3, repeat Row 2. You’ll do this by first, chaining 1 and turning your work. Now place a Single Crochet in the first stitch and each stitch across so that you have 13 stitches.
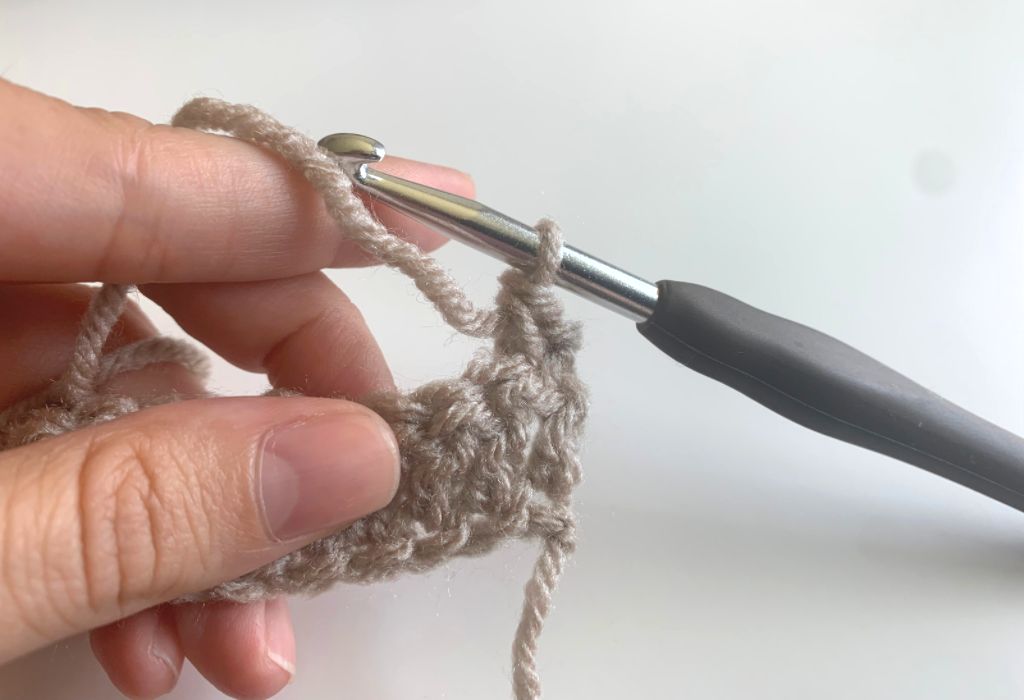
Row 4:
Just to make things fun, we’re going back to rows of Double Crochet! These stitches are taller than the Single Crochet stitches, so at the end of Row 3 you’ll need to Chain 2. Now turn your work and place a Double Crochet in the first stitch and each stitch across (yarn over, insert hook, yarn over, pull up a loop, yarn over, pull through 2 loops, yarn over, pull through 2 loops). Like all rows in this pattern, you should finish with 13 stitches.
Rows 5 – 8:
For the next 4 rows, repeat Row 4. Start by chaining 2 and turning your work, then placing Double Crochets in each stitch across (13 stitches).
Rows 9-10:
In order for each end of the mug rug to mirror each other, we need to repeat the Single Crochet rows. For Rows 9 & 10, we will be repeating Rows 2 & 3: start by Chaining 1 and turning your work. Place a Single Crochet in each stitch across (13 stitches).
Row 11:
We’re almost done! This is the final row! Chain 2 and turn your work. Now place a Double Crochet in each stitch across. You should finish with 13 stitches. Before you cut your yarn, I like to Chain 1 at the end to secure your yarn. Now cut the yarn so that you have a small tail that can be woven in, and use your hook to pull the tail all the way through the last chain. Pull tail to tighten.
Finishing
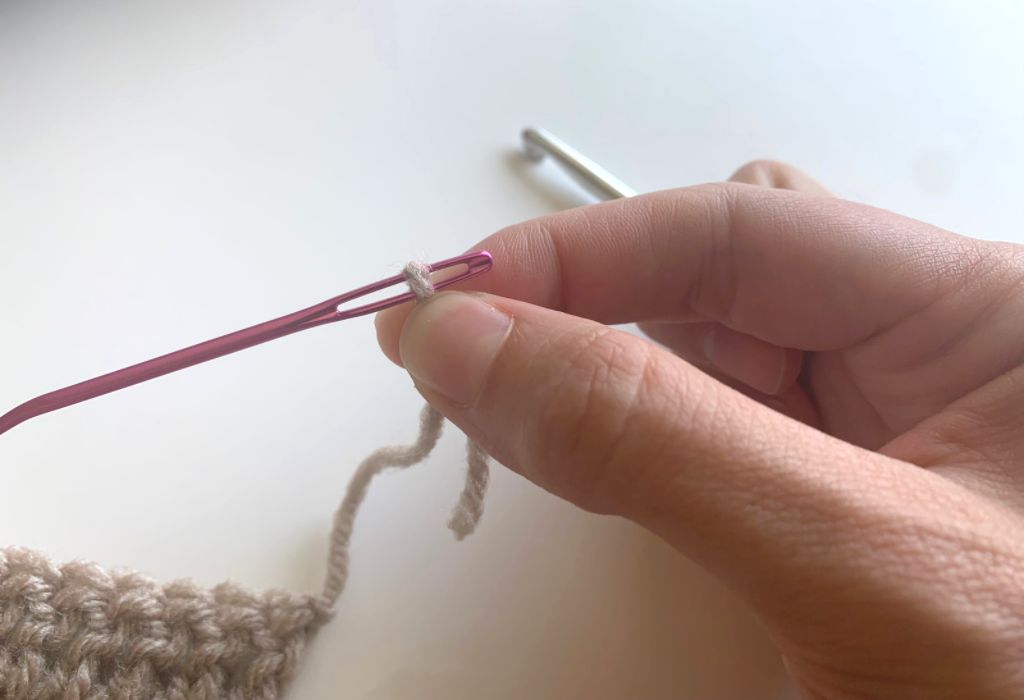
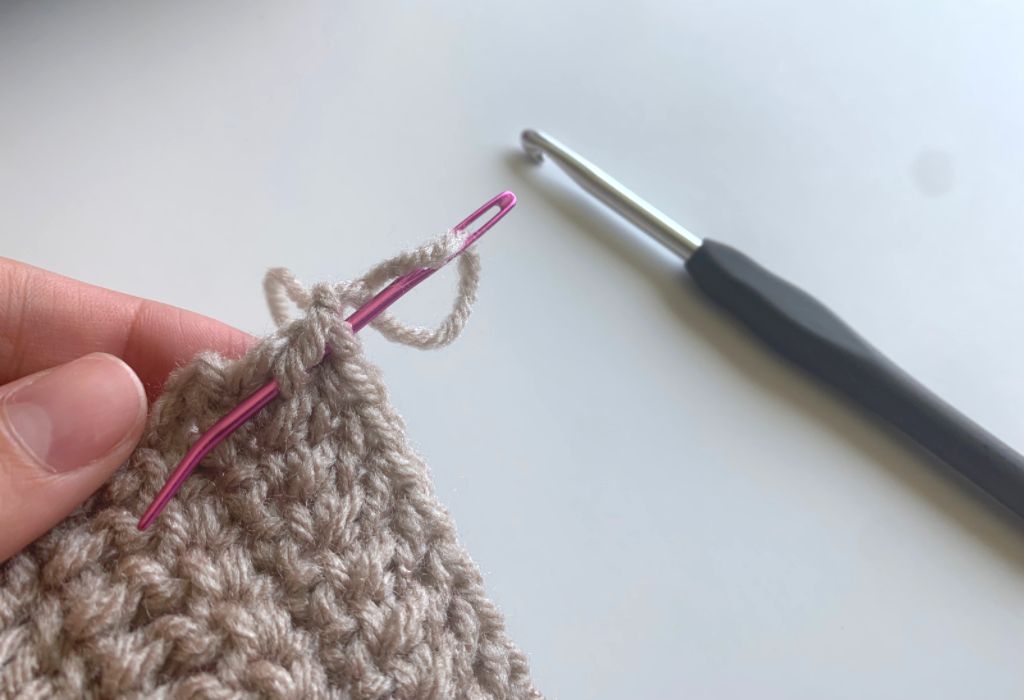
You did it! You’ll notice that you have a yarn tail at the beginning and end of your project – use a yarn or tapestry needle to weave these in and hide them as best you can. I went down through the double crochet stitches and wove them into the single crochet stitches. Cut off any extra.
Scroll down past the pattern below to see how to add the fringe to each end. And you’re done!
Easy Mug Rug Full Pattern
Abbreviations:
Ch – Chain
Dc – Double Crochet
Sc – Single Crochet
St – Stitch
Pattern:
Chain 14.
Row 1: Dc in 2nd Chain from hook. Dc in each remaining chain (13 St)
Row 2: Ch1 and turn work. Sc in first stitch and each stitch across (13 St)
Row 3: Repeat Row 2 (13 St)
Row 4: Ch2 and turn work. Dc in first stitch and each stitch across (13 St)
Rows 5 – 8: Repeat Row 4 (13 St)
Rows 9 – 10: Repeat Row 2 (13 St)
Row 11: Repeat Row 4 (13 St)
Tie off. See instructions below for adding Fringe.
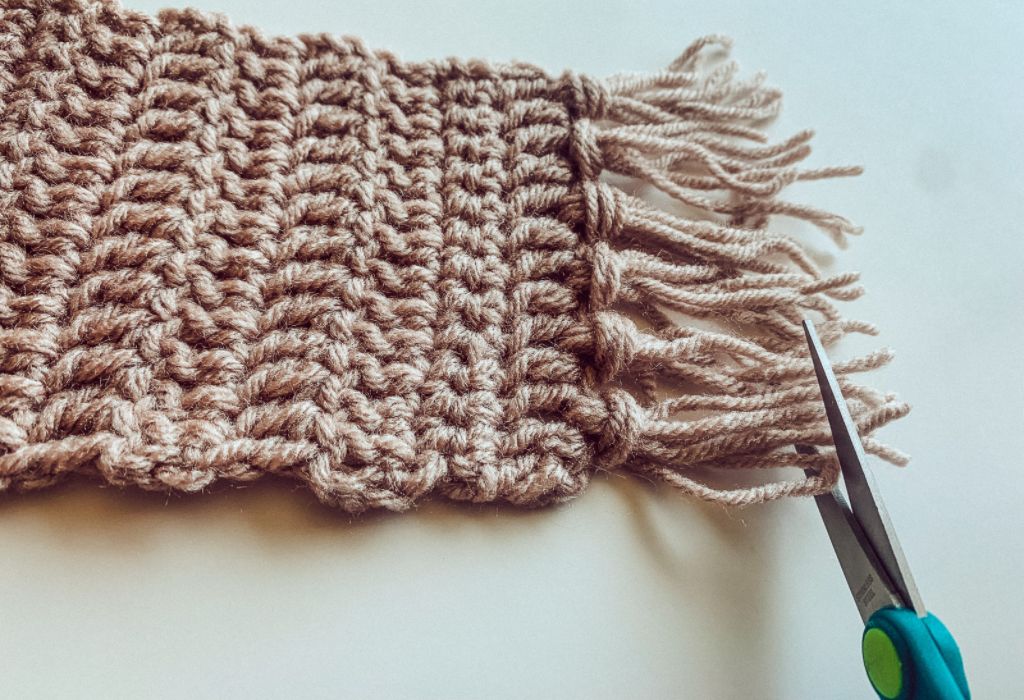
How to Add Fringe
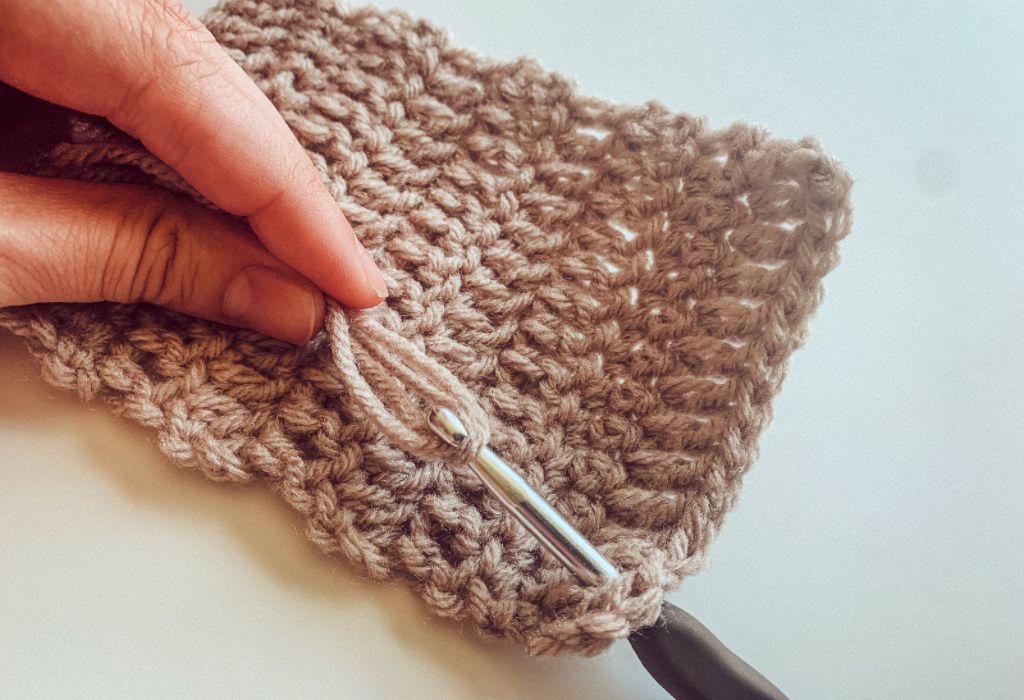
This is the fun part! Adding fringe will complete your mug rug look, and this method can be used for actual rugs, blankets, etc.!
Start by using a card or something similar to wrap yarn around. I used my phone case in the photos below. Wrap your yarn completely around 3 times, then cut at the bottom so that you have 3 strands of yarn roughly the same length.
Hold the three strands together and bend in the middle so that you create a loop. Now pull the loop through the spot on your project where you want to attach your fringe. I added the fringe between the double crochet stitches on each end and repeated this process so that there were 2 Double Crochet stitches between each fringe.
Now use your fingers to pull the ends of your yarn strands through the loop. Do your best to do this evenly. Pull the ends of the yarn to tighten. When you’ve completed adding your fringe to each side of the mug rug, you can take your yarn scissors and trim so that each end is even.
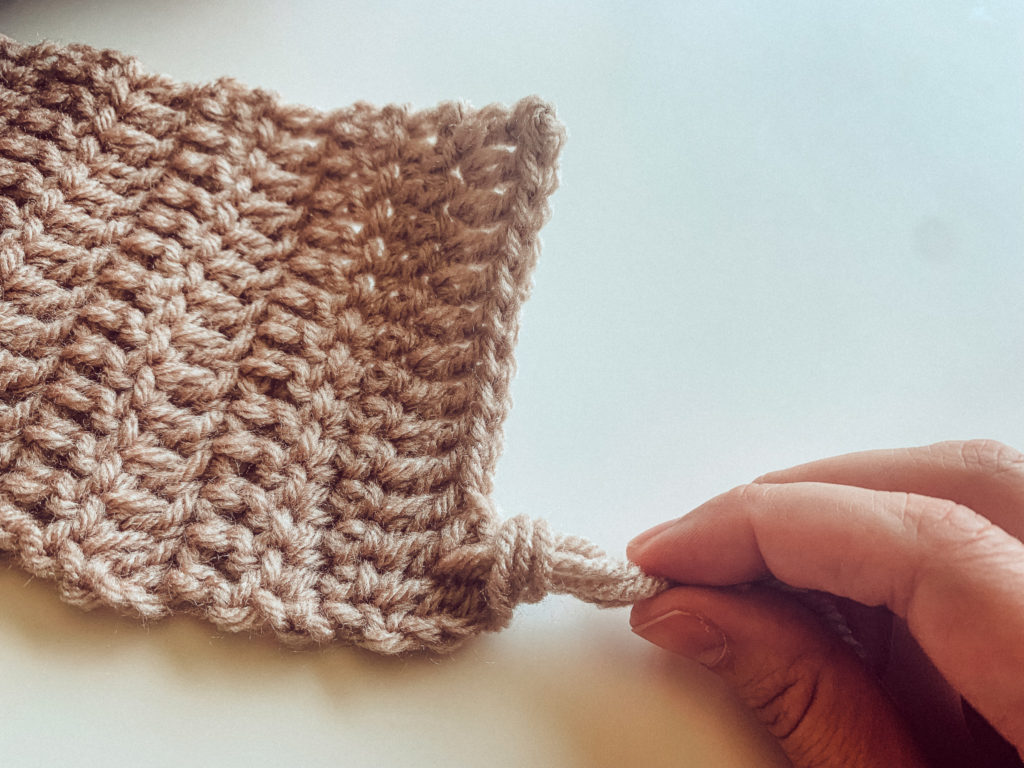
And there you have it! I hope you enjoyed this tutorial and your new mug rug! If you have any questions or other beginner crochet pattern requests, feel free to comment below!