
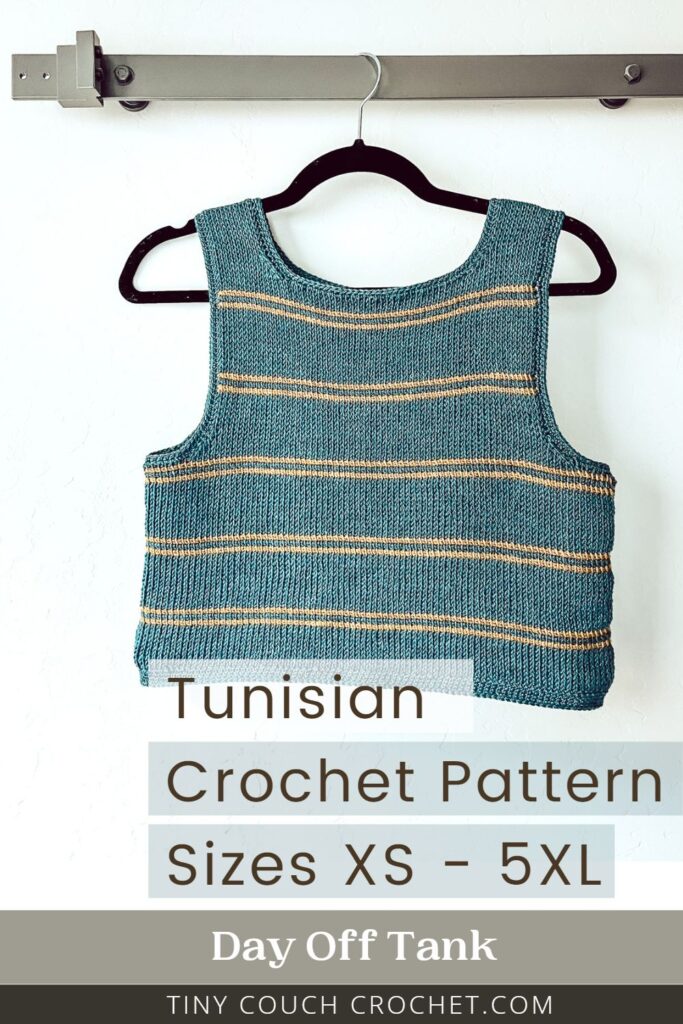
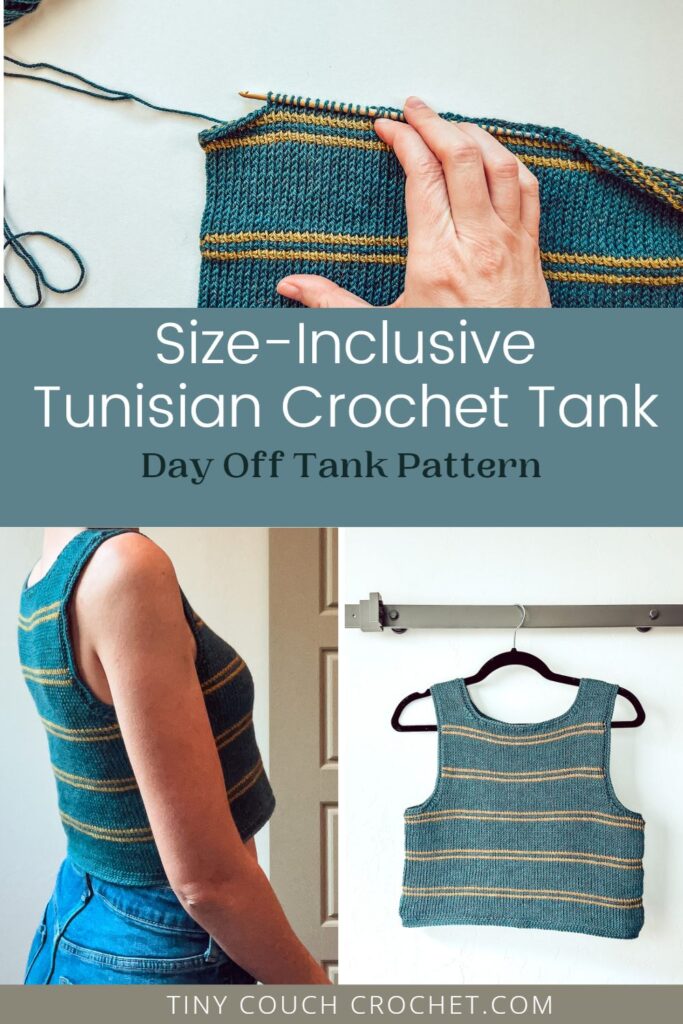
Looking for a beginner-friendly Tunisian crochet wearable? This size-inclusive, easy Tunisian crochet top pattern is simple enough for beginners without compromising design.
The tank uses two of Tunisian Crochet’s staple stitches: the Tunisian Simple Stitch and Tunisian Knit Stitch. The result is a tank that looks knit, with a stripe detail that pops. A hand-made faux knit tank for your summer wardrobe? Yes please!
Read on for info about the pattern, yarn, stitch tutorial links, etc. Or scroll down for the free pattern.
Quick Links:
If you prefer ad-free PDFs, you can also find a beautifully formatted, printable version of this pattern at any of the links below.
- To purchase the PDF pattern on Etsy, click here.
- To purchase the PDF on Ravelry, click here.
- To purchase the pattern & yarn kit from WeCrochet, click here.
Want to save this for later? Save this to Pinterest by clicking on the image below so that you can easily come back 🙂
This post contains affiliate links, which means I receive a small commission, at no extra cost to you, if you make a purchase using this link.
Inspiration
Don’t get me wrong, I love the look of crochet. But sometimes I envy knitters and their light fabric for warm weather tanks! So I wanted to make a crochet version, and knew Tunisian crochet was the way to do it. I also wanted to add a pop of color for a stripe detail that gives warm weather vibes.
While the Tunisian Knit Stitch certainly looks knit, it is much thicker. So to get that lightweight fabric I was looking for, I went for fingering weight yarn. I know, I know, it’s not the quickest – but trust me, it’s not too painful! The stripes switch things up and make it fun, and the end result is gorgeous!
The Yarn
WeCrochet / Knitpicks provided the yarn support for this pattern – thank you WeCrochet! The yarn used was from their Twill line – specifically Twill Fingering.
Twill Fingering is 100% superwash merino wool that comes in rich colors. It’s a dream to work with, and the finished tank is so comfortable!
Twill fingering is a little on the thick side for a weight 1 yarn. If looking for substitutions, I recommend looking for a weight 1 or thin weight 2 yarn that you can meet gauge with.
Skills Needed
If you are new to Tunisian Crochet, there will be a lot of new skills to learn – but don’t worry! Half of the pattern tester group had never tried Tunisian Crochet before, and they were able to make their first project this tank! If you want to start with a smaller project first to see if you like the technique, you can check out this free washcloth pattern here.
The pattern includes the following:
- Tunisian Knit Stitch (for help, see TKS Tutorial by Claudetta Crochet)
- Tunisian Simple Stitch (for help, see TSS Tutorial/Beginner Guide by TL Yarn Crafts)
- Changing colors at the end of a row
- To change colors in this project, do so when making the last Yo of the return pass of the row before: wait until there are two loops left on your hook, drop your working yarn and pull your new color through
- Simple decreases (for help, see Decrease Tutorial by Happy Berry Crochet)
- Binding off
- *Insert hook in next stitch through front and back bars, pull up a loop, Yo and pull through both loops, repeat from * across.
Materials Needed
- Yarn: Twill Fingering yarn (Weight 1, 100% superwash merino wool,183yd/50g)
- Estimated Yarn Amounts in XS (S, M, L, XL) (2XL, 3XL, 4XL, 5XL):
- Main Color: 4 (4, 5, 5, 6) (7, 7, 8, 8) balls of Twill Fingering or 650 (700, 850, 925, 1025) (1150, 1225, 1350, 1400) yards
- Contrast Color: 1 (1, 1, 1, 1) (1, 1, 1, 1) ball of Twill Fingering or 75 (80, 100, 110, 120) (130, 140, 155, 160) yards
- Hooks:
- Panel Hook: 4.0mm Tunisian crochet hook with 10″ to 24″ cord
- Border Hook: 3.25mm crochet hook for border
- Yarn Needle
- Scissors
- Measuring Tape
- Stitch Markers
Guage & Size
Guage: (Measured Unblocked)
4” x 4” = 21 stitches x 26 rows (Unblocked)
Swatch should be slightly larger than 4″ so that you have a larger sample to measure from. This will provide more accurate results.
Size Chart:
This garment includes 0 to 2″ of NEGATIVE ease, meaning it fits snug. For a looser fitting tank, size up. If in between sizes, it is recommended to size up.
| A | B | C | D | E | ||
| Your Bust Size | Panel Width | Bib Width | Total Panel Length | Armhole Length | Body Length | |
| XS | 28″-30″ | 14″ | 12″ | 15.5″ | 8″ | 7.5″ |
| S | 32″-34″ | 16″ | 12″ | 15.5″ | 8″ | 7.5″ |
| M | 36″-38″ | 18″ | 13″ | 18″ | 8″ | 10″ |
| L | 40″-42″ | 20″ | 13″ | 18.5″ | 8.5″ | 10″ |
| XL | 44″-46″ | 22″ | 14″ | 18.5″ | 8.5″ | 10″ |
| 2XL | 48″-50″ | 24″ | 14″ | 21″ | 11″ | 10″ |
| 3XL | 52″-54″ | 26″ | 15″ | 21.5″ | 11.5″ | 10″ |
| 4XL | 56″-58″ | 28″ | 15″ | 21.5″ | 11.5″ | 10″ |
| 5XL | 60″-62″ | 30″ | 15″ | 21.5″ | 11.5″ | 10″ |
Schematic is included in paid PDF.
Abbreviations (U.S. Terminology)
St = Stitch
Yo = Yarn Over
Sc = Single Crochet
TKS = Tunisian Knit Stitch: Insert hook between front and back vertical bars of the next stitch, pull up a loop. (see Skills section)
TSS = Tunisian Simple Stitch: Insert hook behind the front vertical bar of the next stitch, pull up a loop. (see Skills section)
LTS = Tunisian Knit Stitch: Insert hook behind the two vertical bars at the end of the row (you may need to turn work sideways to see the two vertical bars at the end), pull up a loop.
RetP = Return Pass: Yo and pull through first loop on hook, *Yo and pull through two loops, repeat from * until one loop remains.
Dec = Decrease: (applies to both TKS and TSS for this pattern) Insert hook through front vertical bar of the next two stitches, Yo and pull through both bars so that you add one loop to your hook.
MC = Main Color
CC = Contrast Color
The Day Off Tank: Free Tunisian Crochet Top Pattern
Notes:
- Sizing is as follows, unless noted otherwise: XS (S, M, L, XL) (2XL, 3XL, 4XL, 5XL)
Body Panel (Make 2)
With MC & either Panel Hook or Starting Chain Hook:
Chain 75 (85, 95, 105, 116) (128, 137, 147, 158)
With MC & Panel Hook:
Row 1 (starting row): Working in the back bumps of the starting chain, pull up a loop in 2nd chain from hook and each remaining chain, RetP <75 (85, 95, 105, 116) (128, 137, 147, 158) st>
Note: to count stitches in Tunisian crochet, you would count the loops on your hook before making the return pass.
Rows 2 – 10: TKS across until last st, LTS, RetP <75 (85, 95, 105, 116) (128, 137, 147, 158) st>
Switch to CC
Row 11: TKS across until last st, LTS, RetP <75 (85, 95, 105, 116) (128, 137, 147, 158) st>
Switch to MC
Row 12: TSS across until last st, LTS, RetP <75 (85, 95, 105, 116) (128, 137, 147, 158) st>
Switch to CC
Row 13: TSS across until last st, LTS, RetP <75 (85, 95, 105, 116) (128, 137, 147, 158) st>
Switch to MC
Row 14: TSS across until last st, LTS, RetP <75 (85, 95, 105, 116) (128, 137, 147, 158) st>
Rows 15 – 26: TKS across until last st, LTS, RetP <75 (85, 95, 105, 116) (128, 137, 147, 158) st>
Rows 27 – 42: Repeat Rows 11 – 26, changing colors where needed to continue stripe pattern
Rows 43 – 46: Repeat Rows 11 – 14
Sizes XS & S:
Continue to “Fit Checkpoint”
(Note – you should have 3 striped sections so far)
Sizes M – 5XL:
Rows 47 – 58: Repeat Rows 15 – 26
Rows 59 – 62: Repeat Rows 11 – 14
(Note – you should have 4 striped sections so far)
Fit Checkpoint:
This will be the length of the bottom of your tank below the armpit, plus 0.5″ for the border. Check size chart to see how much length will be added for the armhole and determine if this is a length you’d like to keep.
At this point, you can add length by adding 16 rows at a time. Repeat Rows 15 – 30 (or one stripe pattern) for every 2.5″ added.
Fasten off and continue to Body Panel – Bib section
Body Panel – Bib
You should have a total row count of 46 (46, 62, 62, 62) (62, 62, 62, 62) so far.
We will now be starting the row count over at 1.
Continue with MC & 4mm hook
Count 5 (8, 8, 10, 12) (12, 12, 14, 14) stitches from the beginning of your last row and place a stitch marker in that stitch. Repeat for the opposite side of the row. Keep in mind when determining where to place marker that the very first and very last stitches count.
Row 1: Attach yarn at the first stitch marker (near the beginning of your last row) and TKS in same stitch and each stitch across until you reach second stitch marker, make last TKS in marked stitch, RetP <67 (71, 81, 87, 94) (106, 115, 121, 132) st>
You will now be making decreases until you reach the bib width given in the size chart. (Decrease instructions are the same whether you are decreasing on a TKS or TSS row.)
Row 2: Dec, TKS across until there are 3 st left (two stitches plus the last stitch), Dec, LTS, RetP <65 (69, 79, 85, 92) (104, 113, 119, 130) st>
Rows 3 – 3 (5, 7, 10, 11) (12, 12, 12, 12): Continue decreasing by repeating Row 2 <63 (63, 69, 69, 74) (84, 93, 99, 110) st>
Sizes XS, S, M, L & XL:
Shown here as XS (S, M, L, XL)
Rows 4 (6, 8, 11, 12) – 12: TKS across until last st, LTS, RetP <63 (63, 69, 69, 74) st>
Continue to ‘All Sizes’ to finish bib.
Sizes 2XL, 3XL, 4XL & 5XL:
Shown here as (2XL, 3XL, 4XL, 5XL)
Switch to CC
Row 13: Dec, TKS across until there are 3 st left (two stitches plus the last stitch), Dec, LTS, RetP <(82, 91, 97, 108) st>
Switch to MC
Row 14: Dec, TSS across until there are 3 st left (two stitches plus the last stitch), Dec, LTS, RetP <(80, 89, 95, 106) st>
Switch to CC
Row 15: Repeat Row 14 <(78, 87, 93, 104) st>
Switch to MC
Row 16: Repeat Row 14 <(76, 85, 91, 102) st>
Rows 17 – (17, 19, 22, 27): Continue decreasing by repeating Row 2 <(74, 79, 79, 80) st>
Rows (18, 20, 23, 28) – 28: TKS across until last st, LTS, RetP <(74, 79, 79, 80) st>
All Sizes:
Switch to CC
Row 13 (13, 13, 13, 13) (29, 29, 29, 29): TKS across until last st, LTS, RetP <63 (63, 69, 69, 74) (74, 79, 79, 80) st>
Switch to MC
Row 14 (14, 14, 14, 14) (30, 30, 30, 30): TSS across until last st, LTS, RetP <63 (63, 69, 69, 74) (74, 79, 79, 80) st>
Switch to CC
Row 15 (15, 15, 15, 15) (31, 31, 31, 31): TSS across until last st, LTS, RetP <63 (63, 69, 69, 74) (74, 79, 79, 80) st>
Switch to MC
Row 16 (16, 16, 16, 16) (32, 32, 32, 32): TSS across until last st, LTS, RetP <63 (63, 69, 69, 74) (74, 79, 79, 80) st>
Rows 17 (17, 17, 17, 17) (33, 33, 33, 33) -28 (28, 28, 28, 28) (44, 44, 44, 44): TKS across until last st, LTS, RetP <63 (63, 69, 69, 74) (74, 79, 79, 80) st
Switch to CC
Row 29 (29, 29, 29, 29) (45, 45, 45, 45): TKS across until last st, LTS, RetP <63 (63, 69, 69, 74) (74, 79, 79, 80) st>
Switch to MC
Row 30 (30, 30, 30, 30) (46, 46, 46, 46): TSS across until last st, LTS, RetP <63 (63, 69, 69, 74) (74, 79, 79, 80) st>
Switch to CC
Row 31 (31, 31, 31, 31) (47, 47, 47, 47): TSS across until last st, LTS, RetP <63 (63, 69, 69, 74) (74, 79, 79, 80) st>
Switch to MC
Row 32 (32, 32, 32, 32) (48, 48, 48, 48): TSS across until last st, LTS, RetP <63 (63, 69, 69, 74) (74, 79, 79, 80) st>
Rows 33 (33, 33, 33, 33) (49, 49, 49, 49) – 36 (36, 36, 36, 36) (52, 52, 52, 52): TKS across until last st, LTS, RetP <63 (63, 69, 69, 74) (74, 79, 79, 80) st>
<63 (63, 69, 69, 74) (74, 79, 79, 80) st>
Do not fasten off. Continue to Body Panel – Strap 1
BODY PANEL – STRAP 1
Your total row count so far (including bib section) should be 82 (82, 98, 98, 98) (114, 114, 114, 114)
We will now be starting the row count over at 1.
Row 1: TKS 15, RetP <16 st>
Row 2: TKS across until there are 3 st left (two stitches plus the last stitch), Dec, LTS, RetP <15 st>
Rows 3 – 5: Repeat Row 2 <12 st>
Rows 6 – 15 (15, 15, 19, 19) (19, 23, 23, 23):
TKS across until last st, LTS, RetP <12 st>
TKS bind off and fasten off.
BODY PANEL – STRAP 2
Row 1: Count 16 st from left side of Bib and attach yarn, TKS in same stitch and next 14 st, LTS, RetP <16 st>
Row 2: Dec, TKS across to last stitch, LTS, RetP <15 st>
Rows 3 – 5: Repeat Row 2 <12 st>
Rows 6 – 15 (15, 15, 19, 19) (19, 23, 23, 23):
TKS across until last st, LTS, RetP <12 st>
TKS bind off per instructions on Page 4 and fasten off.
Fit Checkpoint:
When assembling, sew sides together first and try on your tank before sewing together the straps. Add/subtract rows to the straps for best fit.
ASSEMBLY
Now is a great time to block your front and back panels! Tunisian crochet tends to curl like knitting and does need to be blocked in order to lay flat. You can skip this portion and block once the item is complete, however blocking each individual panel now will make the assembly & adding borders a bit easier.
Once blocked:
Take both body panels and lay them on top of each other with the wrong side of your work facing out. Sew together the sides to the bottom of the armhole, and tops of the straps as shown below using the Whip Stitch or method of choice.
BORDER – NECKLINE
Flip your work so that the right side is facing out.
With your Border hook, attach yarn along Neckline and Sc evenly around until you get to the flat portion at the top of the bib. You will now “TKS bind off” along the bib: place your hook between the front and back bars of the next TKS, pull up a loop, yarn over and pull through both loops. Continue to Sc along the strap and decrease sections and bind off along the top of the bib until you reach the first Sc (do not join). Sc directly into first Sc and place a stitch marker in this stitch. Sc around the neckline for another round until you get to marked stitch (2 rounds total), slip stitch into marked stitch and fasten off.
BORDER – BOTTOM
Keep work so that the right side is facing out.
With your Border hook, attach yarn near one of the side seams. Sc in each foundation chain along the bottom of your work until you reach the first Sc (do not join). Sc directly into the first Sc and place a stitch marker in this stitch to mark the round, continue to work in a spiral for 3 more rounds moving your stitch marker up with each round (4 rounds total), slip stitch into marked stitch and fasten off.
BORDER – ARMHOLE
Repeat for each armhole.
Keep your work so that the right side is facing out.
With your Border hook, attach yarn along the armhole and Sc evenly around until you get to the flat portion of the body at the bottom of the armhole. You will now “TKS bind off” along the bottom of the armhole: place your hook between the front and back bars of the next TKS, pull up a loop, yarn over and pull through both loops. Continue to Sc along the strap until you reach the first Sc (do not join). Sc directly into first Sc and place a stitch marker in this stitch. Sc around the armhole for another round until you get to marked stitch (2 rounds total), slip stitch into marked stitch. See Fit Checkpoint below before fastening off.
Fit Checkpoint:
Try on tank after 1 or 2 rounds of border for the armhole. For more coverage, replace the single crochets of Round 2 with the following: *Sc, single crochet 2 together (decrease), repeat from * around until you get to marked stitch, slip stitch into marked stitch and fasten off.
Weave in all ends.
Congrats on finishing your new top!
Final Thoughts
I hope you enjoy this pattern as much as I do! If you have any questions, comment down below.
Looking for more garment patterns? Check out the Sierra Crop/Bralette (this one includes a free version here on the blog!)
Or, Check out these other free Tunisian Crochet patterns:
If you make a Day Off Tank, I’d love to see it! Use the hashtag #DayOffTank and tag me in social media posts so that I can share! I am @Tinycouchcrochet on both Instagram and Tiktok. Can’t wait to see your makes!
-Ashley