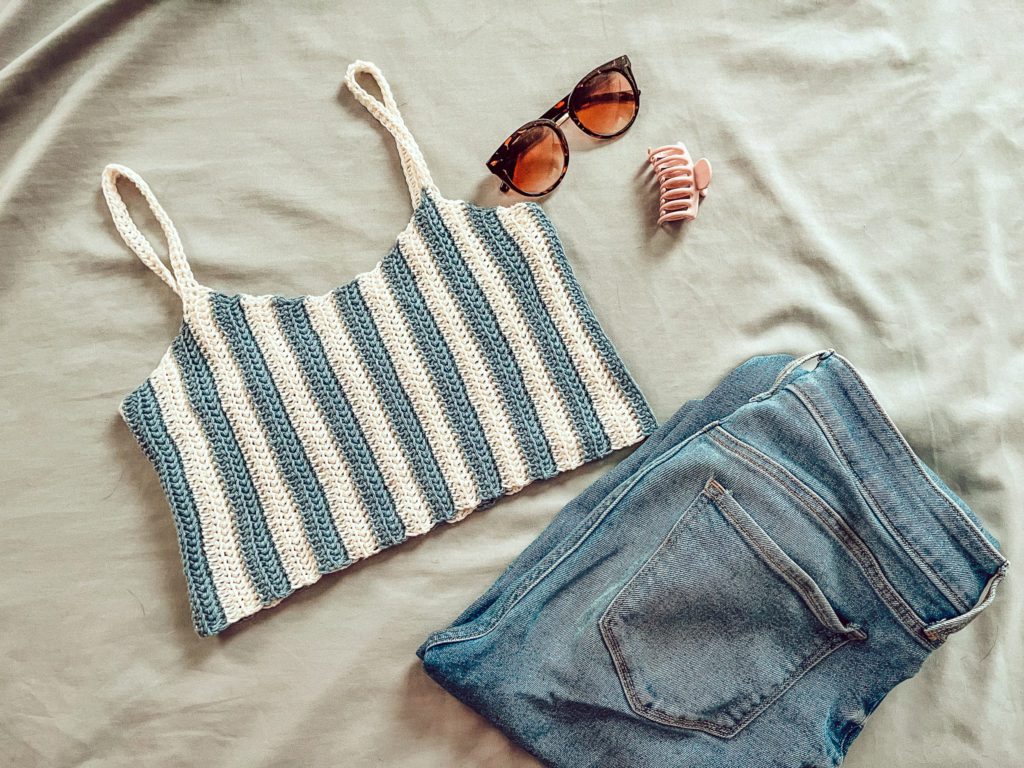
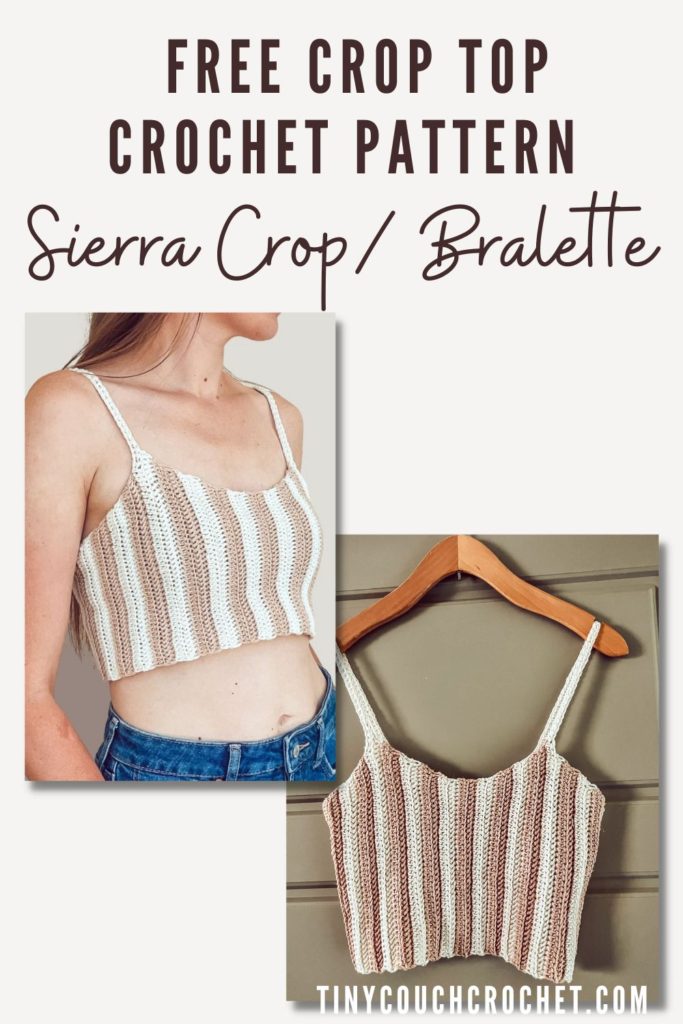
Summer for crocheters means one thing to me – cotton tops! This free crochet crop top pattern was inspired by striped umbrellas etc. at the beach, but it also looks so cute in solid colors.
This top was designed specifically to be a short cropped tank top, but adding/subtracting to the starting chain can easily make it a longer tank or as short as a bralette. The width is also very easy to customize at the end, so you can try on your top and add/subtract rows to get the exact fit you are looking for!
You can scroll down for the size-inclusive free pattern. Or, if you like to download and print your patterns, you can find ad-free PDFs at the links below. This also helps support me so I can continue to make patterns and tutorials.
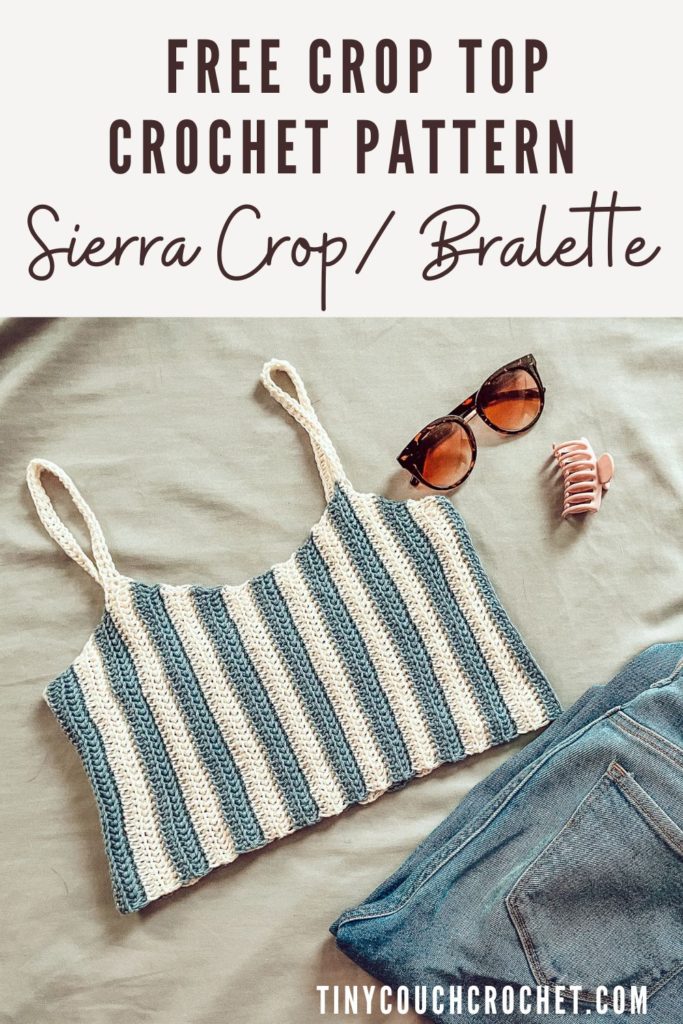
Need to buy yarn first? Save this to Pinterest by clicking on the image below so that you can easily come back 🙂
This post contains affiliate links, which means I receive a small commission, at no extra cost to you, if you make a purchase using this link.
The Yarn
I have been eyeing CotLin by WeCrochet for a while and I’m so glad I finally picked it up! Cotlin is a DK weight yarn, 70% Tanguis Cotton and 30% Linen. The linen gives this top the perfect summer feel! Each skein comes with 123 yards. I made two tops: one out of the colors Swan and Linen, and one out of Swan and Raindrop. I truly love how both tops came out!
If you are looking for a substitute, any DK/Weight 3 cotton yarn will work great. I also had testers use other fibers such as acrylic and wool – but keep in mind that this top is very stretchy, and cotton yarn will hold its stretched shape more than acrylic or wool. You may have to add a few rows to the back panel if you chose to use another fiber, but that’s really easy to do as you’ll see when making it!
- If you have any yarn left over, consider making the Cordelia Headband! Also designed with Weight 3 cotton yarn and tasteful stripes, these two make the perfect summer fit.
Skills Needed
While this pattern is considered an Intermediate pattern, I don’t like labeling patterns in a way that might discourage a beginner. One of the testers for this pattern is a beginner crochet and this was her first garment – she did great! If you are a beginner and need any help, you can always comment, email, or dm me on instagram 🙂 See below for skills needed.
- Basic crochet skills – how to chain, half double crochet, and make and measure a gauge swatch.
- Working in the Back Loop Only (BLO, see below)
- Herrinbone Half Double Crochet – click for stitch tutorial
- Change colors at the end of the row
- Increase/decrease
- Sew using the Mattress Stitch or Whip Stitch
**If you are brand new to crochet or need a refresher, check out my how to crochet post here.
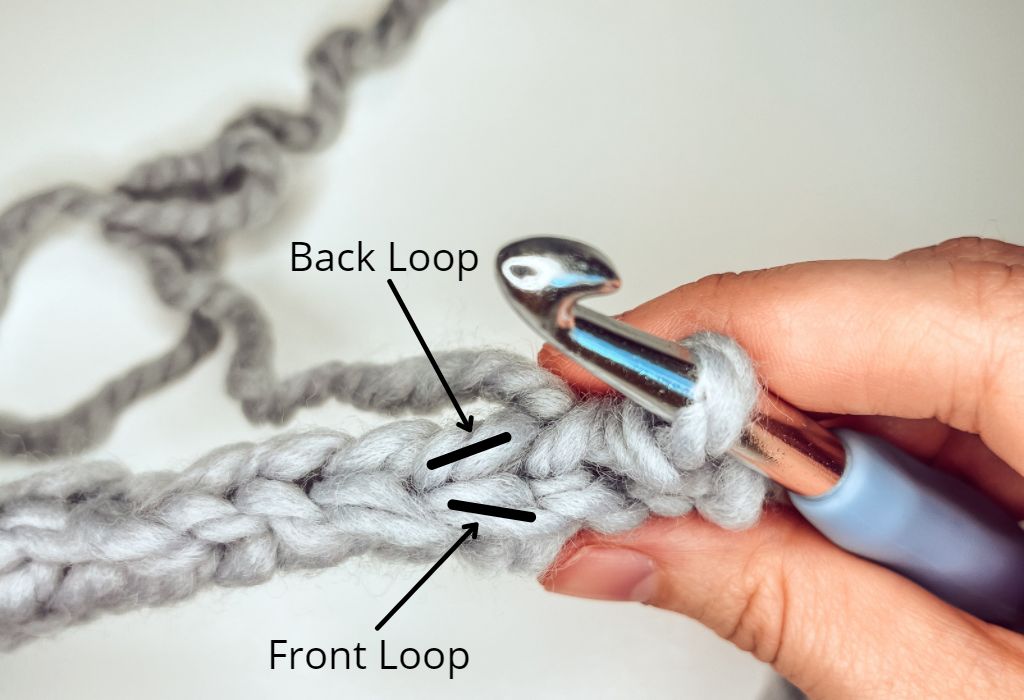
Working in the Back Loop Only (BLO)
When looking down at your stitches, each stitch is made up of two loops that make a V shape. The loop nearest you is the “front loop,” and the loop furthest away is the “back loop” (See image below). Normally, to make a new stitch you would insert your hook through both loops. Some stitches in this pattern are followed by BLO, so you would insert your hook only through the back loop to make your new stitch.
Materials Needed
- Weight 3 yarn, cotton recommended. Yarn estimates given below are for CotLin by WeCrochet for sizes XS (S, M, L, XL) (2XL, 3XL, 4XL, 5XL)
- Color A: 1 (1, 2, 2, 2) (2, 3, 3, 3) skeins or 110 (120, 150, 160, 190) (210, 250, 310, 350) yards
- Color B: 1 (1, 1, 2, 2) (2, 2, 3, 3) skeins or 105 (115, 120, 130, 160) (220, 240, 300, 330) yards
- Size 4mm crochet hook or hook needed to meet gauge (My favorites are the ergonomic hooks from this crochet hook set)
- A darning needle
- Stitch Markers (at least 2)
- Scissors
- Measuring Tape
Construction
This top is worked sideways and in one piece. (Schematic provided in paid PDF). The ends are sewn together to create a tube. Straps are worked with the front panel and sewn onto the back panel at the end.
The width of the top is easily adjustable at the end, where you can add or remove rows to the flat back piece.
The length of the top is adjustable but must be decided in the beginning. Add or subtract chains to the starting chain to adjust length.
Guage & Size
Guage: (Measured Unstretched)
4″ = 17 HbHdc stitches & 13 rows
Size:
See Size Chart below. Choose size that best corresponds with bust size. If in between sizes, size up. Size chart shows STRETCHED dimensions
Schematic provided with paid PDF.
| Your Bust Size | Front Panel Width | Back Panel Width | Back Panel Length | Front Panel Length | |
| XS | 28″-30″ | 18″ | 6″ | 7″ | 9″ |
| S | 32″-34″ | 20″ | 8″ | 7″ | 9″ |
| M | 36″-38″ | 22″ | 10″ | 7.5″ | 9.5″ |
| L | 40″-42″ | 24″ | 12″ | 7.5″ | 9.5″ |
| XL | 44″-46″ | 26″ | 14″ | 9″ | 11″ |
| 2XL | 48″-50″ | 28″ | 16″ | 9″ | 11″ |
| 3XL | 52″-54″ | 30″ | 18″ | 9″ | 11″ |
| 4XL | 56″-58″ | 32″ | 20″ | 9.5″ | 11.5″ |
| 5XL | 60″-62″ | 34″ | 22″ | 9.5″ | 11.5″ |
Abbreviations (U.S. Terminology)
Ch = Chain
St = Stitch
Yo = Yarn Over
Hdc = Half Double Crochet (Yo, insert hook into next stitch, pull up a loop, Yo and pull through all three loops on hook)
HbHdc = Herringbone Half Double Crochet (see Skills Needed section)
HbHdc 2 tog = Herringbone Half Double Crochet 2 together or decrease (Yo, insert hook into next stitch, pull up a loop, pull 1st loop through 2nd loop on hook, yo and insert hook into next stitch, pull up a loop, pull 1st loop on hook through 2nd loop on hook, yo and pull through all 3 loops remaining on hook)
BLO = Back Loop Only (see Skills Needed section)
RS = Right Side
WS = Wrong Side
The Sierra Crop Top / Bralette Crochet Pattern
Notes:
- Sizing is noted as follows: XS (S, M, L, XL) (2XL, 3XL, 4XL, 5XL)
- Turning chain never counts as a stitch.
- Throughout pattern, ‘HbHdc 2’ indicates one HbHdc in each of the next two stitches. ‘2 HbHdc’ indicates 2 HbHdc in the next stitch.
- This pattern is intended to have a snug fit. Once garment is stretched it will have 4″-6″ of negative ease. It is recommended to choose the size that corresponds with your bust size, then add or subtract rows to the back panel at the very end for the best fit.
- Color changes are given for the striped color pattern in photos. Color A represents the strap color and corresponding stripes.
- To customize length of top, add/subtract from the starting chain and each stitch count for your size. For example, to add an inch of length to your top, add 4 chains to the starting chain.
- This pattern is written for bust sizes and not necessarily cup sizes – if you have a cup size of D or more, it is recommended to add 4 chains to the starting chain for 1″ of added length.
- The last stitch of the row can look like the turning chain – to avoid confusion, place a stitch marker in the top of the first stitch of every row. When you come back around on the next row, your last stitch should be placed in the marked stitch.
1st FRONT INCREASE
For Sizes XS, M, XL, 3XL, 5XL: start with Color A
For Sizes S, L, 2XL, 4XL: start with Color B
Color A will be the strap color
You will change colors every 2 rows
Chain 32 (32, 34, 34, 40) (40, 40, 42, 42)
Row 1 (WS): HbHdc in 2nd ch from hook and each remaining chain across
<31 (31, 33, 33, 39) (39, 39, 41, 41) St>
Row 2 (RS): Ch 1 and turn. HbHdc BLO in each st across to last st. HbHdc in last st, change colors.
<31 (31, 33, 33, 39) (39, 39, 41, 41) St>
Row 3: Ch 1 and turn. HbHdc BLO in each st across to last st. HbHdc in last st,
<31 (31, 33, 33, 39) (39, 39, 41, 41) St>
Row 4: Ch 1 and turn. HbHdc BLO in each st across to last st. 2 HbHdc in last st, change colors.
<32 (32, 34, 34, 40) (40, 40, 42, 42) St>
Row 5: Ch 1 and turn. 2 HbHdc BLO in first st, HbHdc BLO in each st across to last st, HbHdc in last st,
<33 (33, 35, 35, 41) (41, 41, 43, 43) St>
Row 6: Ch 1 and turn. HbHdc BLO in each st across to last st. 2 HbHdc in last st, change colors.
<34 (34, 36, 36, 42) (42, 42, 44, 44) St>
Rows 7 – 12 (14, 16, 18, 20) (22, 24, 26, 28): Repeat rows 5 & 6, ending on a Row 6 repeat, changing colors every 2 rows.
<40 (42, 46, 48, 56) (58, 60, 64, 66) St>
*Note: you will continue this row in the next section
STRAP & 1st FRONT DECREASE
With Color A (all sizes), continue from last row and Ch 49 (49, 49, 54, 54) (59, 59, 59, 59)
Row 1: Hdc in back bump of 2nd chain from hook, Hdc in back bump of each remaining chain, HbHdc in next st, HbHdc BLO in each st to last, HbHdc in last st
<88 (90, 94, 101, 109) (116, 118, 122, 124) St>
Row 2: Ch 1 and turn. HbHdc BLO 41 (43, 47, 49, 57) (59, 61, 65, 67), HbHdc 2 tog, change colors.
<42 (44, 48, 50, 58) (60, 62, 66, 68) St>
Row 3: Ch 1 and turn. HbHdc 2 tog BLO, HbHdc BLO in each st across to last st. HbHdc in last st,
<41 (43, 47, 49, 57) (59, 61, 65, 67) St>
Row 4: Ch 1 and turn. HbHdc BLO to last 2 st, HbHdc 2 tog, change colors.
<40 (42, 46, 48, 56) (58, 60, 64, 66) St>
Rows 5 – 9 (9, 11, 13, 15) (15, 17, 19, 19): Repeat rows 3 & 4, ending on a Row 3 repeat, changing colors every 2 rows.
<35 (37, 39, 39, 45) (47, 47, 49, 51) St>
Row 10 (10, 12, 14, 16) (16, 18, 20, 20): Ch 1 and turn. HbHdc BLO in each st across to last st, HbHdc in last st, change colors
<35 (37, 39, 39, 45) (47, 47, 49, 51) St>
2nd FRONT INCREASE
Row 1: Ch 1 and turn. HbHdc BLO in each st across to last st, HbHdc in last st,
<35 (37, 39, 39, 45) (47, 47, 49, 51) St>
Rows 2 – 3: Repeat Row 1, change colors after Row 2
<35 (37, 39, 39, 45) (47, 47, 49, 51) St>
Row 4: Ch 1 and turn. HbHdc BLO in each st across to last st. 2 HbHdc in last st, change colors.
<36 (38, 40, 40, 46) (48, 48, 50, 52) St>
Row 5: Ch 1 and turn. 2 HbHdc BLO in first st, HbHdc BLO in each st across to last st, HbHdc in last st,
<37 (39, 41, 41, 47) (49, 49, 51, 53) St>
Row 6: Ch 1 and turn. HbHdc BLO in each st across to last st. 2 HbHdc in last st, change colors.
<38 (40, 42, 42, 48) (50, 50, 52, 54) St>
Rows 7 – 10 (10, 12, 14, 16) (16, 18, 20, 20): Repeat rows 5 & 6, ending on a Row 6 repeat, changing colors every 2 rows.
<42 (44, 48, 50, 58) (60, 62, 66, 68) St>
STRAP & 2nd FRONT DECREASE
With Color A (all sizes), continue from last row and Ch 47 (47, 47, 52, 52) (57, 57, 57, 57)
Note: this chain length should be 2 less than the first strap, because we are starting it from the higher side. Straps will end up being the same length. If you adjusted the chain amount from the first strap (ex. added 5 chains) add or subtract the same amount of chains for this strap.
Row 1: Hdc in back bump of 2nd chain from hook, Hdc in back bump of each remaining chain, HbHdc in next st, HbHdc BLO in each st to last, HbHdc in last st
<88 (90, 94, 96, 104) (106, 108, 112, 114) St>
Row 2: Ch 1 and turn. HbHdc BLO 39 (41, 45, 47, 55) (57, 59, 63, 65), HbHdc 2 tog, change colors.
<40 (42, 46, 48, 56) (58, 60, 64, 66) St>
Row 3: Ch 1 and turn. HbHdc 2 tog, HbHdc BLO in each st across to last st. HbHdc in last st,
<39 (41, 45, 47, 55) (57, 59, 63, 65) St>
Row 4: Ch 1 and turn. HbHdc BLO to last 2 st, HbHdc 2 tog, change colors.
<38 (40, 44, 46, 54) (56, 58, 62, 64) St>
Rows 5 – 11 (13, 15, 17, 19) (21, 23, 25, 27): Repeat rows 3 & 4, ending on a Row 3 repeat, changing colors every 2 rows.
<31 (31, 33, 33, 39) (39, 39, 41, 41) St>
Row 12 (14, 16, 18, 20) (22, 24, 26, 28): Ch 1 and turn. HbHdc BLO in each st across to last st, HbHdc in last st, change colors
<31 (31, 33, 33, 39) (39, 39, 41, 41) St>
Note: we will now be moving on to the Back Panel (Do not fasten off!) This is a good spot to check your total Row count, which should be as follows:
44 (48, 56, 64, 72) (76, 84, 92, 96)
Customization Note:
It is recommended to try on your top as you are working through the back panel. The back panel is flat, and so you may add or subtract rows as needed for the perfect fit.
If working the striped color pattern, add or subtract 4 rows at a time for a seamless pattern.
BACK PANEL
Row 1: Ch 1 and turn. HbHdc BLO in each st across to last st. HbHdc in last st,
<31 (31, 33, 33, 39) (39, 39, 41, 41) St>
Row 2: Ch 1 and turn. HbHdc BLO in each st across to last st. HbHdc in last st, change colors.
<31 (31, 33, 33, 39) (39, 39, 41, 41) St>
Rows 3 – 8 (16, 20, 28, 32) (40, 44, 52, 60): Repeat rows 1 & 2, changing colors every 2 rows.
<31 (31, 33, 33, 39) (39, 39, 41, 41) St>
For best fit, See Customization Note Above. Fasten off, leaving a long tail for sewing.
FINISHING
Sew the last row of your back panel and first row of the front panel together to make a tube. Use the seaming method of your choice (the Mattress Stitch seaming method is recommended).
Determine where to sew your straps on to the back panel by counting a number of rows from the strap location on the front, down the side, and placing a stitch marker in your chosen location. I recommend choosing Color A rows for a seamless look. Count the number of rows and do the same for the other strap using the same number of rows. Using the Whip stitch, sew straps to the side of each row you marked (top of garment). Remove stitch markers.
Weave in all ends.
Looking for more wearable crochet patterns? Check out the list below!
- Day Off Tank (free version)
- Persephone Pullover PDF
If you make a Sierra Crop Top/ Bralette, I’d love to see it! Use the hashtag #sierracropbralette and and tag me in social media posts so that I can share! I am @Tinycouchcrochet on both Instagram and Tiktok. Can’t wait to see your makes!
-Ashley
Suuuper cute pattern! I was too excited and didn’t read carefully enough so I kept doing BLO in the end stitches 🤪 second times the charm haha
Haha! I bet it is still cute!