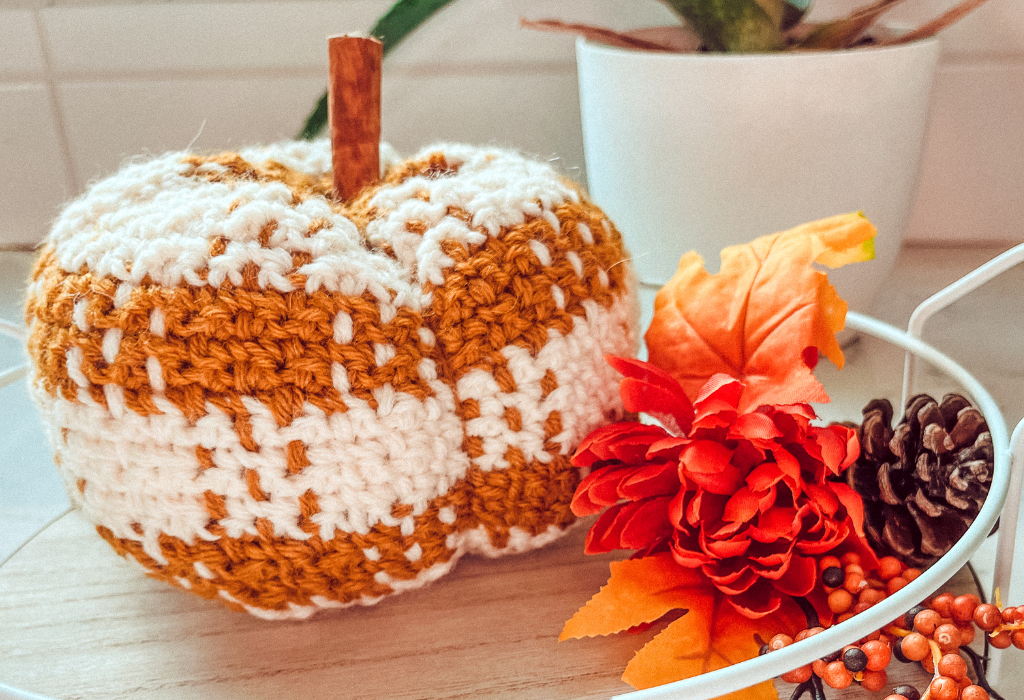
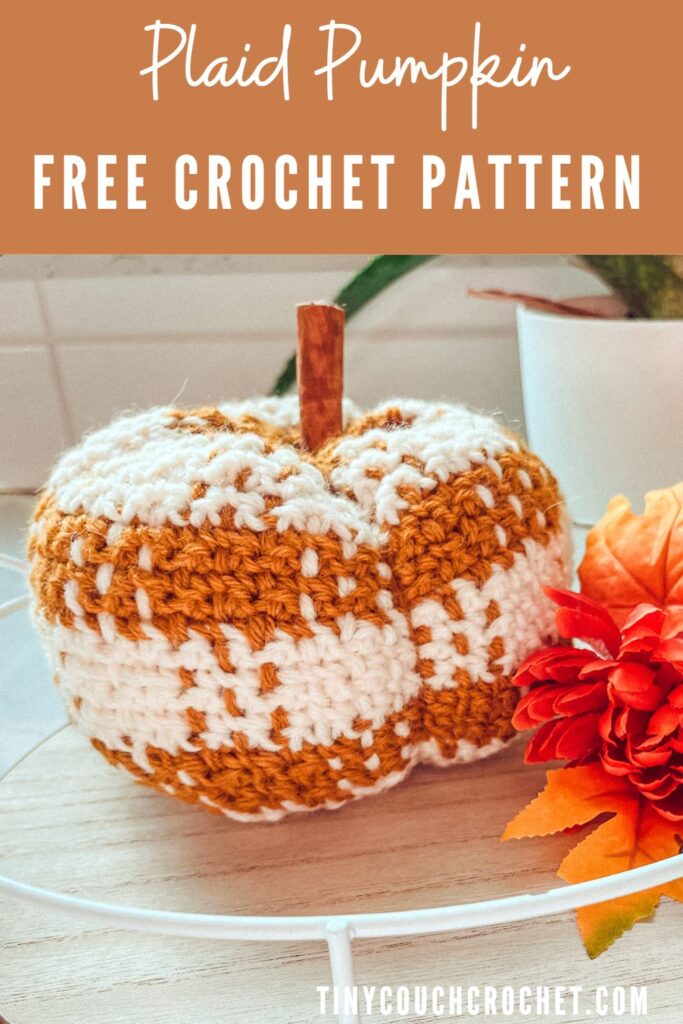
Did you know there was an easy way to crochet plaid without any complicated colorwork? Colorwork is fun, but sometimes we just want a simple crochet project with a big impact. This plaid crochet pumpkin is it!
The secret is crocheting simple stripes, and then weaving the vertical colors through with a darning needle! It’s somehow more fun than weaving in ends, I promise! (Speaking of weaving in ends – there’s none of that here! All ends can be hidden inside the pumpkin so don’t let that scare you from taking this on!)
Scroll down for the free pattern and photo tutorial.
Want to save this for later? Save this to Pinterest by clicking on the image below so that you can easily come back 🙂

This post contains affiliate links, which means I receive a small commission and you can support the blog, at no extra cost to you, if you make a purchase using these links.
The Yarn
I used Lion Brand’s Wool-Ease for this pumpkin because I already had two perfect colors in my stash – Fisherman and Arrowood. (To be completely honest, I always stock up on these two colors when I see them on sale!) Wool-Ease is a worsted weight wool & acrylic blend with a wide range of colors available.
While the yarn used for this sample was a wool and acrylic blend, any worsted weight yarn will work! Or go for dk weight for a smaller pumpkin, or chunky yarn for a larger one. Just be sure to adjust your hook size.
Skills Needed
This pattern is so simple! You’ll need to know/learn just a few skills:
- How to Single Crochet / basic crochet skills (check out my how to crochet post here)
- Changing colors at a new row
- Weaving yarn with a darning needle
Materials Needed
- Lionbrand’s Wool-Ease in two colors (I used the colors Fisherman and Arrowood)
- 100 yards of Fisherman
- 100 yards of Arrowood
- 5 mm crochet hook (I used my Furls Streamline Galaxy hook in Andromeda)
- A darning needle
- Scissors
- Polyfil stuffing
- Stem (stick, wine bottle cork, I used a cinnamon stick!)
- Hot glue gun to glue on the stem
Gauge & Size
Gauge (unblocked) is listed below, but is not critical for this project.
4″ = 10 rows & 10 stitches of Single Crochet
Size:
Finished pumpkin is about 4.5″ tall and 6.5″ in diameter
Abbreviations (U.S. Terminology)
Ch = Chain
St = Stitch
Yo = Yarn Over
Sc = Single Crochet (insert hook into next stitch, pull up a loop, Yo and pull through both loops)
MC = Main Color
CC = Contrast Color
Plaid Crochet Pumpkin Pattern
Notes:
See abbreviations above.
Turning chain never counts as a stitch.
For visual learners – there is a photo tutorial below the pattern.
With MC, Chain 49
Row 1: Sc in 2nd chain from hook, Sc each remaining chain across — 48 St
Row 2: Chain 1 and turn work. Sc in each st across — 48 St
Row 3: Chain 1 and turn work. Sc in each st until 1 stitch across, changing colors on last stitch — 48 St
- To change colors at the end of a row, when making your last stitch of the row drop your working yarn and pull the new color through both loops to finish your last stitch. Then continue on with the new color.
- Alternatively, you can complete Row 3 with the main color and fasten off, then tie on the new color when starting Row 4.
With AC:
Rows 4 & 5: Chain 1 and turn work. Sc in each st across — 48 St
Row 6: Chain 1 and turn work. Sc in each st until 1 stitch across, changing colors on last stitch — 48 St
Rows 7 thru 35: Continue to repeat Rows 4 thru 6 (Single crochet each stitch across, changing colors every 3 rows. You should end with the Main Color)
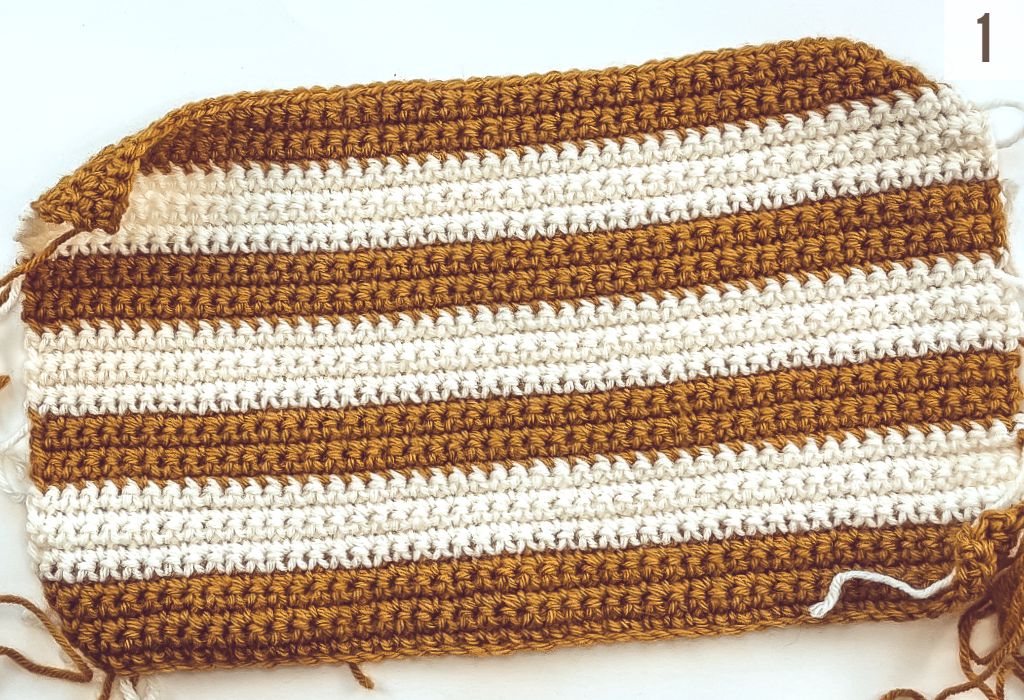
Fasten off. (See Photo 1 below)
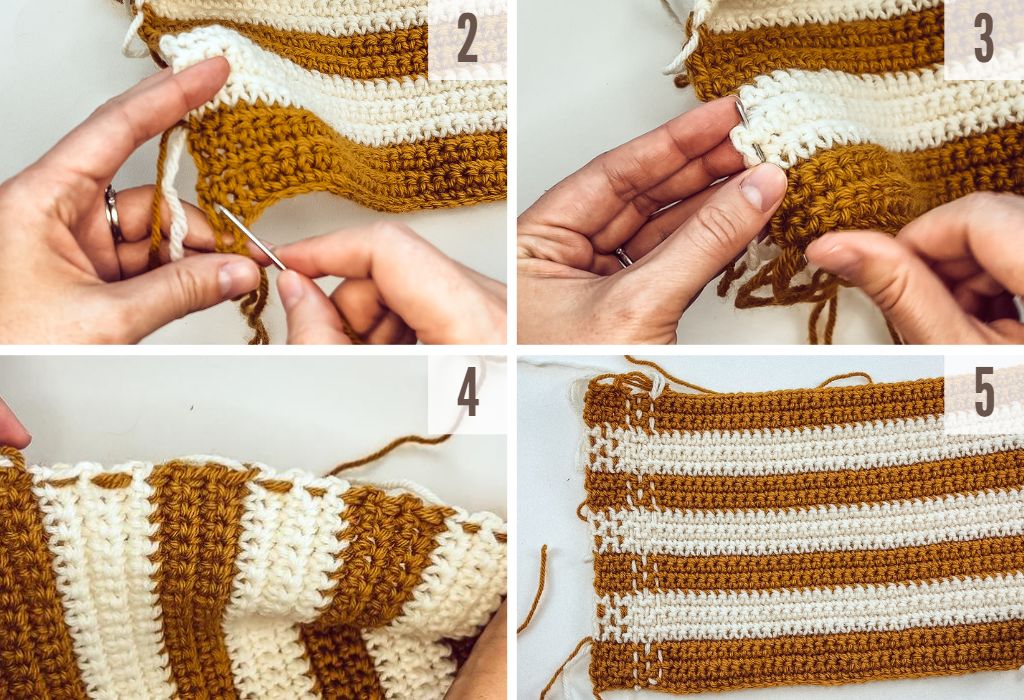
Take your Main Color and cut a piece of yarn that is about 7 times the height of your project. Fold in half and thread your darning needle so that you are working with both strands. Attach to bottom of project by tying to the first starting chain. Now weave in and out of the rows, going up your project, in the space just to the right of each stitch. (See photos 2 thru 4 below). When you get to the top, go over the last row and come back down by weaving in the space to the right of the second stitch of each row.
Alternate where you weave in and out to achieve the perfect plaid look. Come back up the project once more and tie the ends to the top of the project. (No need to weave in the ends, we will hide them inside the pumpkin)
Now switch to the Accent Color and do the same by weaving into the space next to the next 3 rows of stitches. Continue to switch yarn colors every 3 columns of stitches until the end of the project. You should end with the Accent color. (See Photo 5 below)
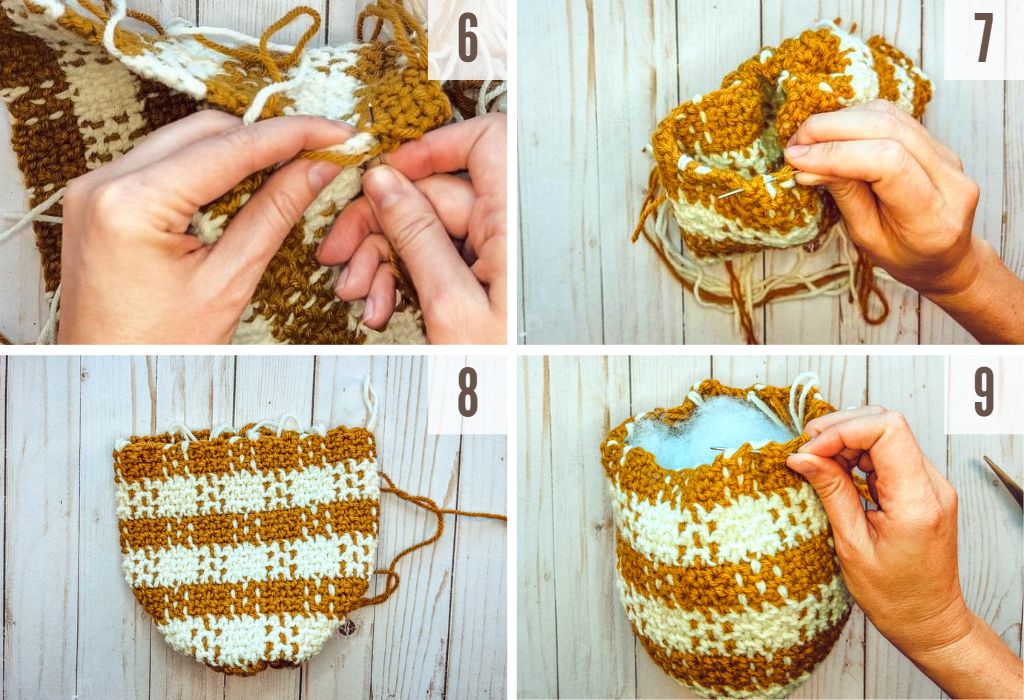
Sew the sides of the project together to create a cylinder (Photo 6 below). Now sew the top of the project closed by weaving in and out of the top stitches like you would a beanie (Photo 7 below). Choose which side will be the inside of your pumpkin and hide all yarn tails inside. Stuff the pumpkin with polyfil and sew together the other end so that you have a ball (Photos 8 & 9 below)- do not fasten off!
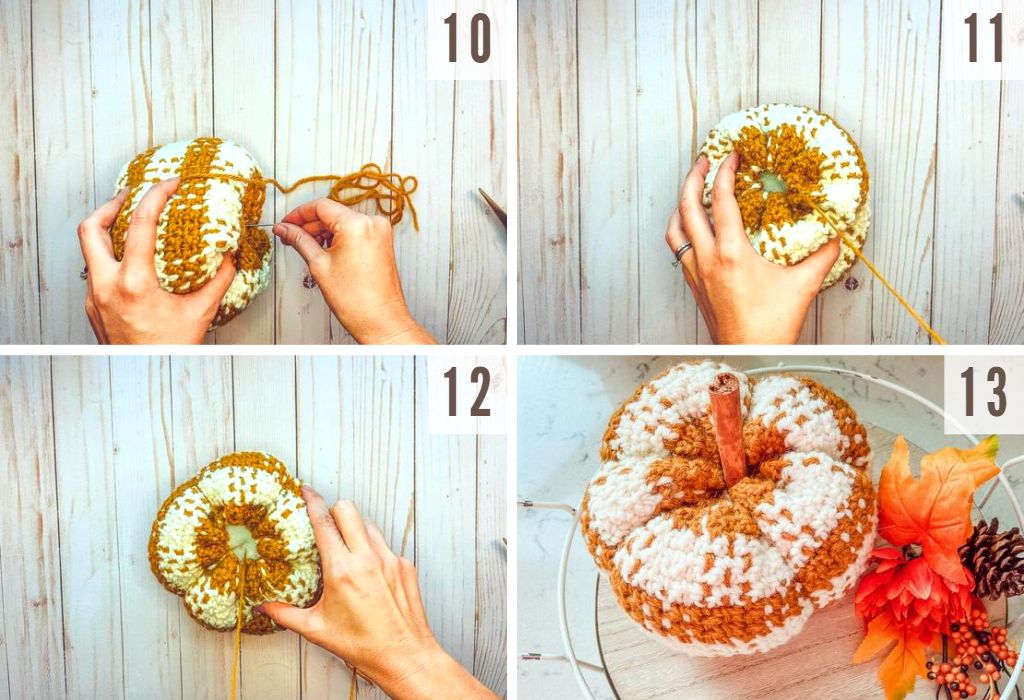
Go through the middle of your pumpkin out the bottom and pull tight. Now go around the outside of the pumpkin to create the pumpkin’s ridges (Photos 10 thru 12 below). Go back down through the middle and up the side until you are happy with the look and number of ridges on your pumpkin- weave in and out through the bottom & tie the end so it doesn’t come loose. Hide remainder of yarn tail inside the pumpkin.
Glue on your stem of choice and you’re done!
Photo Tutorial
Looking for more free Halloween/Autumn patterns? Check out these patterns below!
If you make a plaid crochet pumpkin, I’d love to see it! Use the hashtag #tinyplaidcrochetpumpkin and tag @tinycouchcrochet on Instagram for a chance to be featured! Can’t wait to see your makes!
-Ashley