It’s Spooky Season! Not only is it a fun time of year, but my son was born on Halloween – so this season is extra fun for my family.
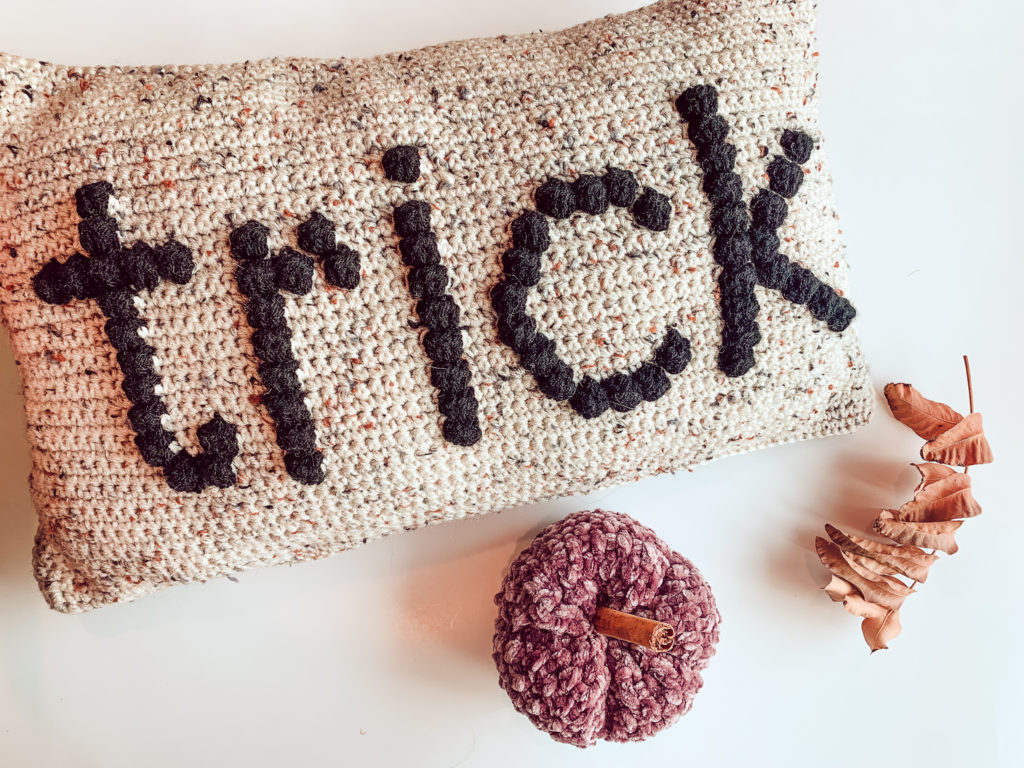
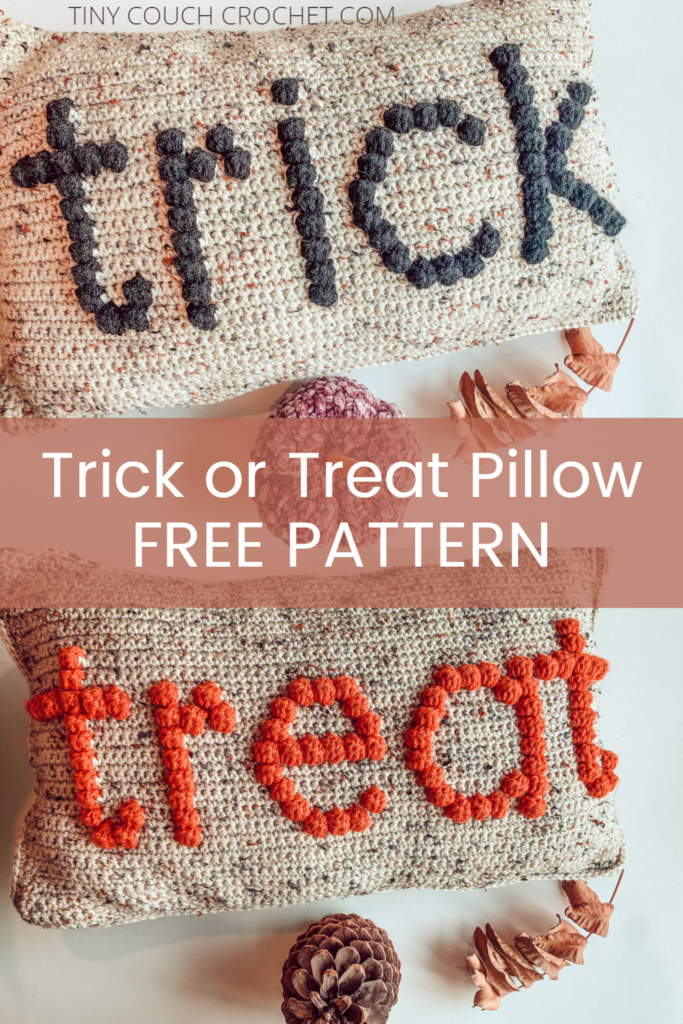
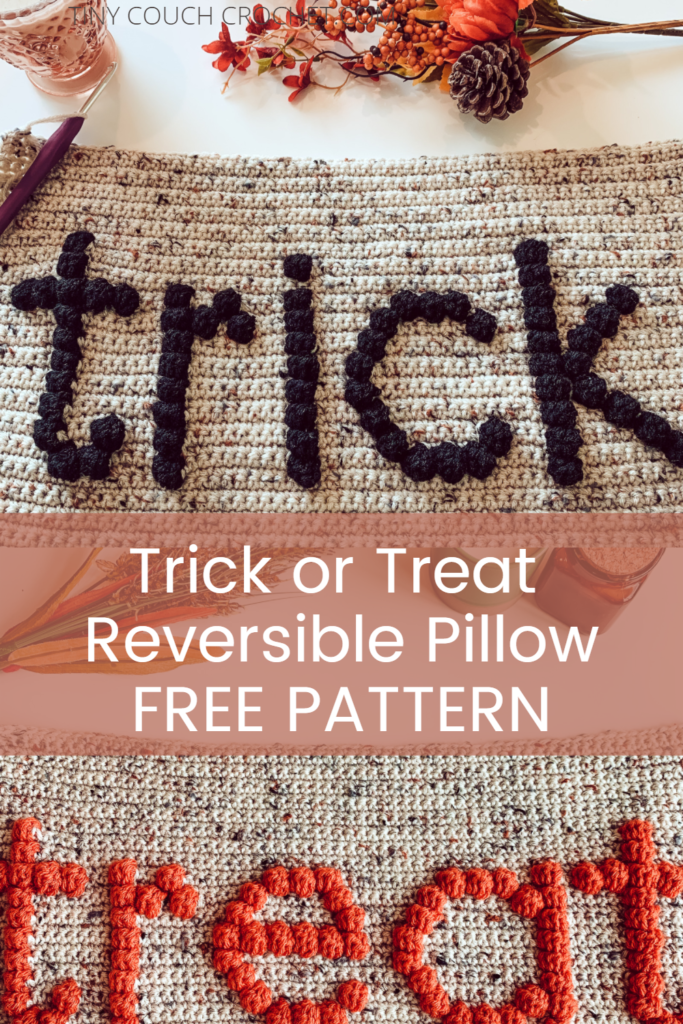
I wanted to do a fun reversible pillow – it’s really a Trick ~ OR ~ Treat Pillow! But of course, you could always make a solid-colored back panels and make two pillows for a Trick or Treat set.
You can find the full pattern for both sides of the pillow with written instructions as well as color charts in PDF format for a small fee on Etsy (click here). Or, scroll down for the free Halloween crochet pattern in the form of charts.
Want to save the pattern for later? Click here to pin this image.
This post contains affiliate links, which means I receive a small commission, at no extra cost to you, if you make a purchase using this link.
The Yarn
I used Red Heart Super Saver for this pattern and found the perfect autumn neutral: Aran Fleck. It’s a cream/tan color with flecks of orange, gray and black, and it’s just so fun! It also looks much more expensive than it is. Affordable and cute? I bought more than I needed for this pattern because I plan on using it for so much more!
I also used the colors Black for the “Trick” panel and Carrot for the “Treat” panel. There is a color called Pumpkin that is also available and possibly more appropriate – but I thought the orange in Carrot was a closer match to the flecks in the background color.
What You’ll Need
Here is the total materials list:
- Red Heart Super Saver Acrylic Worsted Weight Yarn (or similar Weight 4 yarn)
- 2 Skeins in Aran Fleck
- 1 Skein in Black
- 1 Skein in Orange
- (Note – 2 skeins total are all that is necessary if you do not want to change colors for the words)
- US Size H / 5.0 mm crochet hook (I like to use the hooks from this crochet hook set)
- A yarn or tapestry needle
- Scissors
- Poly Fill or 12×20 Pillow Insert
Guage & Size
Guage: (Measured Unstretched)
4″ = 14 Sc stitches, 15.5. rows
Size:
Finished pillow size is approximately 12″ x 20″.
Abbreviations (U.S. Terminology)
Ch = Chain
St = Stitch
Yo = Yarn Over
SC = Single Crochet
Bo = Bobble (Yarn over, insert hook into stitch, pull up a loop, yarn over and pull through 2 loops on hook, repeat into same stitch 4x until you have 6 loops on hook, Yo and pull through all 6 loops on hook)
Chart Notes
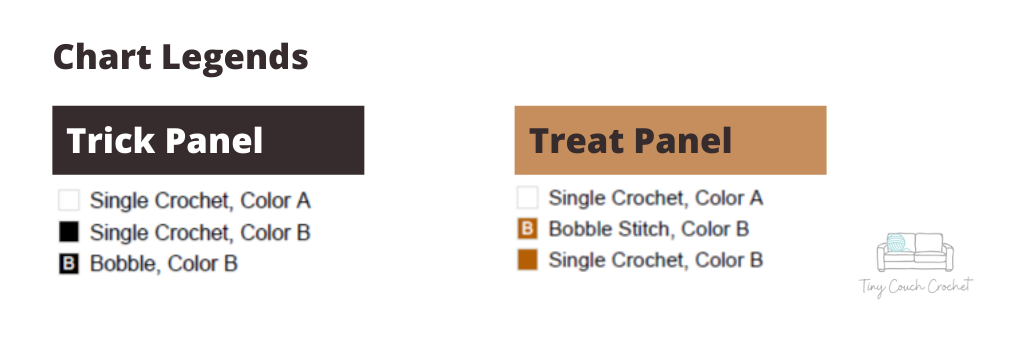
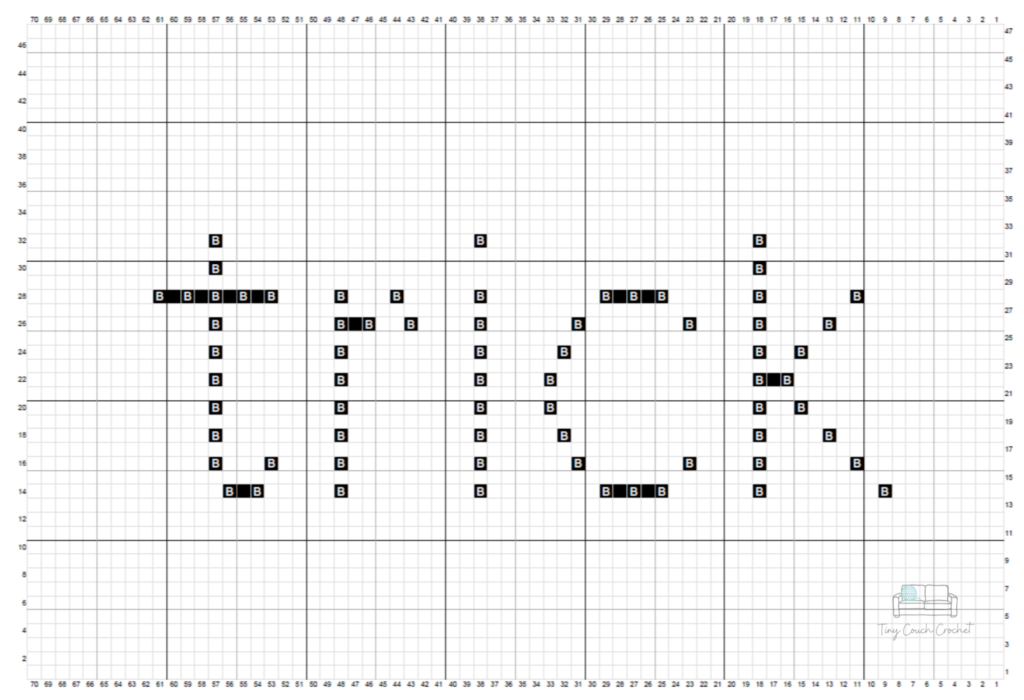
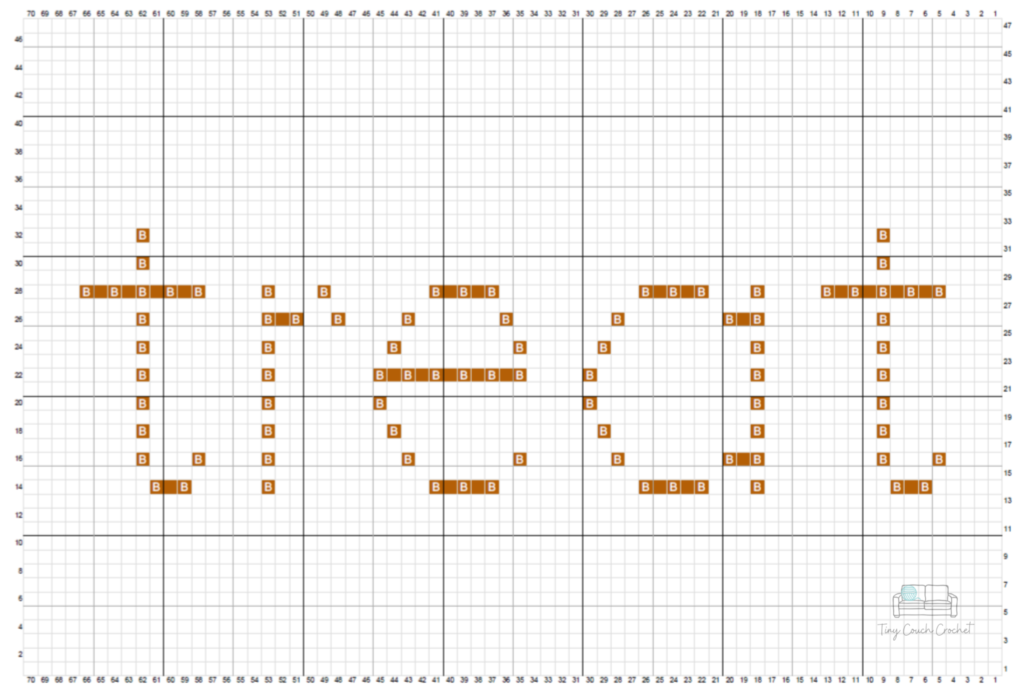
The pillow is constructed by making the front and back panels separately. Make each panel using the charts below. Each cell represents a stitch. Plain cells represent a Single Crochet stitch, while cells with a ‘B’ represent Bobble stitches. Full legends are included on the charts below.
Start each chart with the bottom right corner of the chart, and work Row 1 right to left across the bottom (this will be the Right Side of your work, as will all odd-numbered rows). Then turn your work as you move up to Row 2 and follow the chart from left to right as you work on the Wrong Side (same with all even-numbered rows).
If you’ve never worked with bobbles before, it’s worth noting that you work a bobble stitch on the Wrong Side of your work and it will pop out on the Right Side. Therefore, there will always be a row of single crochet stitches worked on the Right Side between bobble stitches.
Chart legends are shown below. The background color of the pillow is Color A (I used Aran Fleck) and accent color is Color B (I used Black for the Trick panel and Carrot for the Treat Panel).
If you are new to crochet or need a refresher, check out my how to crochet post here.
The Trick or Treat Pillow Free Crochet Pattern
“Trick” Panel
Chain 71 in Aran Fleck.
Follow “Trick” Chart Below as directed in the Chart Notes section above. Do not fasten off.
Border: Work Single Crochet stitches evenly around panel. Start by working a Sc in first stitch and each stitch across (70 St). Place 2 additional Sc in last stitch for 3 total Sc in corner. Continue down side of panel working 46 Sc even, then 3 Sc in corner. Continue along bottom of panel by working a Sc into each stitch (68 St not including corners), then 3 Sc in corner, then 46 Sc even up the other side. Place 2 additional Sc in top corner and slip stitch into first Sc. Fasten off.
“Treat” Panel
Chain 71 in Aran Fleck.
Follow “Trick” Chart Below as directed in the Chart Notes section above. Do not fasten off.
Border: Work Single Crochet stitches evenly around panel. Start by working a Sc in first stitch and each stitch across (70 St). Place 2 additional Sc in last stitch for 3 total Sc in corner. Continue down side of panel working 46 Sc even, then 3 Sc in corner. Continue along bottom of panel by working a Sc into each stitch (68 St not including corners), then 3 Sc in corner, then 46 Sc even up the other side. Place 2 additional Sc in top corner and slip stitch into first Sc. Fasten off.
Optional Plain Panel
Chain 71
Row 1: Sc into 2nd chain from hook and each chain across to end – 70 St
Rows 2 – 46: Chain 1 and turn work. Sc into first stitch and each stitch across (do not fasten off) – 70 St
Border: follow same instructions for Trick or Treat panel borders above. Fasten off.
Finishing
To attach panels, place one panel on a flat surface Wrong Side up. Place the other panel on top, Right Side up, so that the wrong sides of the panels are facing each other. Align the border stitches with each other and attach yarn in a corner stitch of the border by inserting hook through an aligning stitch in both panels and chaining 1. Now Sc in same aligning stitch. Work a Sc through aligning stitches of both panels around 3 sides. Insert pillow insert or Poly-fil, and continue Sc the last side to close up your pillow. Slip stitch to first Sc and fasten off. Weave in ends.
If you make a reversible Trick or Treat pillow or a set, please tag me in social media posts so that I can share! I’d love to see them. I am @Tinycouchcrochet on both TikTok and Instagram.
Looking for more Halloween patterns? Check out these free pumpkin patterns below!