This post contains affiliate links, which means I receive a small commission, at no extra cost to you, if you make a purchase using this link. Please see my disclosure for more details.
The Struggle with Velvet Yarn
You’ve seen it in the craft store – it’s so pretty, so soft, and it’s calling your name. But if you’ve ever tried to actually crochet with velvet yarn, you know it’s not the easiest material to work with. The velvet makes it hard to find the stitch you’re working in. On top of that, if your tension isn’t completely consistent, your project will come out looking inconsistent. There just isn’t any give.
Don’t give up just yet. There are too many beautiful things to be made! See below for my top 5 crochet stitches to use that will make working with velvet yarn a better experience.
How I Fell in Love with Velvet
Last year (2020… what are we calling it? The lost year?) like many people, I had a lot of free time. I had three large skeins of velvet yarn that I had tried to make a blanket with the previous year, but quickly gave up. I didn’t want to venture out to craft stores during the pandemic, so I decided to work with what I had.
I took the time to try different things and discovered some tricks that make working with velvet much easier. The result was so worth it! I can now make crochet items will velvet yarn, and make them quickly.
Why Standard Stitches are Hard
One of the most difficult things about working with Velvet Yarn is actually being able to see the stitch you are working into. The fuzzy yarn makes an awesome final product because there are fewer holes that can be seen, but this makes the making of the product difficult. This is true for the three basic crochet stitches – Single Crochet (SC), Double Crochet (DC), and Treble Crochet (TC).
This is not to say that these stitches are impossible. If you are following a pattern and want to use velvet yarn, do your best to feel out each stitch as you go. This will save you from missing a stitch and needing to frog your piece later. And that will save you time in the end!
But if you are crocheting free-hand, or would like to design something yourself, see below for list of stitches that make crocheting with velvet yarn much easier to work with!
Top 5 Stitches to use with Velvet Yarn
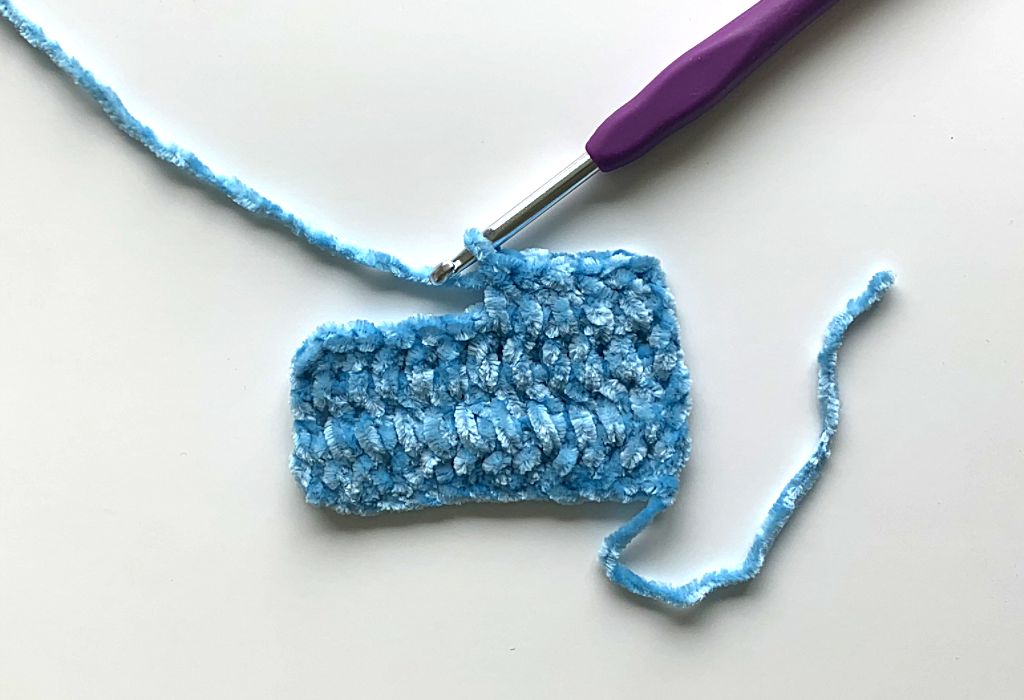
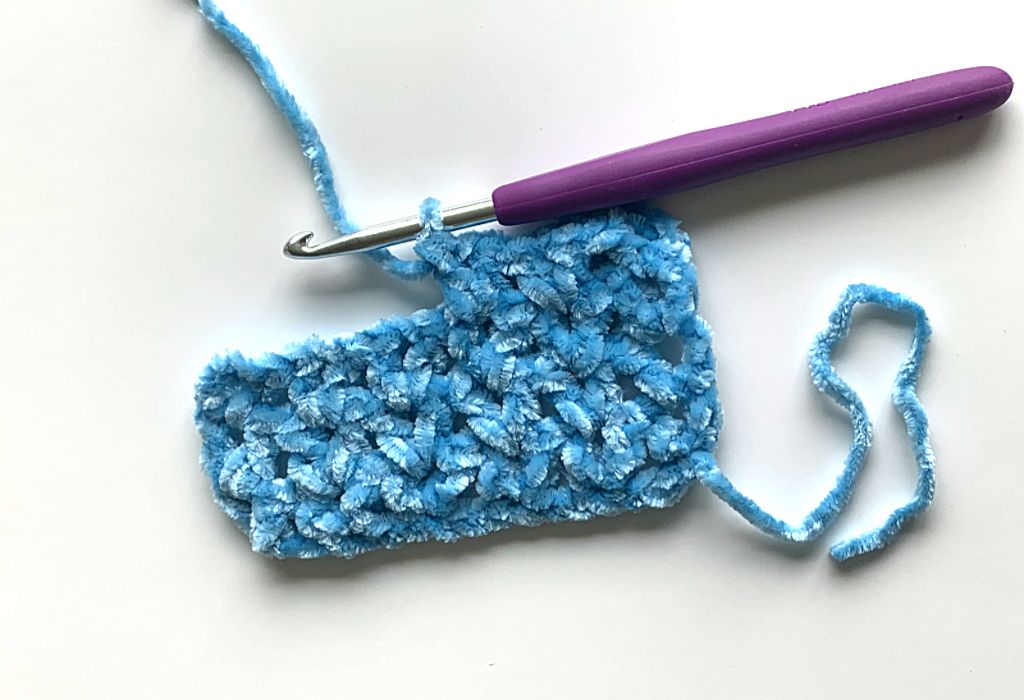
Stitch #1 – SC, HDC, and DC Between the Posts
As mentioned above – finding the stitch you need to work into with a fuzzy yarn? Not fun. If your project requires a standard Single Crochet (SC), Half Double Crochet (HDC) or Double Crochet (DC) stitch repeated, try working in between the posts. The ‘post’ is directly below where you would normally insert your hook.
The photo above shows an example of Double Crochet in between the posts. It will be easier to see the post in Double Crochet stitches because they are taller, but this method will work for all three of these stitches. (Notice that this item is actually three stitches in one? Bonus!)
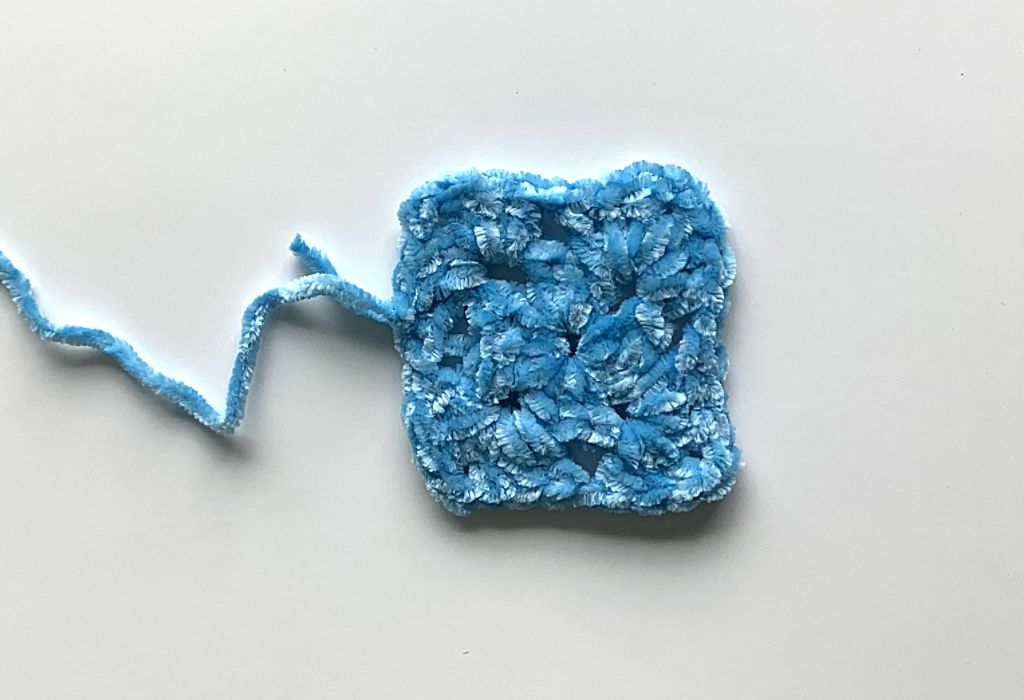
Stitch #2 – The Granny Square
The granny square may not be a stitch exactly, but it is a project using Double Crochet stitches and chains, working from the center of the square out. Each new row of Double Crochet is worked into the chain spaces of the row before. This method of working in the chain spaces below is great for velvet or fuzzy yarn. No stitches to find!
If you have never crocheted a granny square before or if you need a refresher, stay tuned – there will be an entire blog post dedicated to granny squares coming soon. Let me know in the comments below if you are interested!
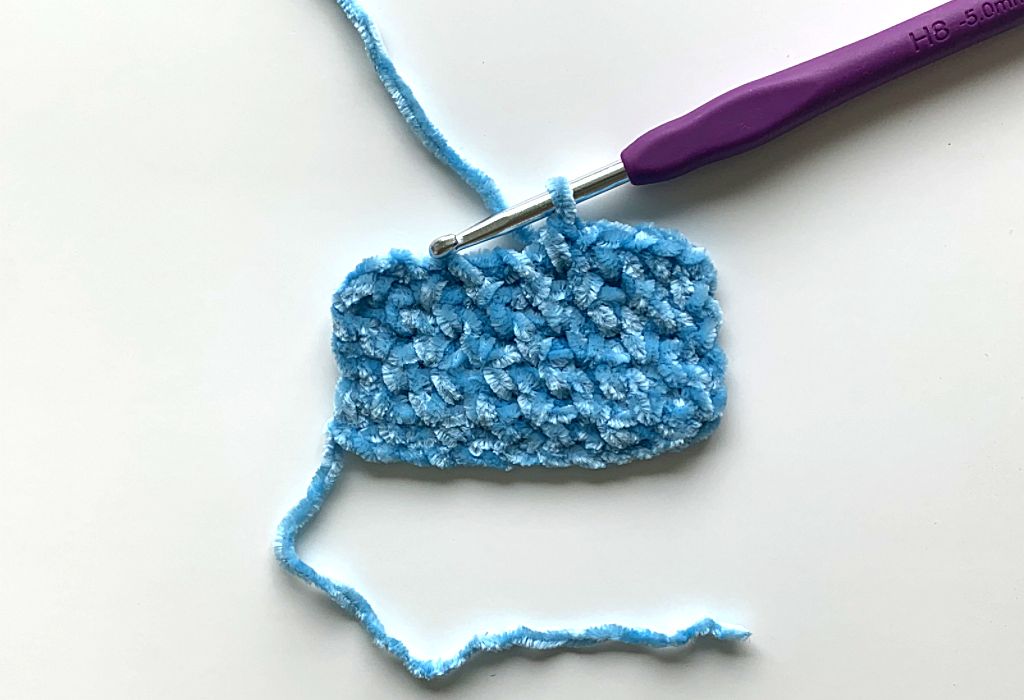
Stitch #3 – The Moss Stitch (Also Known as the Linen, Granite and Woven Stitch)
This one stitch has a lot of names floating around, but that’s probably because it’s used so often! It’s a go-to stitch of mine and it works great for velvet yarn. The entire stitch is made out of Single Crochet (SC) stitches and chains, so it does work up a bit slowly, but the end result is worth it!
Moss Stitch:
Chain an even number.
Row 1: 1 Single Crochet (SC) in second chain from hook. *Chain 1, skip 1 chain, 1 SC in next chain, repeat from * to end of row. Chain 1 and Turn.
Row 2: Skip first SC, *1 SC in chain space, chain 1, skip next SC, repeat from * to end of row, 1 SC in chain space. Chain 1 and Turn.
Repeat Row 2 to end of project.
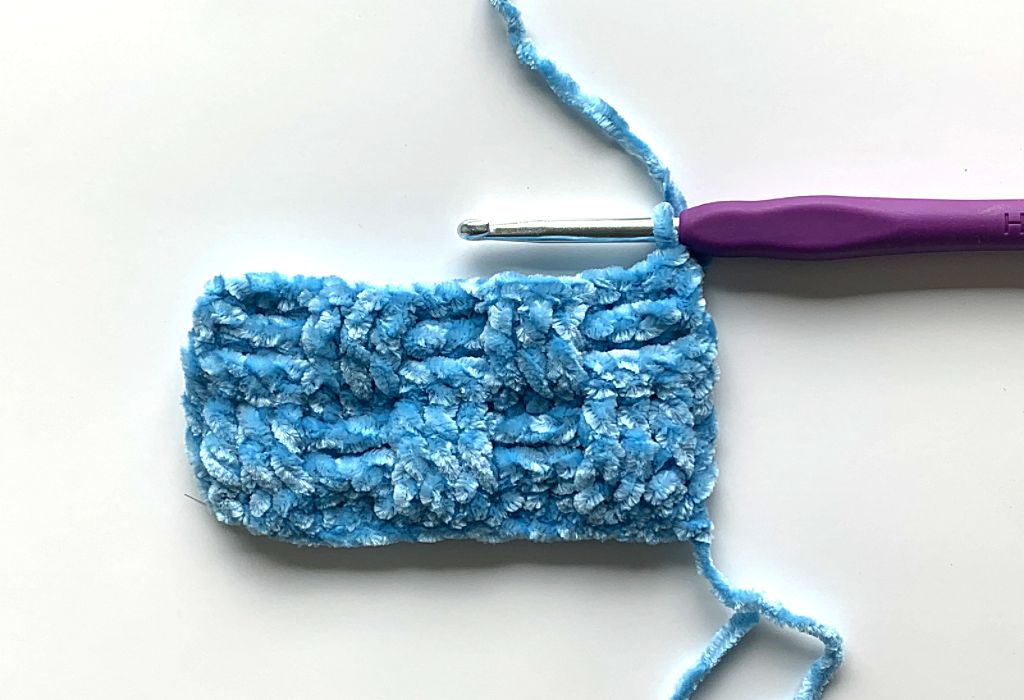
Stitch #4 – Basket Weave Stitch
The Basket Weave stitch is perfect for velvet yarn because once again, no stitch to find! Only posts, and as we learned earlier, posts are easy to find. The Basket Weave stitch is made out of Front Post Double Crochet (FPDC) and Back Post Double Crochet (BPDC) stitches.
(A similar option is the Rice Stitch or the Mini-Basketweave stitch. You can find a full tutorial of thttps://tinycouchcrochet.com/rice-stitch-modern-crochet-stitch-tutorial/he Rice stitch here!)
Front Post Double Crochet (FPDC):
Yarn over (YO), insert hook around the front of the post of the stitch below so that the post is in front of your hook, YO and pull up a loop (3 loops on your hook). YO and pull through first two loops (two loops left on your hook). YO and pull through remaining two loops.
Back Post Double Crochet (BPDC):
Yarn over (YO), insert hook around the back of the post of the stitch below so that the post is behind your hook, YO and pull up a loop (3 loops on your hook). YO and pull through first two loops (two loops left on your hook). YO and pull through remaining two loops.
Basket Weave Stitch:
Chain multiple of 6 plus 7
Row 1: Double Crochet (DC) in 4th chain from the hook, and in each remaining chain. Chain 2 and turn work.
Row 2: Skip first DC, *FPDC around each of the next 3 DC, BPDC around each of the next 3 DC, repeat from * to last 3 stitches. FPDC in each of the last three DC, DC in turning chain. Chain 2 and turn work.
Row 3: Skip first DC, *BPDC around each of the next 3 FPDC, FPDC around each of the next 3 BPDC, repeat from * to last 3 stitches. BPDC in each of the last three FPDC, DC in turning chain. Chain 2 and turn work.
Row 4: Skip first DC, *BPDC around each of the next 3 BPDC, FPDC around each of the next 3 FPDC, repeat from * to last 3 stitches. BPDC in each of the last three BPDC, DC in turning chain. Chain 2 and turn work.
Row 5: Skip first DC, *FPDC around each of the next 3 BPDC, BPDC around each of the next 3 FPDC, repeat from * to last 3 stitches. FPDC in each of the last three BPDC, DC in turning chain. Chain 2 and turn work.
Row 6: Skip first DC, *FPDC around each of the next 3 FPDC, BPDC around each of the next 3 BPDC, repeat from * to last 3 stitches. FPDC in each of the last three FPDC, DC in turning chain. Chain 2 and turn work.
Repeat Rows 3-6 for remainder of project.
Stitch #5 – V-Stitch
The V stitch has beautiful drape for clothing and works up quickly. Like the other stitches mentioned above, you typically work in a chain space in the row below. This makes for a visually interesting stitch that is easy to crochet with velvet!
The V-stitch description is below. Scroll down for a swatch of the V-Stitch made with Bernat Baby Velvet yarn.
V-Stitch:
Chain multiple of 3 plus 2
Row 1: Double Crochet (DC) in 5th chain from the hook, *skip 2 chains, (DC, Chain 1, DC) in the next chain, repeat from * across to the end of the row. Chain 4 and turn work.
Row 2: DC in first chain space, *(DC, Chain 1, DC) in next chain space, repeat from * across to end of row. Chain 4 and turn work.
Repeat Row 2 to end of project.
Velvet Stitch Takeaways
If you’ve read through all of the stitches listed above, you’ve probably noticed a pattern. The easiest stitches to work with involve working into a chain space, or working between or around the post of the stitch below. Knowing these things, I’m sure you’ll be able to create all kinds of fun items with velvet yarn!
Looking for more stitch roundups? Check out these 9 crochet stitches that look like knitting!
Do you have a favorite stitch to use when working with velvet yarn not listed above? Let me know in the comments below!