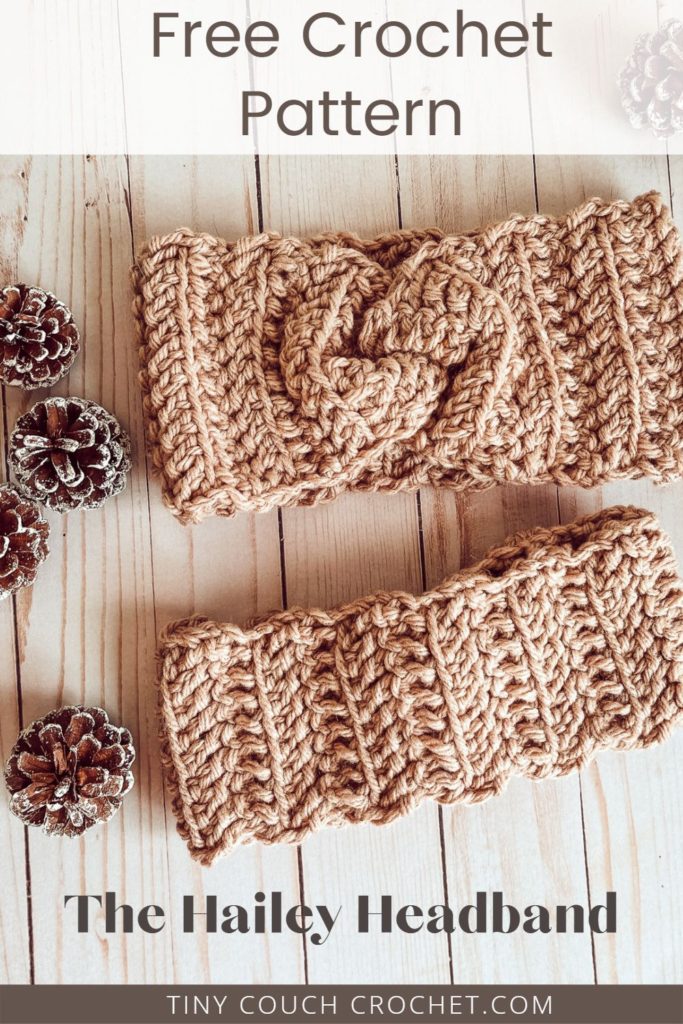
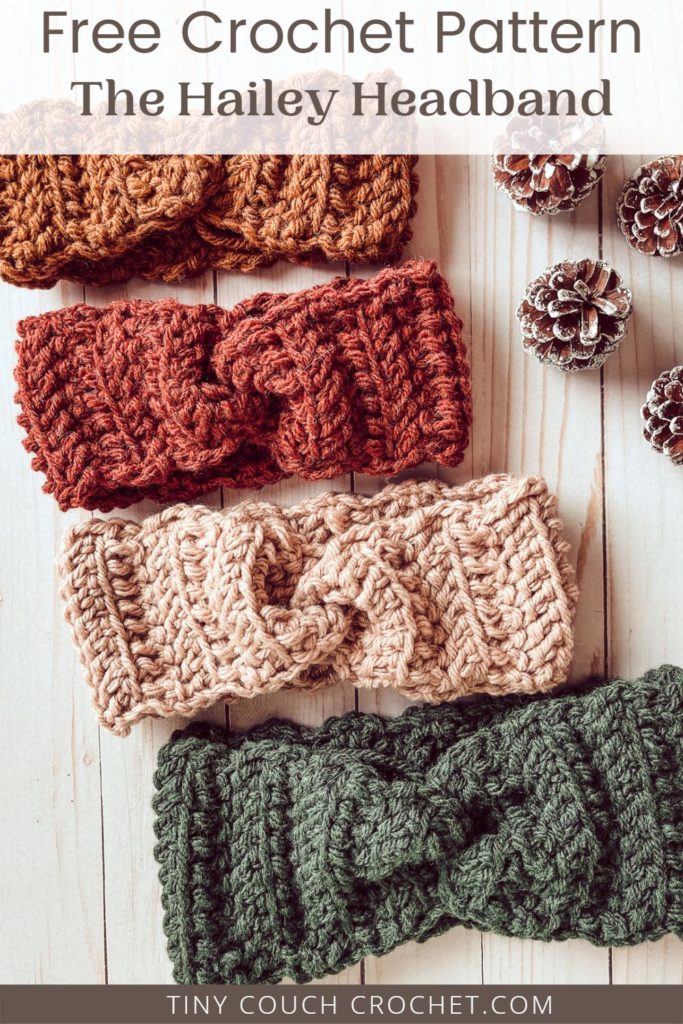
Headbands and ear warmers are my go-to quick crochet project. This crochet twisted ear warmer free pattern is quick, cute, and has SO much texture for being a one-stitch repeat project! You crochet a rectangle using one stitch, then sew it together to get the cute twist look. Crochet an ear warmer for toddlers, children and adults with this free pattern.
You can scroll down for the free pattern, or if you’re like me and you like to print copies of all of your patterns, click to purchase the PDF for a small fee on Etsy. I put a lot of work into the PDFs, including photo tutorials and options for customization (what hook size to use for different yarn weights, etc.) That said, you can make this headband entirely from the free version below. I am happy to provide both options 🙂
As quick as the pattern is, sometimes you need to save the pattern to make it later. Click here to save this pattern to Pinterest.
This post contains affiliate links, which means I receive a small commission, at no extra cost to you, if you make a purchase using this link.
The Yarn
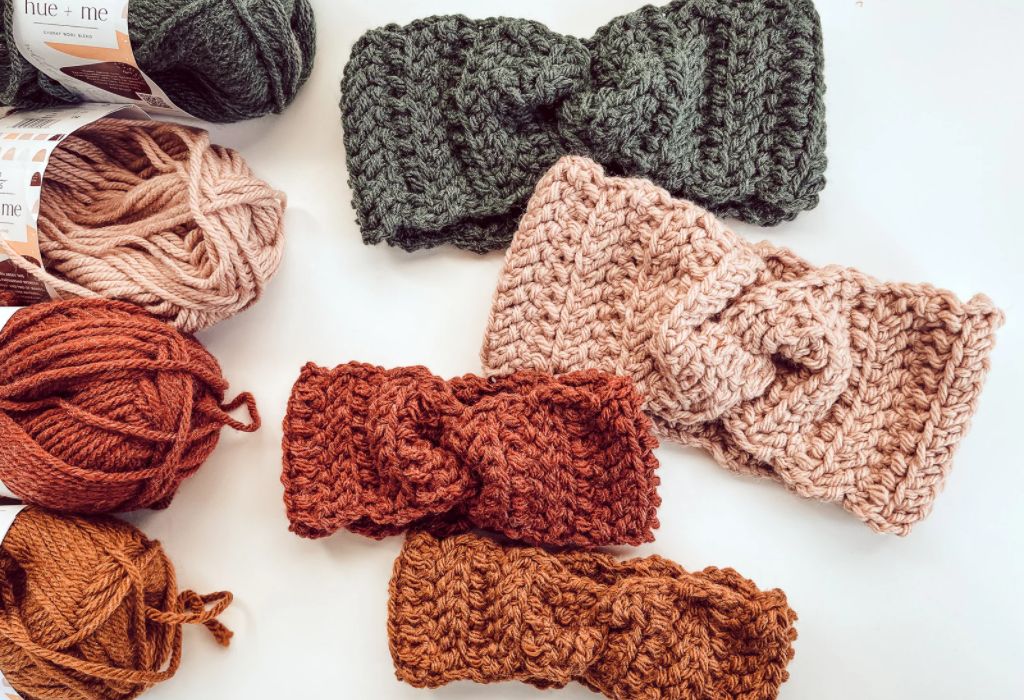
This pattern is a bulky crochet ear warmer and uses Weight 5 yarn. While any bulky yarn will do as long as you meet guage, I highly recommend Lion Brand and Two of Wands’ collaboration Hue + Me. It is a chunky wool blend: 20% wool and 80% acrylic, machine washable and dryable, and comes in beautiful colors. I LOVE wool blends – this yarn is warm without being itchy.
I actually bought this yarn in four specific colors for a different project, but couldn’t resist using it when the idea for this headband popped in my head. Now I need to buy more for the original project!
The colors used in the cover photo are Juniper, Desert, Spice, and Arrowwood. Aren’t they gorgeous? The entire Hue + Me collection is somehow colorful and neutral at the same time. I can’t wait to use them in more projects.
Skills Needed
This project is great for advanced or ambitious beginners. The main stitch itself is probably not the first stitch you’ll learn, but it’s great to have in your toolbox. It’s called the Herringbone Double Crochet stitch, and it’s one of my absolute favorites.
If you are brand new to crochet or need a refresher, check out my how to crochet post here. Practice these beginner techniques and then come back – this is a great pattern to make after you’ve done a few regular Double Crochets!
To make a Herringbone Double Crochet (HbDC), Yarn over and insert your hook into the next stitch. (For this project, we’ll be going through the front loop of the stitch and not both loops. This is specific to this pattern and not the Herringbone Double Crochet stitch itself). Now yarn over and pull up a loop so that you have 3 loops on your hook. Pull the first loop into the second loop, you will now have two loops left on your hook. Yarn over again and pull through just the first loop on your hook. Yarn over one last time and pull through remaining two loops.
If you need more help with the Herringbone Double Crochet, you can Purchase the pattern on Etsy which includes a photo tutorial, or you can check out my post for the Patton Throw. The Patton throw uses HbDC stitches in the back loop only, while this pattern is HbDC in the front loop only, so keep that in mind.
What You’ll Need
Here are the materials you’ll need:
- 1 skein of Lion Brand’s Hue + Me yarn or similar Weight 5 yarn
- Size 6.5mm crochet hook (My favorites are the ergonomic hooks from this crochet hook set)
- A yarn or tapestry needle
- Scissors
- Measuring Tape
Guage & Size
Guage: (Measured Unstretched)
3″ = 7 stitches
3″ = 4 rows
Size:
See Size Chart below for band circumference and width for sizes Toddler – Adult Medium/Large. Measure your band before it’s sewn together and before it’s stretched. Note that for the best fit, make band length 1.5″ to 2″ shorter than head circumference.
| Age | Head Circ. | Headband Length | Headband Width |
| Toddler | 18″ | 16.5″ | 3″ |
| Child | 20″ | 18″ | 3.5″ |
| Teen/Adult S | 21″ | 19.5″ | 4″ |
| Adult M/L | 23″ | 21″ | 4.5″ |
Abbreviations (U.S. Terminology)
Ch = Chain
St = Stitch
Yo = Yarn Over
FLO = Front Loop Only
HbDC = Herringbone Double Crochet (See Skills Needed section above for description)
The Hailey Headband Pattern
Notes:
- This ear warmer / headband is made by crocheting a long rectangle, and then sewing the ends together to make the crossed look.
- The edges intentionally have a scalloped look and are not supposed to look completely straight.
Toddler Size
Chain 10.
Row 1: HbDC in 4th chain from hook. HbDc in each chain across (7 St)
Rows 2 – 22 (or as many needed to meet length in size chart): Ch 2 and turn work. Skip 1st stitch. HbDC in FLO of next 6 Stitches. HbDC in FLO of top of turning chain. (7 St) Move to Finishing Section
Child Size
Chain 11.
Row 1: HbDC in 4th chain from hook. HbDc in each chain across (8 St)
Rows 2 – 24 (or as many needed to meet length in size chart): Ch 2 and turn work. Skip 1st stitch. HbDC in FLO of next 7 Stitches. HbDC in FLO of top of turning chain. (8 St) Move to Finishing Section
Teen/Adult Small Size
Chain 12.
Row 1: HbDC in 4th chain from hook. HbDc in each chain across (9 St)
Rows 2 – 26 (or as many needed to meet length in size chart): Ch 2 and turn work. Skip 1st stitch. HbDC in FLO of next 8 Stitches. HbDC in FLO of top of turning chain. (9 St) Move to Finishing Section
Adult Medium/Large Size
Chain 13.
Row 1: HbDC in 4th chain from hook. HbDc in each chain across (10 St)
Rows 2 – 28 (or as many needed to meet length in size chart): Ch 2 and turn work. Skip 1st stitch. HbDC in FLO of next 9 Stitches. HbDC in FLO of top of turning chain. (10 St) Move to Finishing Section
Finishing: Fasten off by leaving a long tail to sew the ends of your headband closed.
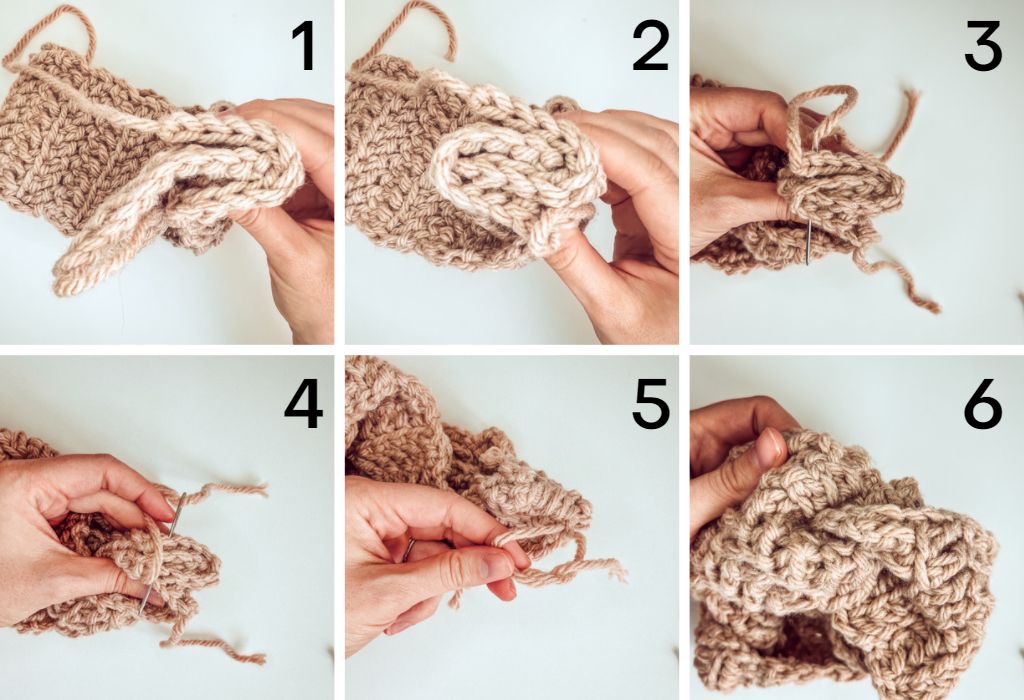
To close band: fold ends over each other as shown in photos 1 & below, so that there are 4 layers. Use yarn needle to sew through all 4 layers. I recommend bringing the needle up and through the same side every time for a more secure attachment. When you get to the other side, secure tail by tying it to the yarn tail from the start of the project with a couple of knots (Photo 5). Cut off any excess close to the knot. Flip headband inside out. Finished!
Looking for more Hair Accessory crochet patterns? Try these:
If you make a Hailey Headband, I’d love to see your work! Use the hashtags #thehaileyheadband and #tinycouchcrochet and tag me in social media posts so that I can share! I am @Tinycouchcrochet on both Instagram and Tiktok. Can’t wait to see your makes!
-Ashley