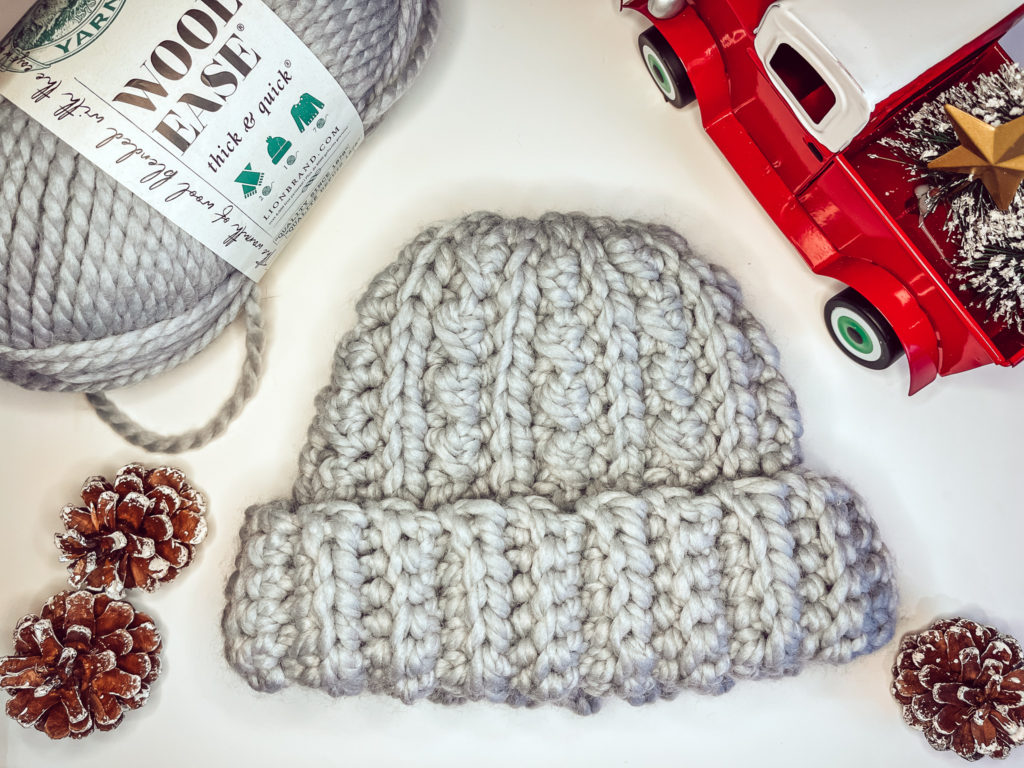
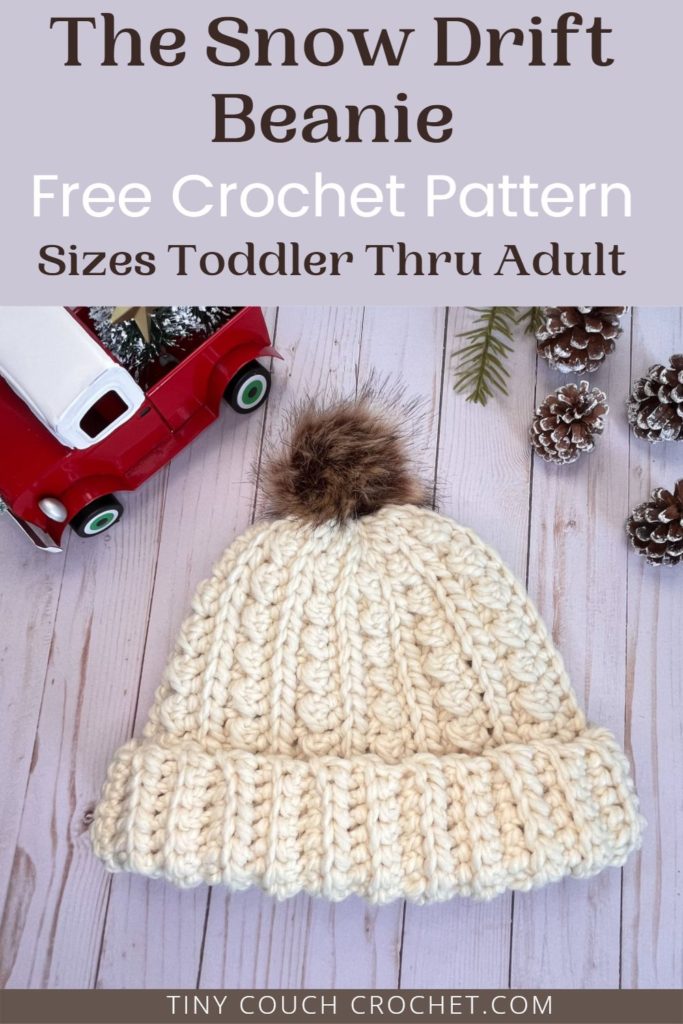
I’ll be honest – Chunky yarn hats are my favorite things to crochet. They work up quick and are SO cozy! And super bulky yarn is just so fun to use. This pattern does take a bit longer than your average super bulky beanie to crochet but the details in the final result are so worth it. I was going for a chunky crochet beanie that was “classic snow hat” and “modern cute” at the same time.
You can scroll down for the free pattern. Or, if you like to download and print your patterns, you can get it on Etsy for a small fee by clicking here. This also helps support me so I can continue to make patterns and tutorials.
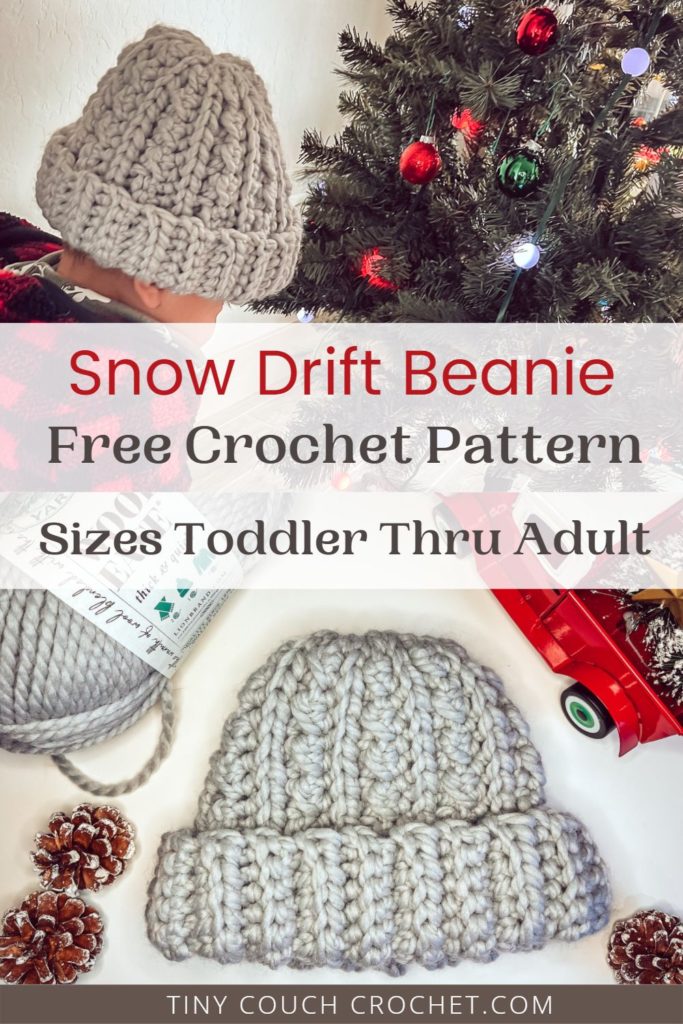
Need to buy yarn first? Save this to Pinterest by clicking on the image below so that you can easily come back 🙂
This post contains affiliate links, which means I receive a small commission, at no extra cost to you, if you make a purchase using this link.
The Yarn
This pattern uses my all time favorite super bulky yarn! While any super bulky, Weight 6 yarn will do as long as you meet guage, I highly recommend Lion Brand Wool-Ease Thick and Quick yarn. It is a super bulky wool blend: 20% wool and 80% acrylic and is machine washable and dryable. And it comes in so many fun colors and combinations of colors, I can’t get enough!
If you’re looking for more free patterns with chunky yarn, check out the links below:
- The Patton Throw – a super fast throw made with Wool-Ease Quick & Thick
- The Hailey Headband – a super fast twisted headband/ear warmer made with Lion Brand & Two of Wand’s collaboration Hue + Me.
Skills Needed
While none of the stitches in the pattern are complicated, there is a lot of switching back and forth between working in the back loop only (BLO) and working in a stitch as normal. This pattern also switches from regular half double crochets (hdc) to half double crochet slip stitches (HdcSS) to slip stitches (Sl St). In short, I recommend checking your work after every row to avoid a frogging heartache down the road. That said, the pattern is a 4 row repeat, and you quickly get the hang of it after a couple of repeats. Personally, I like the switch ups and think they make for a fun pattern!
If you are brand new to crochet or need a refresher, check out my how to crochet post here. If you need a little help with certain stitches/techniques, see below.
Half Double Crochet Slip Stitch (HdcSS)
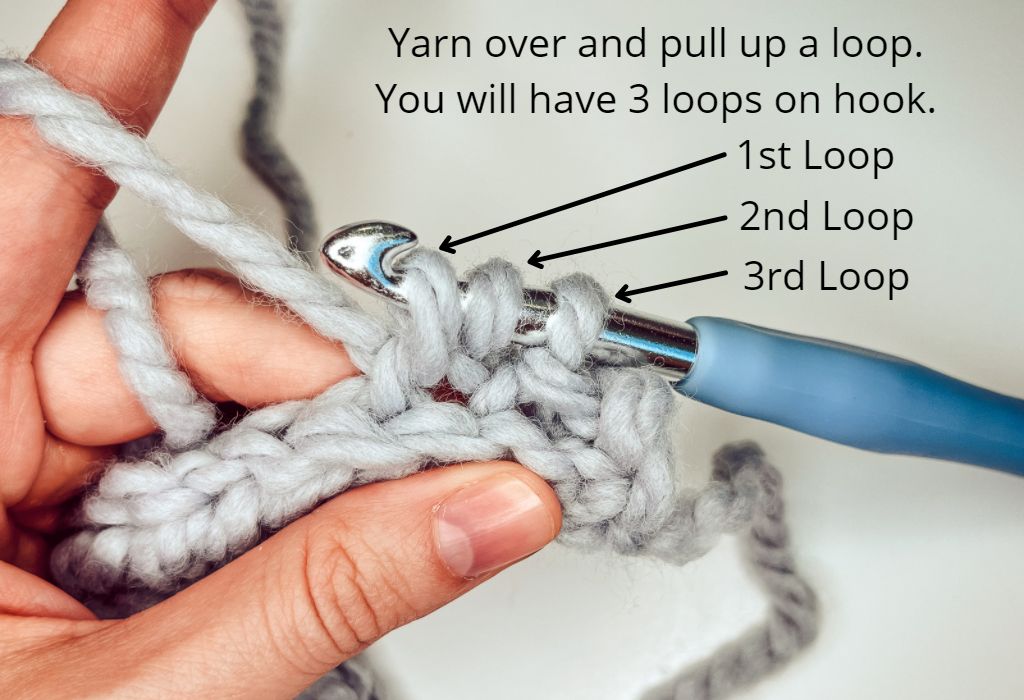
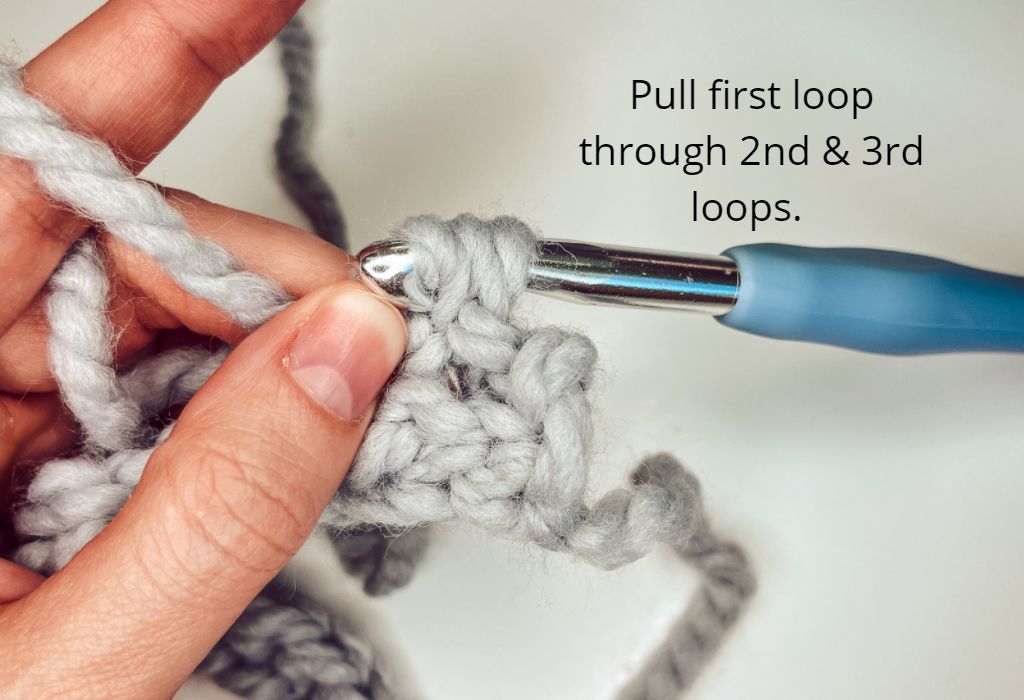
I have also seen this called a “Yarn over slip stitch.” For this stitch, Yarn over, insert hook into the next stitch, pull up a loop. You will have three loops on your hook. Pull the first loop through the next two loops on hook. Stitch complete. (It is similar to a regular slip stitch, but with an extra loop to pull through)
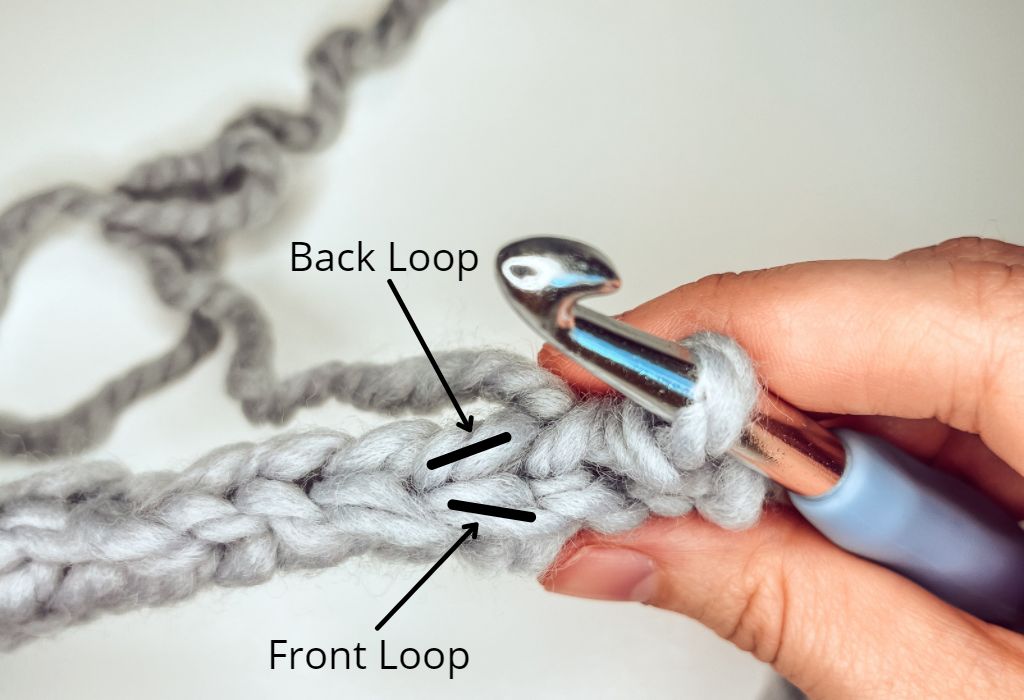
Working in the Back Loop Only (BLO)
When looking down at your stitches, each stitch is made up of two loops that make a V shape. The loop nearest you is the “front loop,” and the loop furthest away is the “back loop” (See image below). Normally, to make a new stitch you would insert your hook through both loops. Some stitches in this pattern are followed by BLO, so you would insert your hook only through the back loop to make your new stitch.
Materials Needed
- 1 to 2 skeins of Wool-Ease Thick and Quick yarn or similar Super Bulky Weight 6 yarn
- Size 8mm crochet hook (My favorites are the ergonomic hooks from this crochet hook set)
- A yarn or tapestry needle
- Scissors
- Measuring Tape
- Optional Pompom
Guage & Size
Guage: (Measured Unstretched)
5″ = 12 HdcSS stitches
5″ = 12 rows of the 4 row repeat pattern (Rows 2 – 5)
Size:
See Size Chart below for sizes Toddler – Adult Large. Beanie circumference should be roughly 1″ to 2″ smaller than head circumference for best fit.
Note: this beanie is very stretchy, and made to be big & cozy. If you are unsure of size or are between sizes, choose the smaller size.
| Age | Head Circ. | Beanie Circ. | Beanie Height |
| Toddler | 18″ | 17″ | 9″ |
| Child | 20″ | 17″ | 10″ |
| Teen & Adult S | 21″ | 19″ | 11″ |
| Adult M/L | 22″ + | 21″ | 11″ |
Abbreviations (U.S. Terminology)
Ch = Chain
St = Stitch
Yo = Yarn Over
Sl St = Slip Stitch (Insert hook into next stitch, Yo, pull through stitch and loop on hook)
Sc = Single Crochet (Insert hook into next stitch, pull up a loop, Yo and pull through both loops on hook)
Hdc = Half Double Crochet (Yo, insert hook into next stitch, pull up a loop, Yo and pull through all three loops on hook)
BLO = Back Loop Only (see Skills Needed section)
HdcSS = Half Double Crochet Slip Stitch (see Skils Needed section)
RS = Right Side
WS = Wrong Side
The Snow Drift Beanie Pattern
Notes:
- The beanie is made by crocheting a rectangle (brim and main body together), sewing the ends together into a cylinder and then sewing the top closed
- The turning chain at the beginning of each row does not count as a stitch.
- Instructions are for size Toddler. Changes for Child, Teen/Adult S, Adult M/L are in [..]
Chain 23 [25, 29, 29]
Row 1 (WS): HdcSS in 2nd chain from hook, HdcSS in next 19 [21, 24, 24], Sl St in next 2 [2, 3, 3] — 22 [24, 28, 28] St
Row 2 (RS): Ch 1 and turn work. Sl St BLO in next 2 [2, 3, 3], HdcSS in BLO in next 20 [22, 25, 25] — 22 [24, 28, 28] St
Row 3 (WS): Ch 1 and turn work. Sc BLO in next 12 [12, 13, 13], *Sl St, Hdc, repeat from * 3 [4, 5, 5] more times, Sl St in next 2 [2, 3, 3] — 22 [24, 28, 28] St
Row 4 (RS): Ch 1 and turn work. Sl St in next 2 [2, 3, 3], *Hdc, Sl St, repeat from * 3 [4, 5, 5] more times, Sc BLO in next 12 [12, 13, 13] — 22 [24, 28, 28] St
Row 5 (WS): Ch 1 and turn work. HdcSS in BLO next 20 [22, 25, 25], Sl St in BLO in next 2 [2, 3, 3] — 22 [24, 28, 28] St
Rows 6 thru 40 [40, 44, 48]: Repeat Rows 2 – 5, ending on a Row 4 repeat.
Finishing: (Note that the Right Side of your work should have a braided look)
Chain 1. With the Right Side of your work facing you and the Wrong Side facing down, fold your work in half so that the two ends meet. Slip stitch through the stitches of your last row and the starting row so that you have a cylinder. Fasten off, leaving a long tail.
Weave tail through the top stitches, pulling the tail tight every couple of stitches so that you close the top completely. Weave in the remainder of both tails or tie them together and clip off excess. Flip beanie inside out. (Use your favorite method to attach optional Pompom if you choose)
Looking for more quick crochet patterns? Try the Delilah Velvet Headband here.
If you make a Snow Drift Beanie, I’d love to see it! Use the hashtags #snowdriftbeanie and #tinycouchcrochet and tag me in social media posts so that I can share! I am @Tinycouchcrochet on both Instagram and Tiktok. Can’t wait to see your makes!
-Ashley