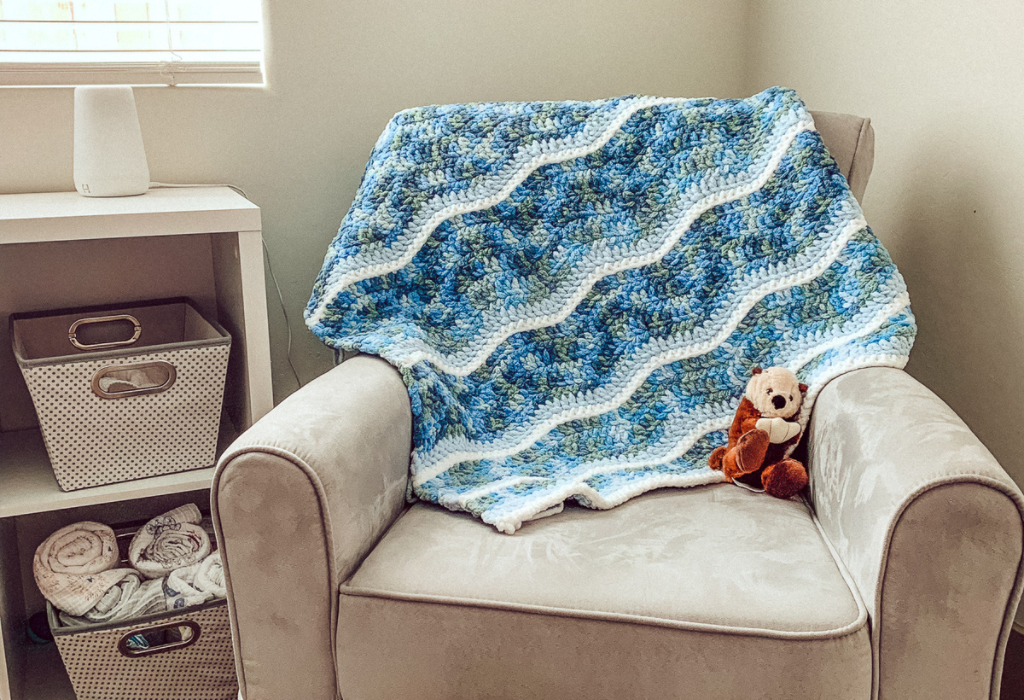
This crochet blanket is soft, quick to make, and has a fun theme – ocean waves! What a sweet way to welcome a new baby. The blanket is made with Bernat Baby Blanket yarn, although any bulky chenille yarn safe for babies will do. Read through the info below or scroll down for the free baby blanket crochet pattern.
This post contains affiliate links, which means I receive a small commission, at no extra cost to you, if you make a purchase using this link.
To save this pattern for later, Pin it here!
How the Tiny Waves blanket was made
I was holding my 4-month-old when one of my oldest friends broke the news – she was pregnant! It’s such an exciting thing to be able to celebrate with your friends, especially knowing you’ll have children close in age. So of course I sat down to design a blanket worthy of a beautiful baby shower gift.
Something unique to this friendship is that for a time after college, we both lived in the same beach town. Although neither of us live there anymore, I wanted the baby to have a piece of that time. I know someday when our babies are older we’ll both be visiting that same beach town. Our kids will get to make memories there of their own!
With that in mind, I took a look at some of the yarn I had in my stash, and believe it or not, I already had it – the perfect color combo for waves! And so, the Tiny Waves blanket was born. (OK, it took a little more designing and a lot more frogging, but you get the idea.)
The Yarn
There are a lot of chenille yarns out there, but I just love the feel of Bernat’s Blanket Yarn. And they have a whole line made specifically for babies! The yarn is so soft and easy to work with once you’ve worked up a few rows.
To get the perfect ocean wave combo, I used the colors Lovely Blue, Light Sky and White. I love how Lovely Blue is a variegated yarn that represents the many colors of the water, and the white mimics that perfect froth at the tip of a wave.
Helpful How-Tos
While this blanket is beginner-friendly, there will be some color changes and stitching into the back loop. Check out the sections below if you need some help in this area 🙂
If you are new to crochet or need to brush up your skills, check out my How to Crochet post here!
How to change colors at the end of a row – Single Crochet
When working a row of Single Crochet, start your last stitch in the same color you’ve been working with by inserting your hook into the last stitch and pulling up a loop. Now drop your yarn, and yarn over and pull through both loops on your hook with your new color.
You can now chain with your new color to lock it in. For this specific pattern, after every Sc row with a color change a Dc row follows, so would Chain 3 with your new color.
How to change colors at the end of a row – Double Crochet
When working a row of Double Crochet, start your last stitch in the same color you’ve been working with by Yo, inserting your hook into the last stitch and pulling up a loop. Yo and pull through 2 loops. Now drop your yarn, and yarn over and pull through both loops on your hook with your new color.
You can now chain with your new color to lock it in. For this specific pattern, after every Dc row with a color change a Ac row follows, so would Chain 1 with your new color.
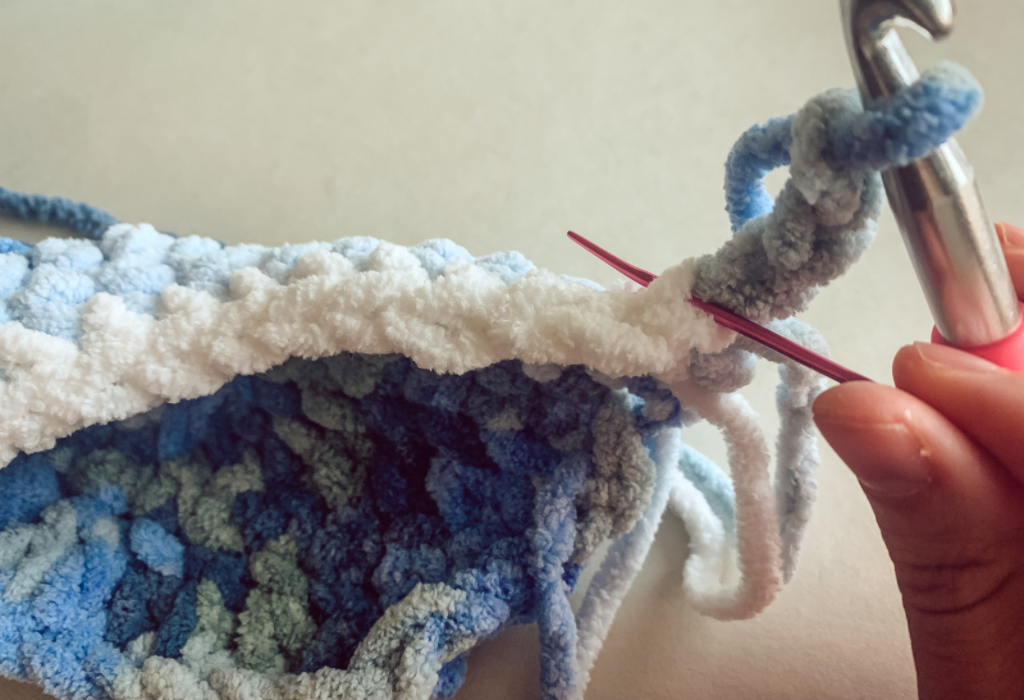
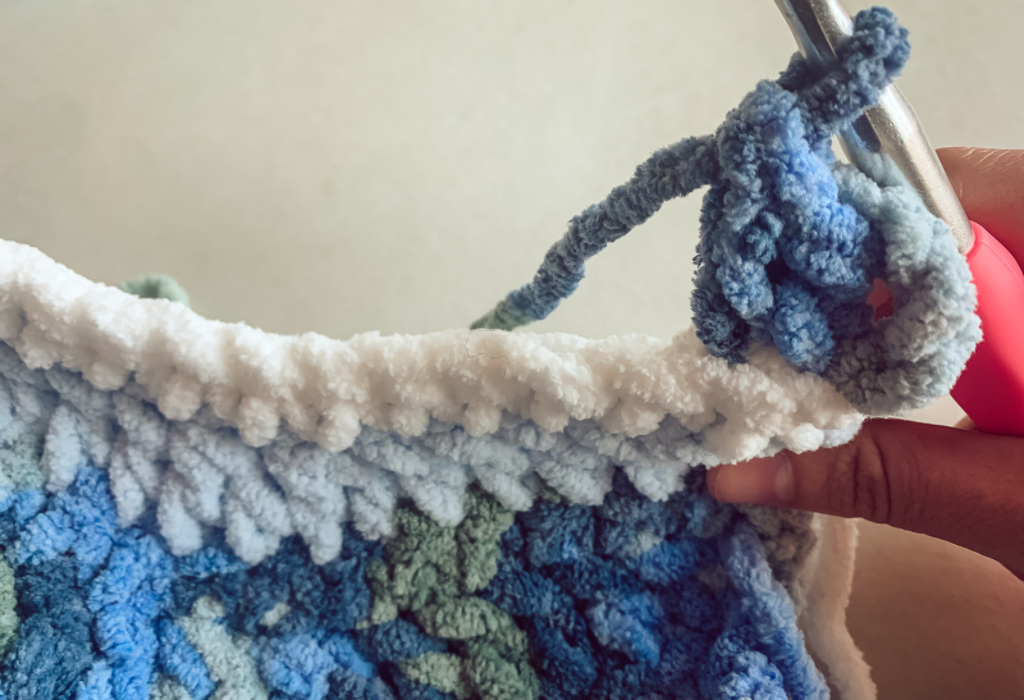
How to stitch into the Back Loop Only (BLO)
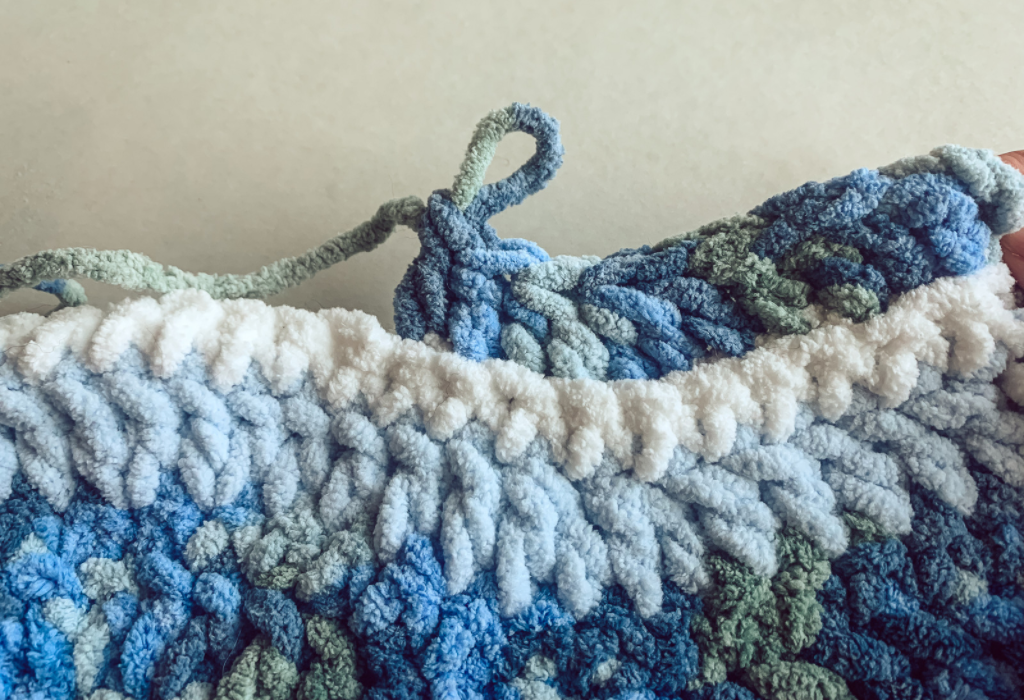
When looking down at each stitch, you will notice a sideways V shape. The bar of the V that is closest to you is the front loop, the bar further away from you is the back loop. When the pattern calls for stitching in the Back Loop Only (BLO), this means inserting your hook in the middle of the V and under the back loop. See photos below.
What You’ll Need
Here are the materials you’ll need:
- Bernat Baby Blanket yarn (6 Super Bulky, 100% Polyester) I used the colors below:
- 2 skeins of Lovely Blue
- 1 skein of Light Sky
- 1 skein of White
- Size N (10.0 mm) crochet hook. My favorite hooks are from this ergonomic hook set!
- A yarn or tapestry needle
- Scissors
- Measuring tape if you want to check guage.
Gauge & Size:
Guage: 3″ = 4 rows of the pattern, 7″ from peak to peak
Overall size: Roughly 35″ wide x 40″ long
Abbreviations (U.S. Terminology):
Ch = Chain
St = Stich
Yo = Yarn Over
Sc = Single Crochet
Dc = Double Crochet
Dc2tog = Double Crochet 2 stitches together (Yo, Insert hook into next stitch, pull up a loop, Yo and pull through first two loops on hook, Yo, insert hook into next stitch, and pull up a loop, Yo and pull through first two loops, Yo and pull through 3 remaining loops on hook)
Blo = Back Loop Only
RS = Right Side
Tiny Waves Blanket – Free Pattern
Notes:
- Color A is Lovely Blue, Color B is Light Sky, Color C is white.
- The basic pattern is a two row repeat, however the color changes vary, which is why the rows are split up the way they are in the pattern below.
- Every row following a Color C (White) row is stitched into the Back Loop Only. All other rows are stitched normally into both loops.
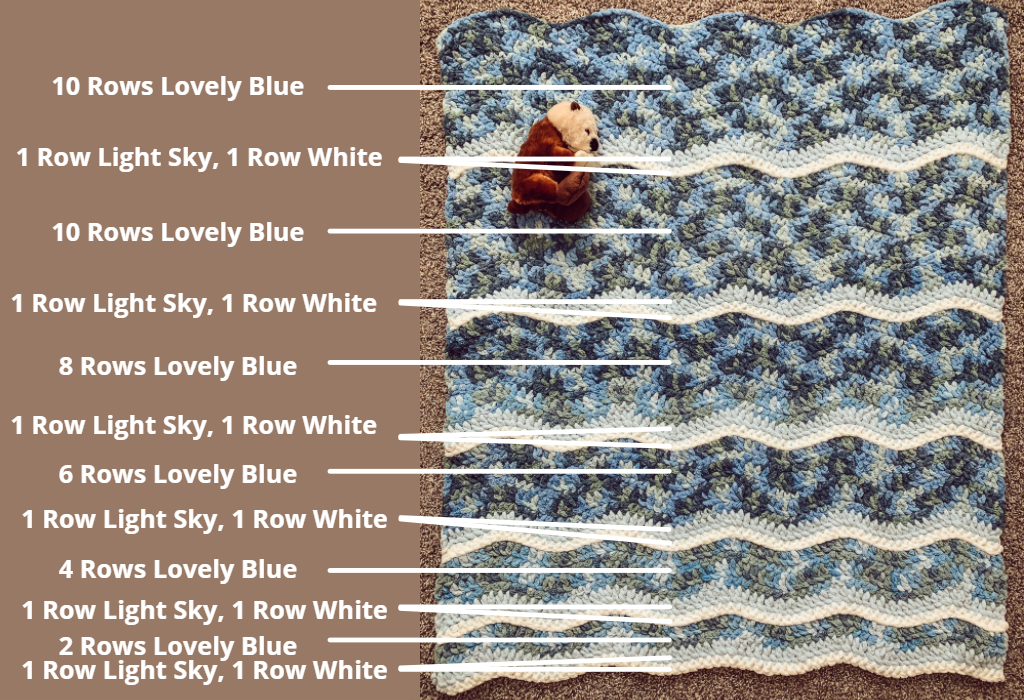
- See Image at the bottom of pattern for graphic of color changes. The wave pattern decreases in height as you add on to the blanket to mimic waves nearing the shore.
Starting Chain: Multiple of 14 + 3 (If you want to increase or decrease blanket width, add or subtract 14 to the starting chain)
Chain 73 (Color A)
Row 1 (RS, Color A): Dc in 4th chain from hook (counts as first two Dc), Dc into next 4 chains, (Dc2tog over next 2 chains) X 2, * Dc into next 4 chains, (2 DC in next chain) X 2, Dc into next 4 chains, (Dc2tog over next 2 chains) X 2, Repeat from * to last 5 chains. Dc in next 4 chains, 2 Dc in last chain (70 St)
Rows 2 (Color A): Chain 1 and turn. Sc into each stitch across (70 St)
Row 3 (Color A): Chain 3 and turn, Dc into first St (Counts as first 2 Dc), Dc into next 4 St, (Dc2tog over next 2 St) X 2, * Dc into next 4 St, (2 Dc into next St) X 2, Dc into next 4 St, (Dc2tog over next 2 St) X 2, Repeat from * to last 5 St. Dc in next 4 St, 2 Dc in last St (70 St)
Rows 4 – 10 (Color A): Repeat rows 2 – 3 (70 St)
Row 11 (Color B): Repeat Row 3 (70 St)
Row 12 (Color C): Repeat Row 2 (70 St)
Row 13 (Color A): Repeat Row 3 in BLO throughout the row.
Rows 14 – 22 (Color A): Repeat Rows 2 – 3 (70 St)
Rows 23 – 25 (Colors Vary): Repeat Rows 11-13 (70 St)
Rows 26 – 32 (Color A): Repeat Rows 2 – 3 (70 St)
Rows 33 – 35 (Colors Vary): Repeat Rows 11-13 (70 St)
Rowa 36 – 40 (Color A): Repeat Rows 2 – 3 (70 St)
Rows 41 – 43 (Colors Vary): Repeat Rows 11-13 (70 St)
Rows 44 – 46 (Color A): Repeat Rows 2 – 3 (70 St)
Rows 47 – 49 (Colors Vary): Repeat Rows 11-13 (70 St)
Row 50 (Color A): Repeat Row 2 (70 St)
Rows 51 – 52 (Colors Vary): Repeat Rows 11-12 (70 St)
Fasten off after row 52 and weave in ends.
See chart below for color pattern. See sections above for how to change colors at the end of a row.
I love the final result and I hope you do too!
If you make yourself (or someone else) a Tiny Wave blanket, please tag me in social media posts so that I can share! I’d love to see them. I am @Tinycouchcrochet on both TikTok and Instagram.
Looking for more blanket patterns?
- Check out the Patton Throw free pattern here!
- Check out the Cassidy Sampler Baby Blanket here!
-Ashley

